
Prerequisites and location
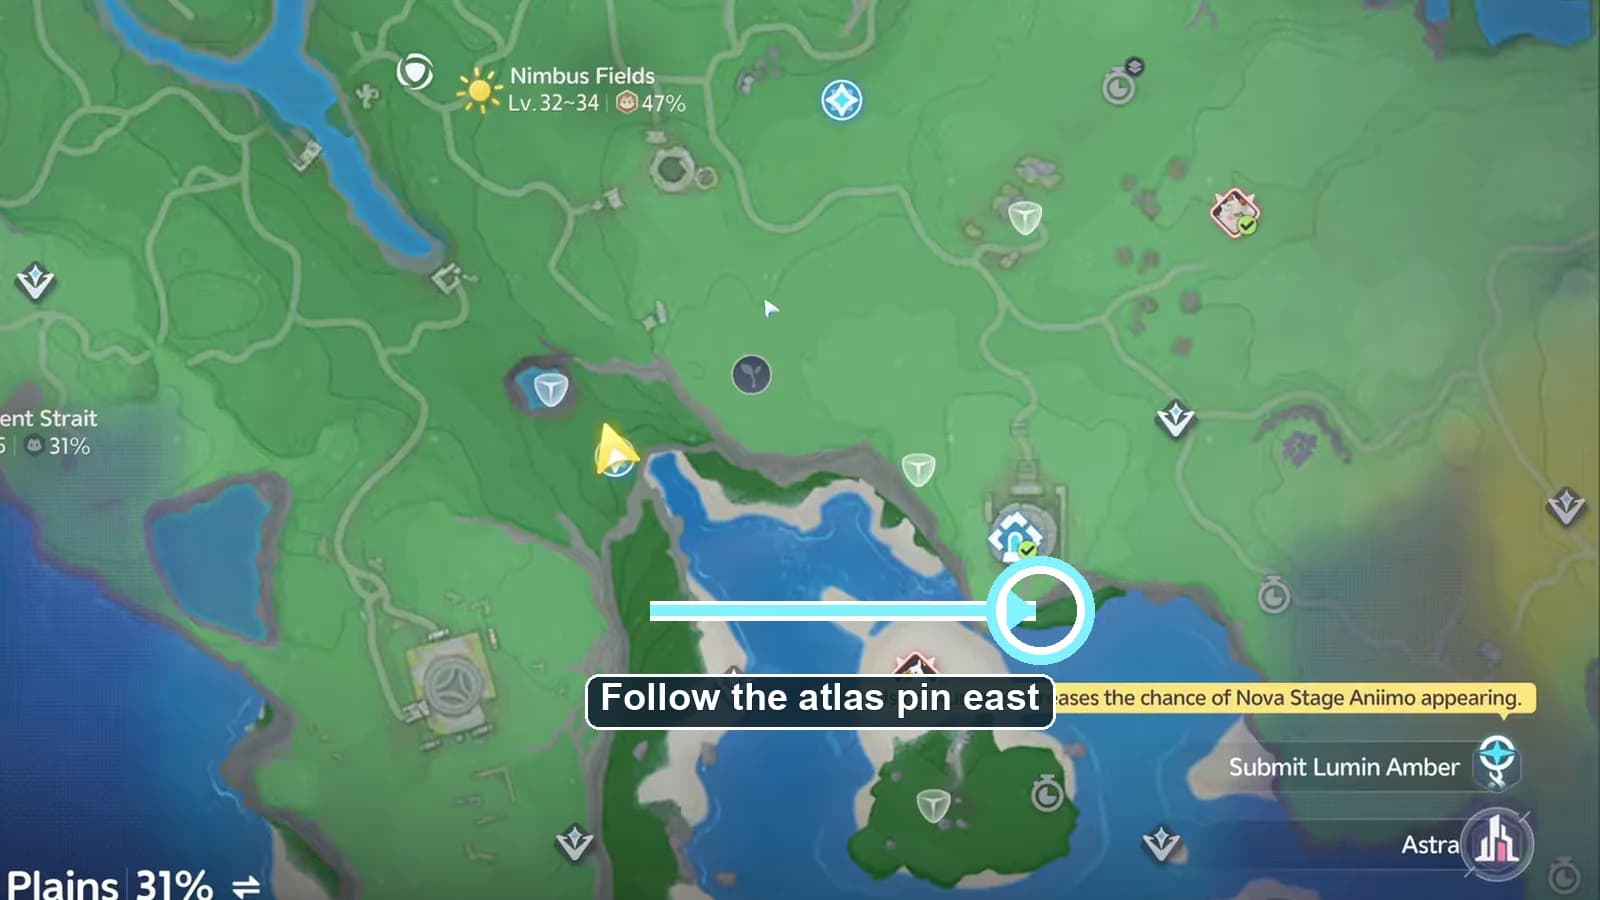
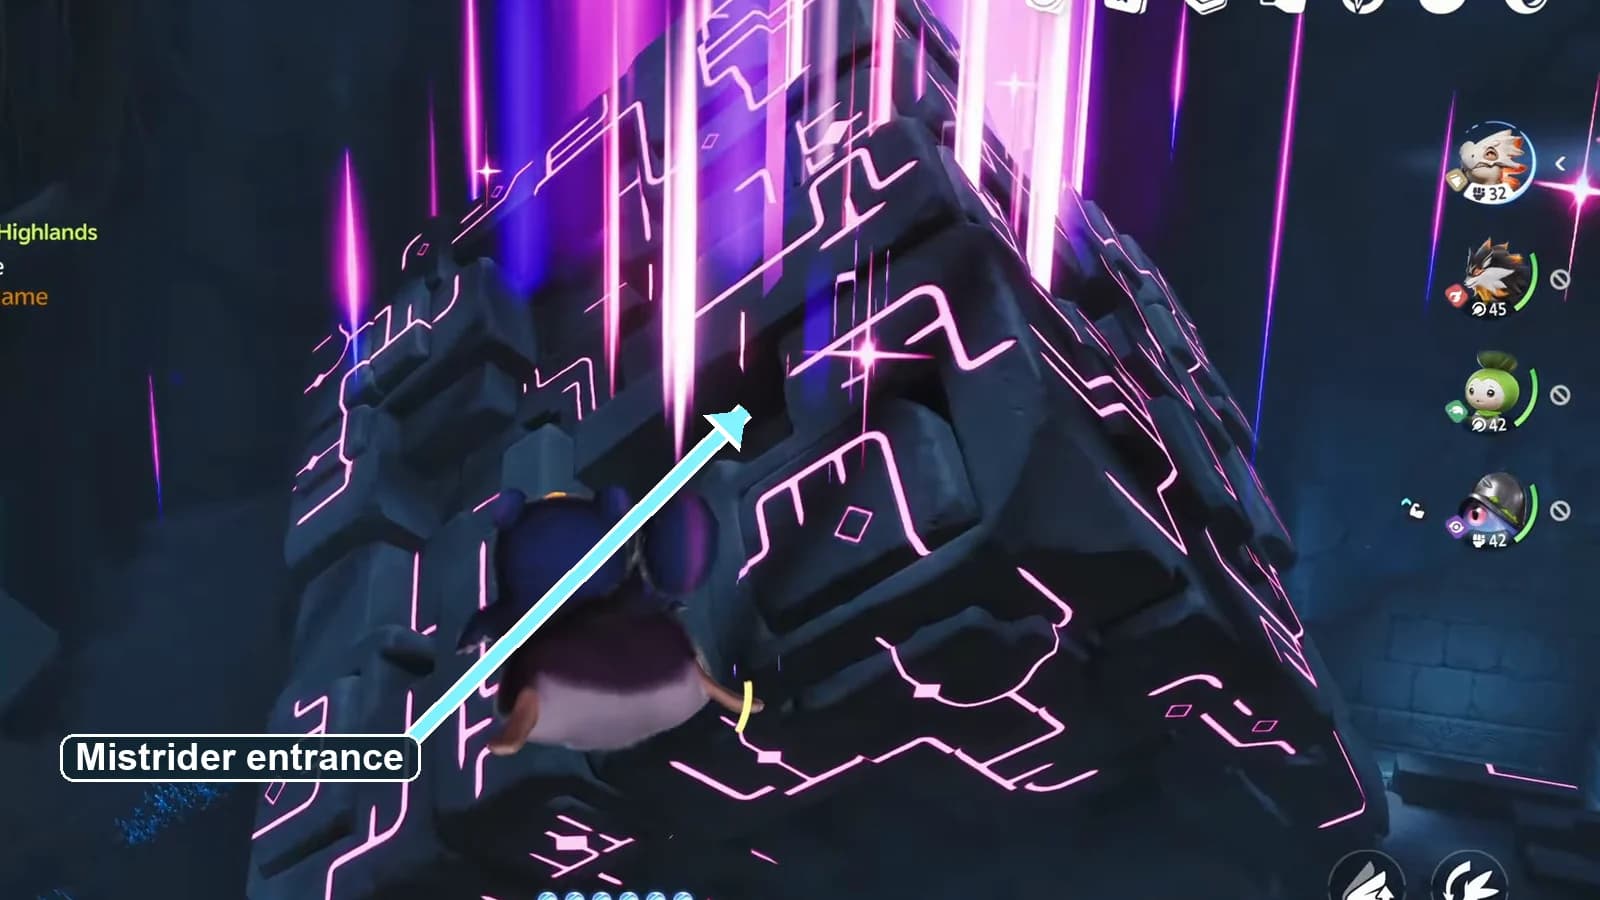
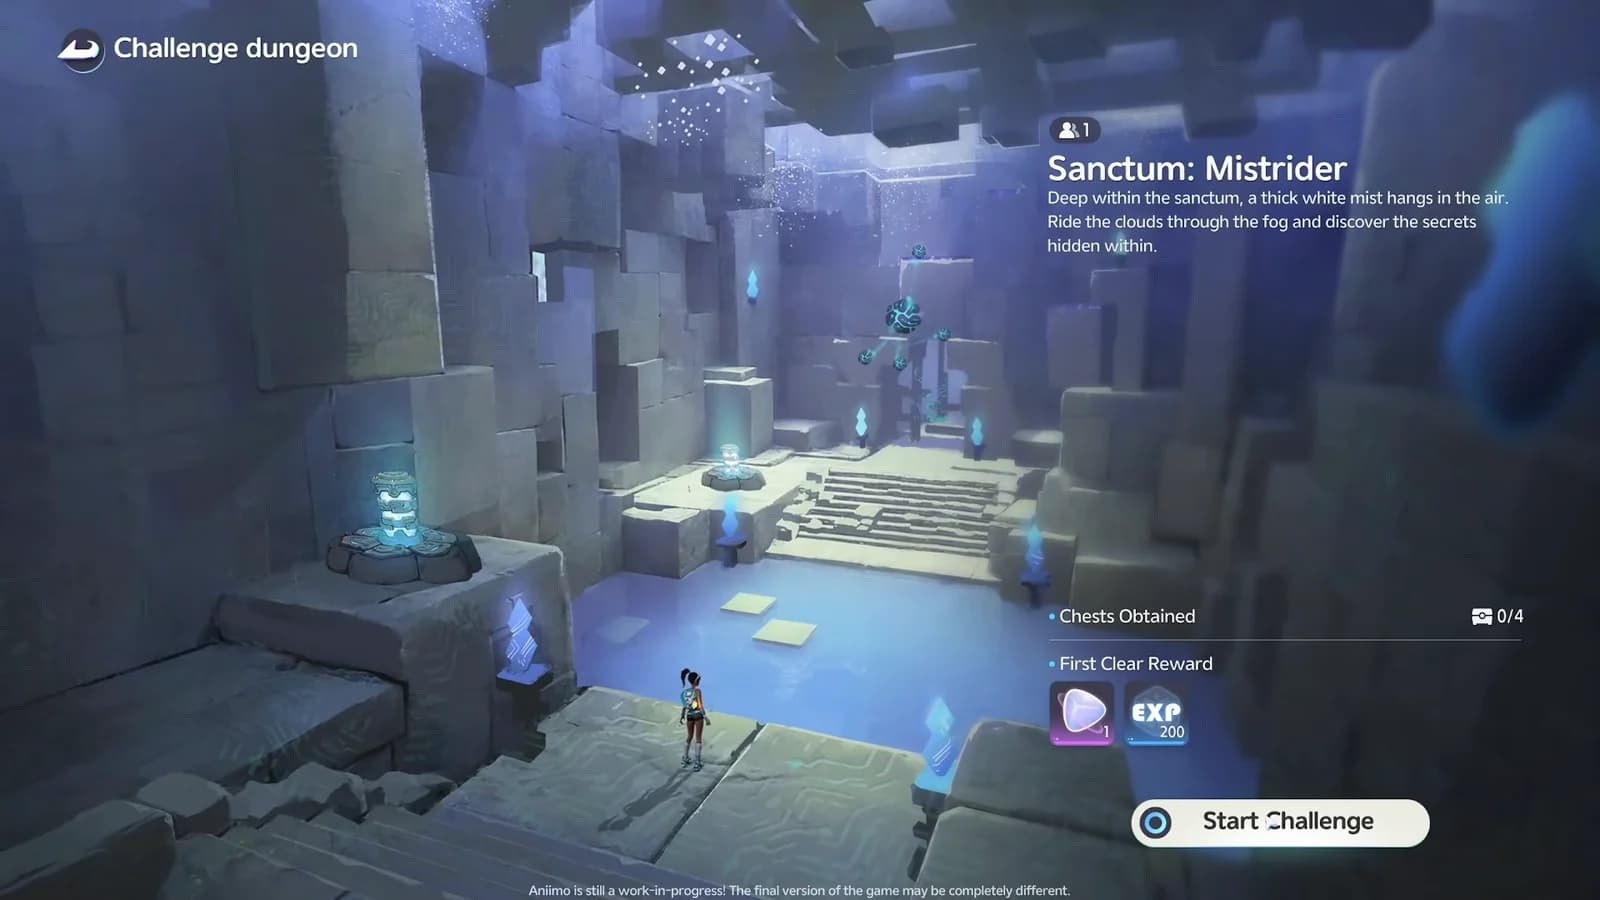
Open the exact Mistrider atlas pin. The marker sits at 1339, 1986 on the AniimoVerse atlas. The map label is Nimbus Fields; older checklists use the singular Nimbus Field for the same entrance. A fresh run takes one player and starts at four optional chests.
Nimbus Fields
Older checklist label
- Value
- Nimbus Field
Atlas coordinates
- Value
- 1339, 1986
Players
- Value
- 1 · Solo
Fresh-run chest counter
- Value
- 0/4
First-clear panel
- Value
- Item ×1 · EXP 200
Trial movement

Quick solution
- Claim Turbo, press the displayed Flight Mode input inside the first cloud and ascend the opening block route.
- Attach the first Ancient Battery in Flight Mode, place it on the round charging plate and pass the powered gate.
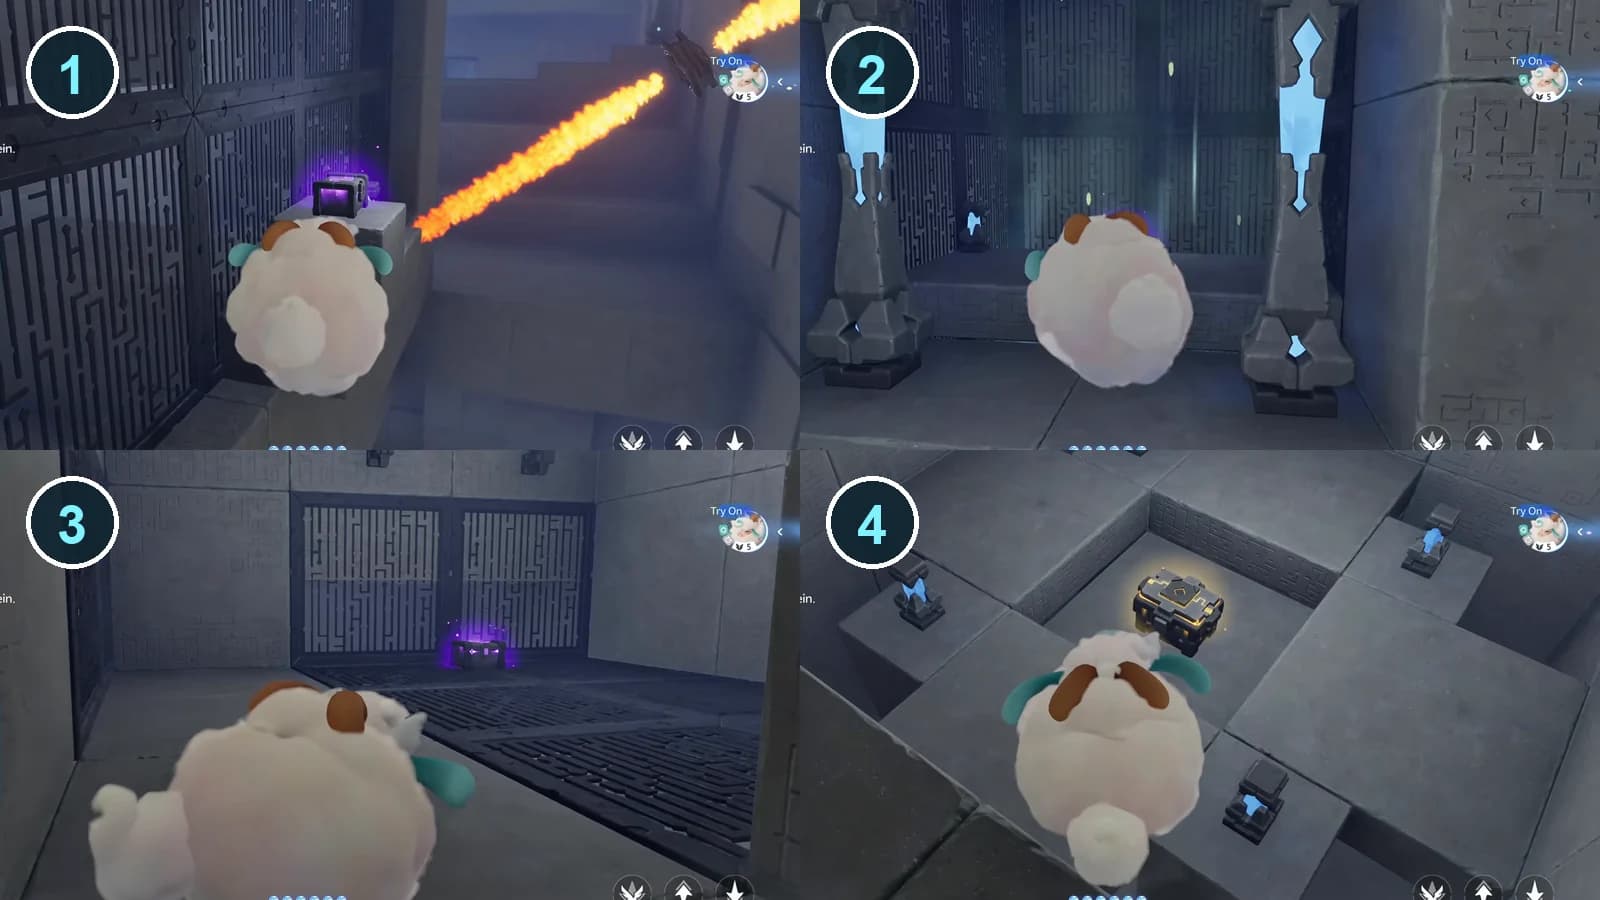
- Collect chest 1 beside the flame jets and chest 2 inside the blue-pillar alcove.
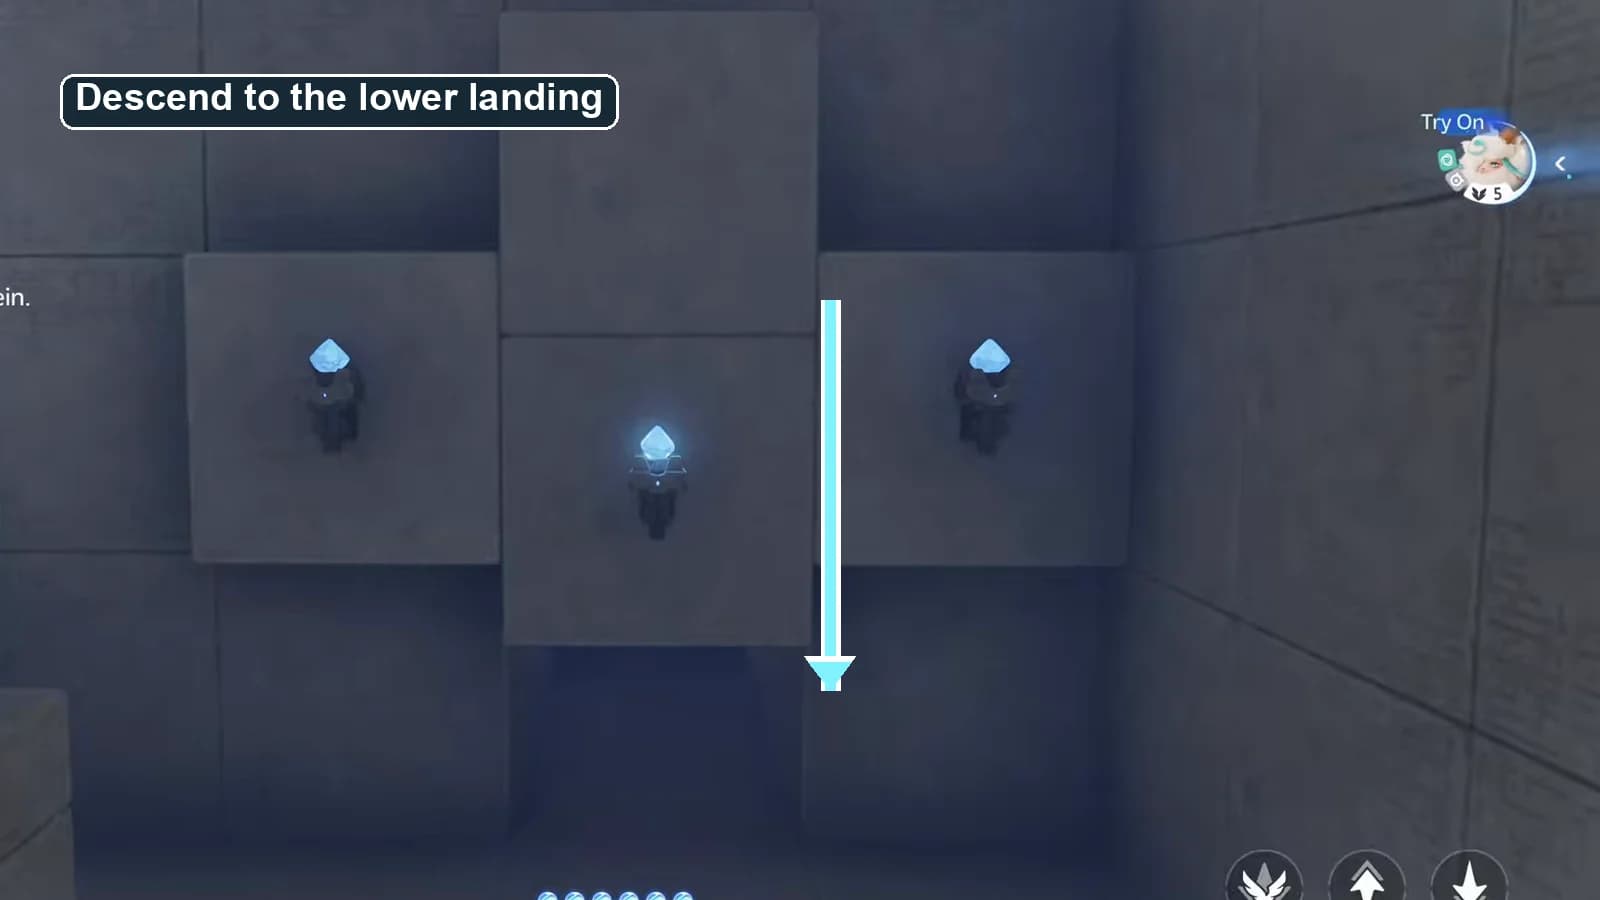
- Descend to the lower landing, collect chest 3 beside the grating and activate the route to the raised stairs.
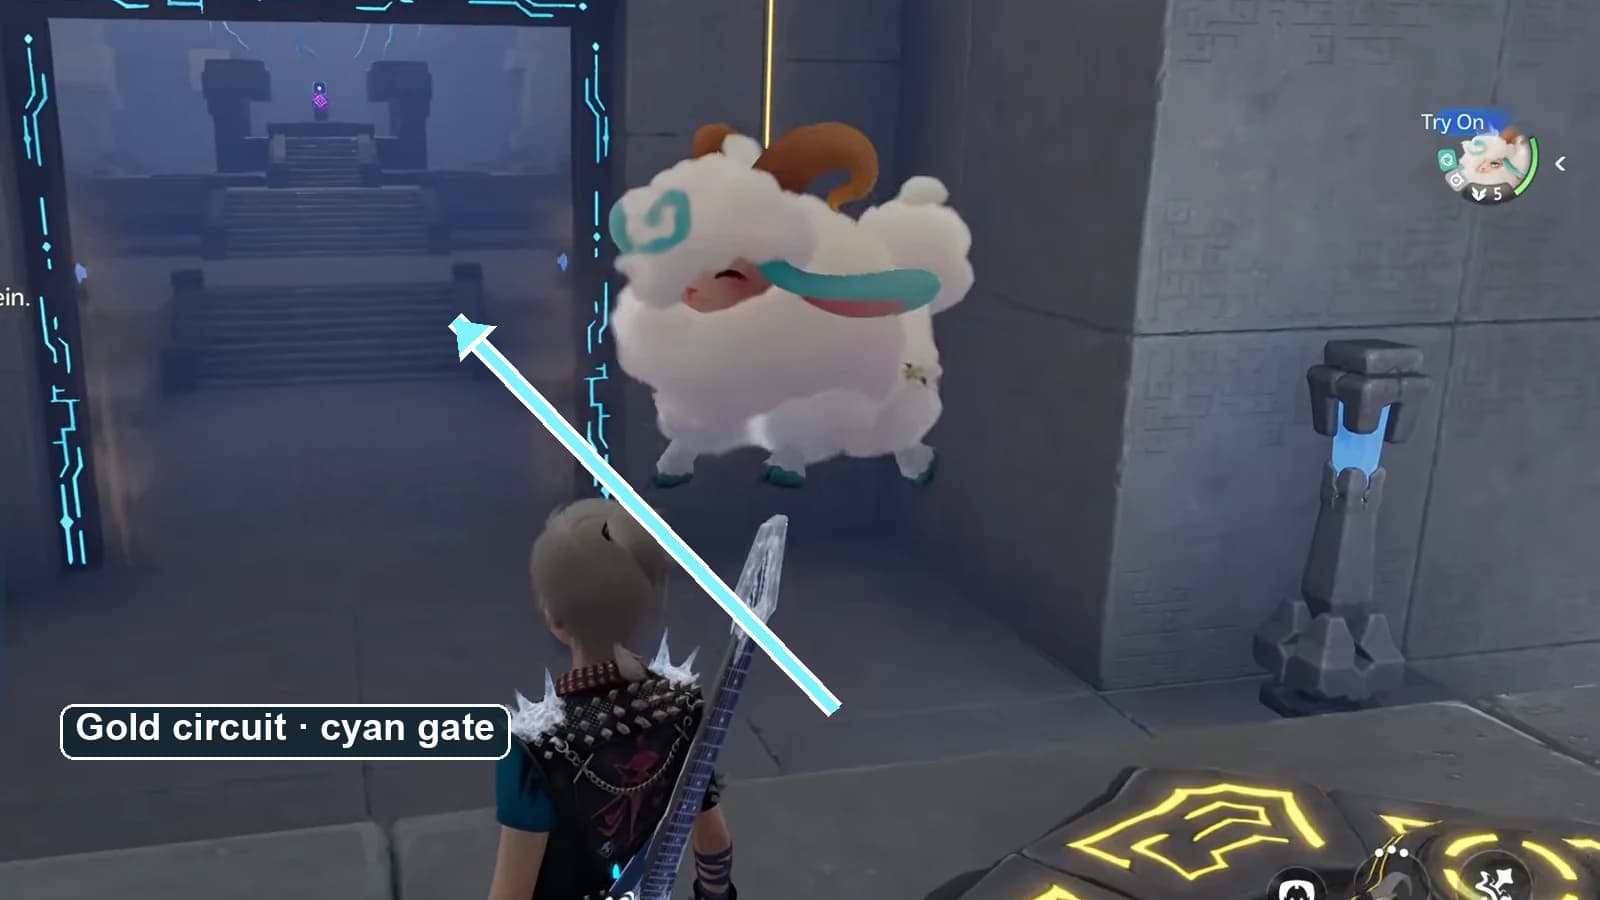
- Carry the later Ancient Batteries onto their round charging plates until both circuits turn gold and the gate trim turns cyan.
- Use Open Passage, collect chest 4 from the four-lamp pit, align the split flower into a full cyan rosette, then interact with the Terminus to restore the Vein.
Trial Aniimo and Cloudwalk controls
The trial is  Turbo, and the visible ability label is Cloudwalk, not a generic Wind attack. On the default PC layout, enter a cloud and press T for Flight Mode, Space to ascend, Ctrl to descend and X to exit. While flying, move close to an Ancient Battery to attach it. If you have rebound these keys, follow the on-screen prompt instead.
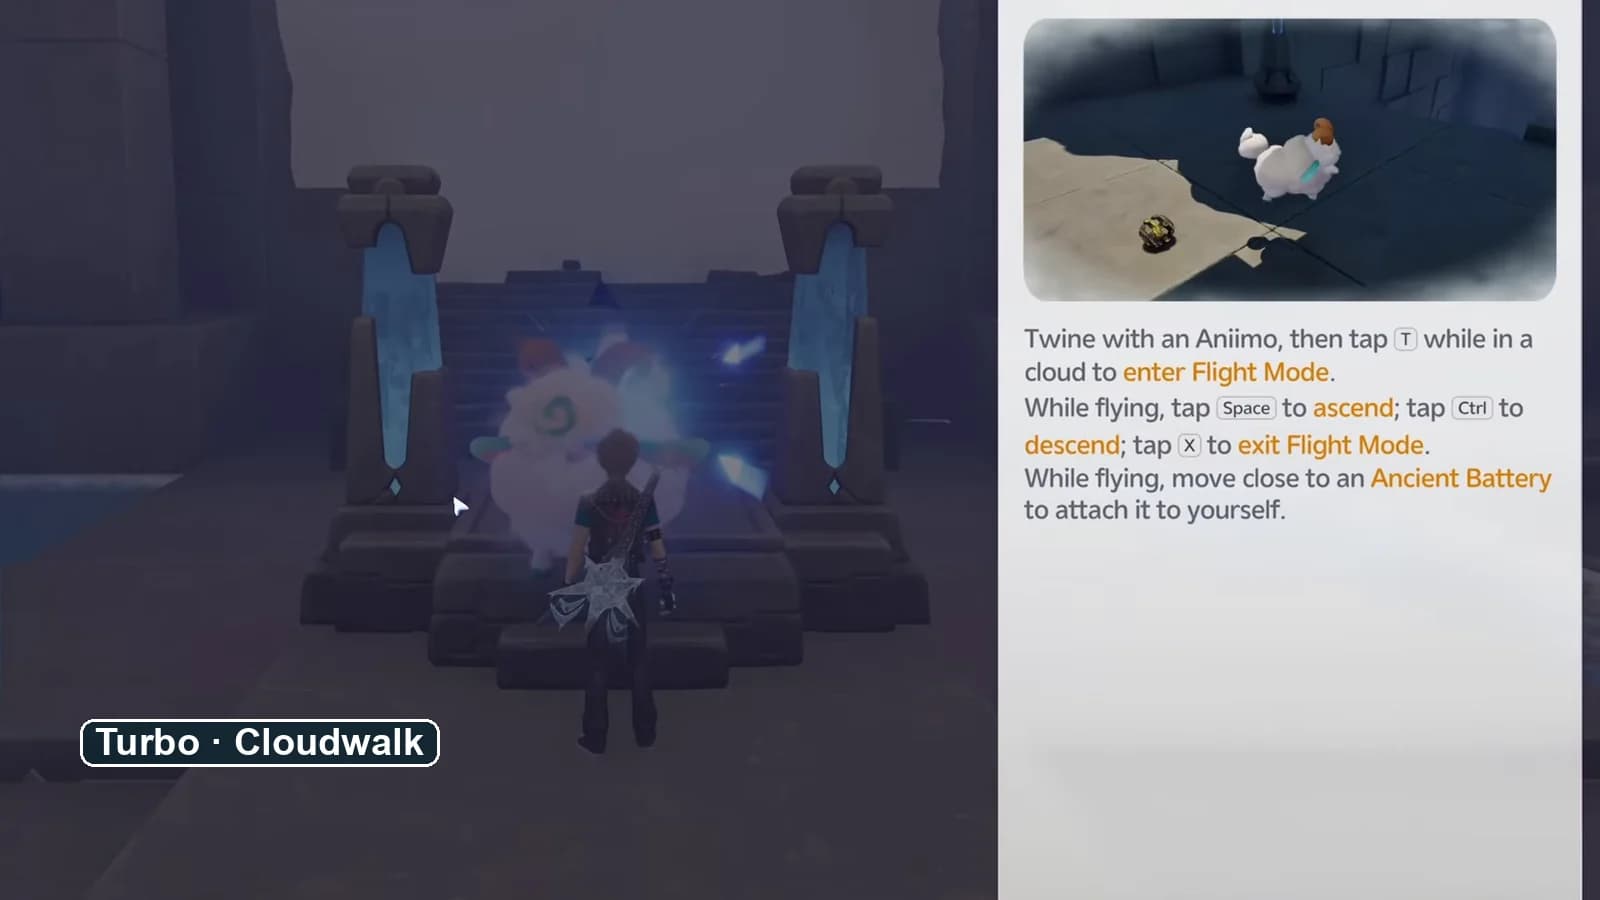
If the controls are unfamiliar, review Twining and mobility before the opening ascent. The puzzle expects deliberate vertical corrections rather than a continuous sprint through the room.
Numbered room sequence
Claim Turbo and climb the opening path
Touch the trial statue, claim
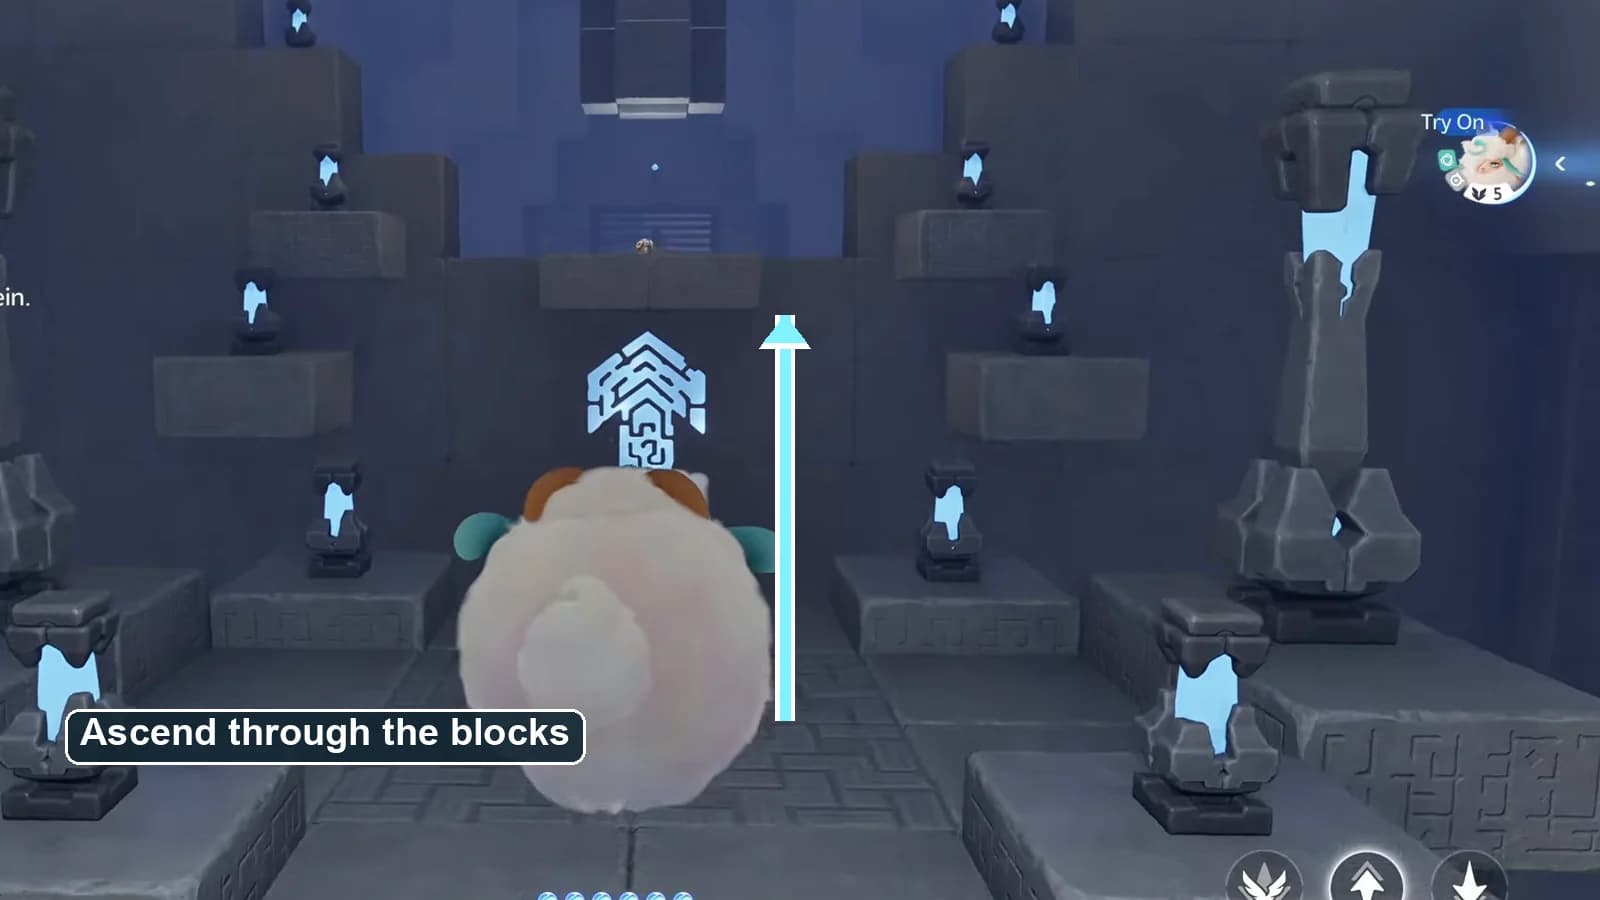
Turbo and Twine. Enter Flight Mode in the cloud, follow the stepped stone platforms and use the bright upward route marker to reach the first battery gate.Power the first battery gate
At the shutter with three circular emblems, do not attack the discs. Approach the nearby Ancient Battery in Flight Mode so it attaches and carry it beside the round charging plate. Untwine, either directly from Flight Mode or after exiting it, then follow the displayed Manipulate, Drag and Drop/Throw prompts to seat the battery. Wait for the circuit to turn gold and the gate trim to turn cyan before passing through.
Cross the flame route and take chests 1 and 2
- Finish this before the pass
- Use short height changes to pass the sweeping flame jets. Chest 1 sits on the narrow grating ledge beside those jets. Continue through the next gate and turn into the alcove framed by two tall blue-lit pillars for chest 2. Confirm 2/4.
Descend through the drop section and raise the stair route
- Finish this before the pass
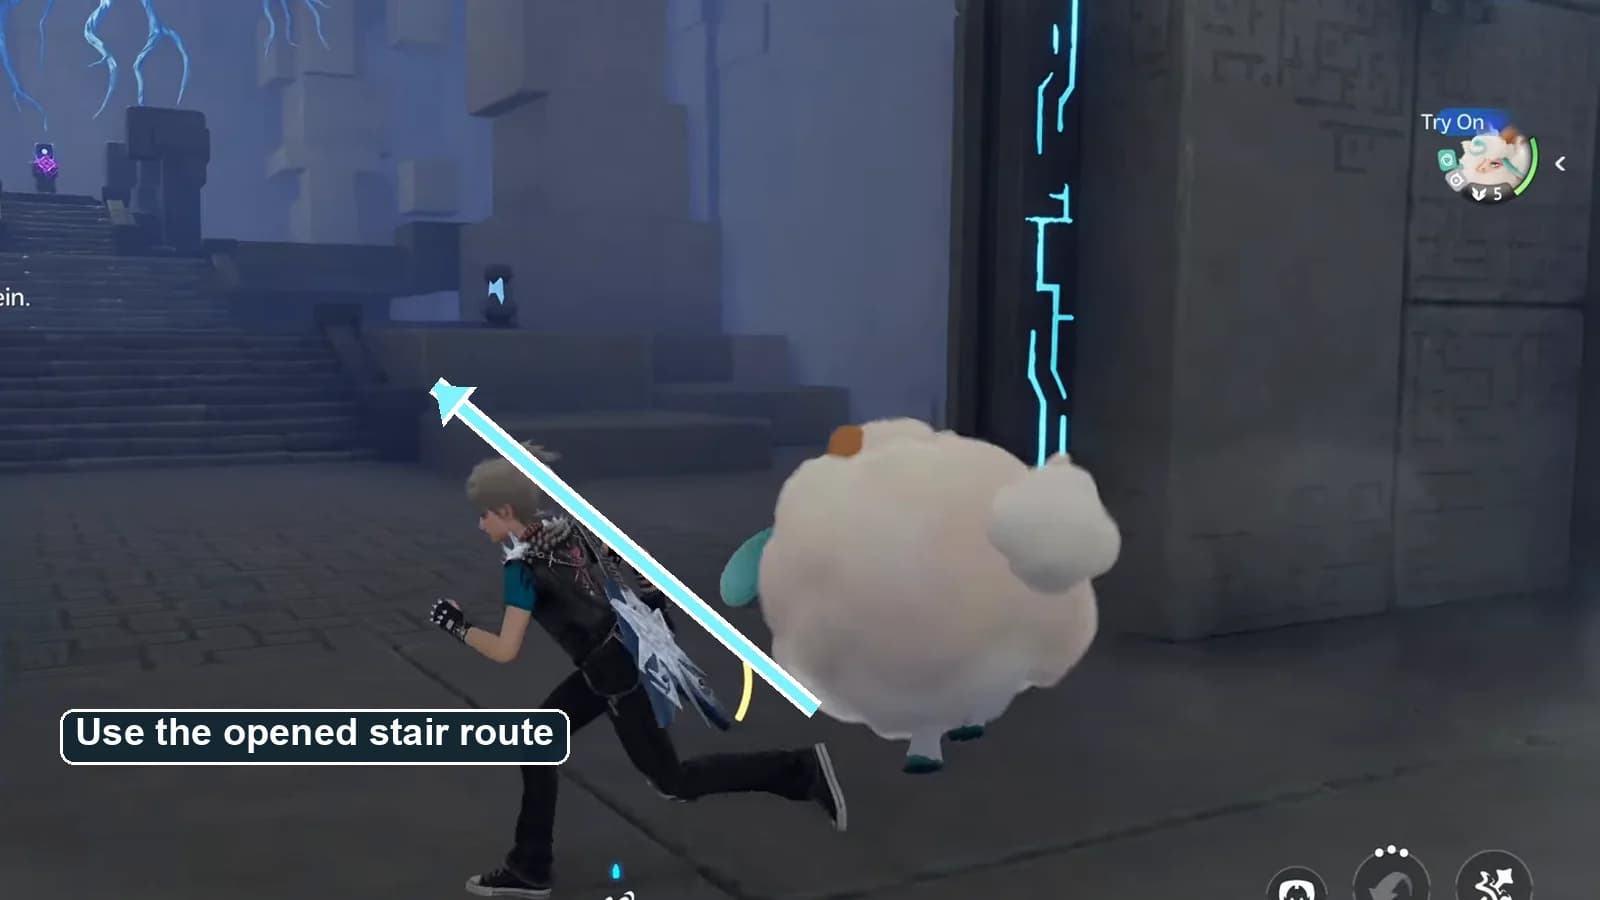
- Follow the large white direction marker, then descend around the block cluster to the lower landing. Cross the grating to chest 3 beside the flame marker; the counter reaches 3/4. Continue through the lower route and take the opened stairs back upward.
Power the later device gate
Move close to each Ancient Battery in Flight Mode and carry it beside the matching round charging plate. Untwine, either directly from Flight Mode or after exiting it, then follow the displayed Manipulate, Drag and Drop/Throw prompts to seat it. Both circuits turn gold before the purple gate trim changes to cyan and the shutter opens. If a circuit stays purple, its battery is not seated on the plate.
Use Open Passage and collect chest 4
- Finish this before the pass
- Past the battery gate, use the control labeled Open Passage and descend into the square pit ringed by four blue lamps. Open chest 4, the last optional chest in the room, then return toward the final flower gate.
Align the final flower gate
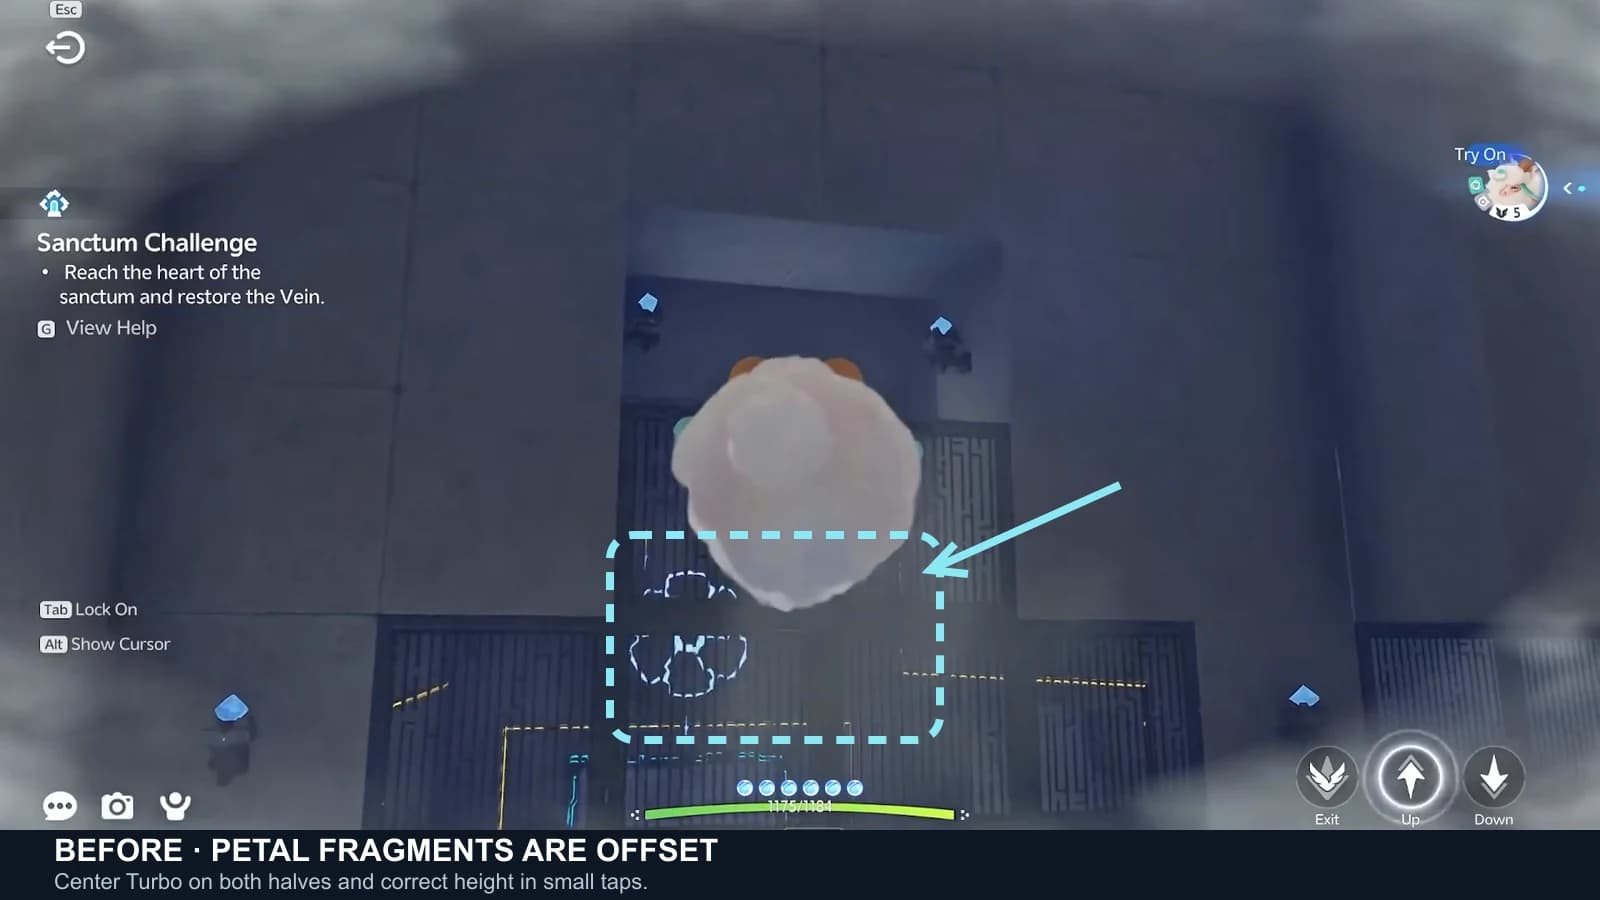
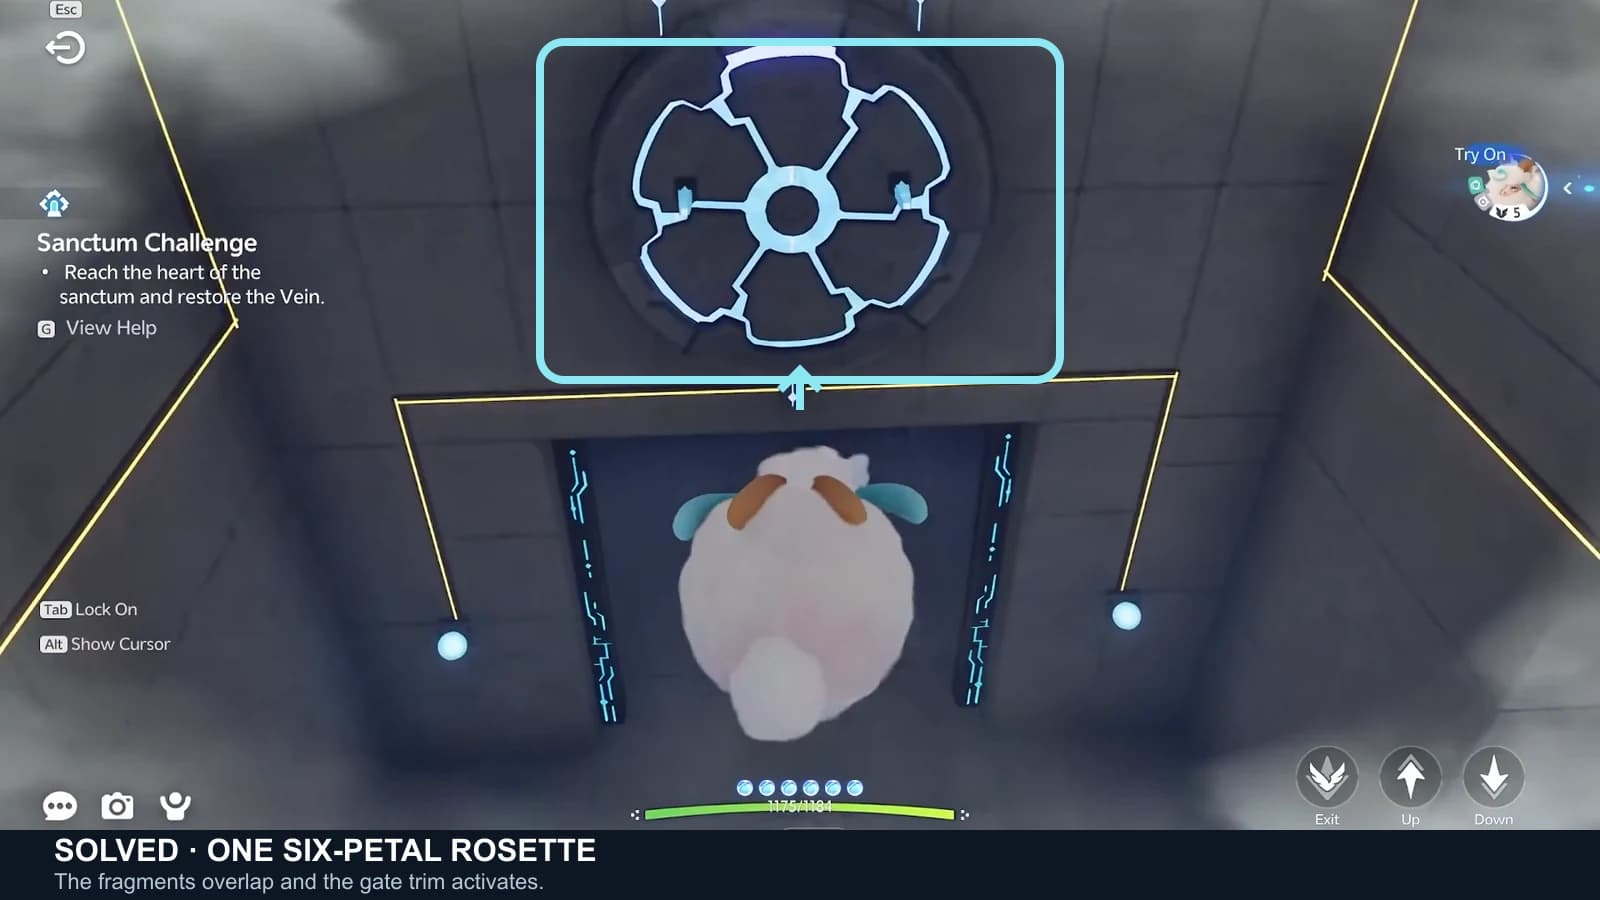
Hover toward the gate on its centerline. Use small height and lateral corrections until the separated petal fragments overlap as one cyan six-petal rosette and the gate opens. This is a separate gate after the earlier battery-powered shutter.
- The run closes behind you here
Restore the Vein at the Terminus
Pass the flower gate and follow the short final route to the purple square core. Interact with this Sanctum Terminus, also called the Tesseract, to restore the Vein. Do not count on returning for a missed chest afterward.
Four-chest checklist
Chest 1
- Room step
- Step 3
- Landmark
- Narrow grating ledge immediately beside the sweeping flame jets
- Check
- Counter reaches 1/4
Chest 2
- Room step
- Step 3
- Landmark
- Side alcove framed by two tall blue-lit pillars after the first chest
- Check
- Counter reaches 2/4
Chest 3
- Room step
- Step 4
- Landmark
- Purple chest at the grating wall beside the flame marker on the lower route
- Check
- Counter reaches 3/4
Chest 4
- Room step
- Step 6
- Landmark
- Sunken square pit ringed by four blue crystal lamps before the flower gate
- Check
- Last chest before the flower gate
Final flower alignment close-up
This final flower gate is a perspective check after chest 4, not the earlier battery gate. Hover on the centerline, keep the upper and lower fragments in view and adjust in small vertical and lateral taps. The incomplete state shows separated petal arcs. Success is the moment they overlap as one cyan six-petal rosette and the gate opens.
Wrong-turn recovery
Completion and rewards
The entrance card labels the slot First Clear Reward and shows one item plus 200 EXP.  Lumin Amber is the general first-clear award for Sanctums. Use the chest counter as your completion check rather than the drops.
Turbo profile carry the current entity details.Frequently asked
Where is the Mistrider Sanctum?
Mistrider is in Nimbus Fields at 1339, 1986 on the AniimoVerse atlas. Older checklists use the singular Nimbus Field. Open the exact Mistrider atlas pin.
How many players and optional chests does Mistrider have?
Mistrider is a one-player solo Sanctum and a fresh run starts at 0/4 optional chests.
Which trial Aniimo and movement does Mistrider use?
The trial is Turbo, and its visible ability label is Cloudwalk. Flight Mode handles the vertical route and lets Turbo attach nearby Ancient Batteries.
What shows that the flower alignment is solved?
The separated petal segments become one complete cyan six-petal rosette, the gate’s cyan trim activates and the shutter opens.