









Which Aniimo does your team need?
Start with the problem you want to solve. A Fire burst carry and a cleanse healer earn their slots in different ways; placing them on the same power ladder hides the more useful comparison.
 Fire burst carryInfergon
 You can maintain Fire Debuff and hand over a clean BREAK window.
 Sustained Lightning carryFulmintis
 You enjoy a longer channel and can support its critical-hit loop.
 Ranged play and repositioningStellarys
 You like alternating skills with basic attacks and managing a clone.
 Fire BREAK and carry potentialMagmarex
 You want one slot to contribute BREAK and close-range Fire pressure.
 Grouping and controlHexxin
 Your carry benefits from grouped targets or you need healing reduction.
 EP support for expensive carriesSomniwing
 You are building around a charged attack or a long damage sequence.
 Healing and cleanseGracewingYou want healing over time and cleanse in the same slot.
 Early progression and an evolution planEmberpupYou are opening the map and need a useful catch now.
Infergon has a clear reason to anchor a team: Power of Fire adds 40% damage while the target has more than five Fire Debuff stacks. Lava Breath supplies eight stacks, and Flaming Claws turns that setup into a burst sequence. We recommend it when you want each teammate to contribute toward one deliberate damage window.
The catch is that its own attacks spend the resource that enables the bonus. Each Flaming Claws strike consumes two stacks, so reaching the threshold once is not enough. Infergon rewards a Fire team that keeps replenishing the target, rather than a collection of individually strong damage dealers.
How to make the pick work
- Build Fire Debuff with Flamerion and Lava Breath. Aim to enter the damage window comfortably above five stacks.
- Create BREAK with Magmarex’s stack-preserving skills, then switch to Infergon while the Fire setup is still intact.
- Use Flaming Claws and its stronger recast within five seconds. Check the remaining stacks before committing to another sequence.
Investment priority
Establish the stack-and-BREAK rotation first, then build ATK and compatible Fire damage or critical rate. Reserve EP for both claw casts; a stronger stat line cannot rescue a rotation that runs out before the recast.
Which form?
Basic Form is the recommendation. Infergon supplies Fire damage; the rest of the team must cover resistant encounters.
A team to start from




Flamerion supplies Fire stacks and EP, Magmarex creates BREAK, and Glacy heals while adding Glimmer Shot’s team damage buff. Use Gracewing in the healer slot when cleanse is more useful.
Fulmintis links damage and resource recovery: Electro Stash restores 4 EP whenever a skill critically hits. That makes critical rate useful for more than a larger damage number. During Lightning Blade Storm, refunds help fund the continuing sequence, provided the channel stays connected.
This is a team commitment. Dazmand’s Thunder Sweep supplies 20% to 35% Lightning-damage critical rate for 20 seconds on hit, scaling with Dazmand’s ATK, while Enhanced Lightning Blade adds 35% skill critical rate for the same duration. Those windows give the build a coherent setup, but they do not make it interruption-proof. Choose Fulmintis because you want to support that loop, not simply because a form received an SS vote.
How to make the pick work
- Open with Dazmand’s Thunder Sweep. Use Somniwing to support the EP pool and recovery, and prepare Glacy’s healing or damage buff.
- Activate Enhanced Lightning Blade immediately before Lightning Blade Storm so the buff covers the channel.
- Keep the attack connected and release on a three-slash breakpoint for the stronger final slash. Rebuild support before forcing another long commitment.
Investment priority
Prioritize consistent critical hits and enough survivability to finish the channel before adding more damage-only support. ATK matters, but lost channel time also means lost opportunities to recover EP.
Which form?
Basic Form supports the core loop. Prismana adds Light coverage and Enhanced Light Blade; it is a coverage choice, not a prerequisite for this recommendation.
A team to start from

Dazmand supplies the Lightning CRIT buff, Somniwing expands the EP plan, and Glacy protects the longer field time. If BREAK is the bottleneck, the full guide includes a Luminelle, Turbo and Blazen relay.
Shadow Magic lets Stellarys break control, retreat and leave a clone that mimics attacks and skills at 20% damage. The clone lasts 20 seconds, but you need to stay within 20 metres. That gives ranged play a useful escape tool without making distance irrelevant: you still need to fight alongside the shadow you created.
Grand Sorcerer adds 5 Might to each basic hit for five seconds after a skill. The practical lesson is to alternate skills and basics instead of emptying every skill at once. We recommend Stellarys for this rhythm and its repositioning options, rather than claiming it has the highest damage ceiling.
How to make the pick work
- Use Shadow Magic to establish the clone, or hold it when an incoming control effect makes the escape more valuable.
- Land Shooting Stars, then fit basic attacks into Grand Sorcerer’s five-second window.
- Stay close enough to keep the clone active. Recast Shadow Magic when the position helps, rather than treating it as a button to press immediately on cooldown.
Investment priority
Start with an ATK baseline and an EP budget that sustains skill-basic alternation. For the glide’s recovery effect, remember that three hits on the same target are required; scattered hits do not satisfy the condition.
Which form?
Use Basic Form for the Dark loop. Rainstorm adds Water; Prismana and Umbrabow add Ice. Select coverage for the encounter rather than assuming the rarest form is always the upgrade.
A team to start from
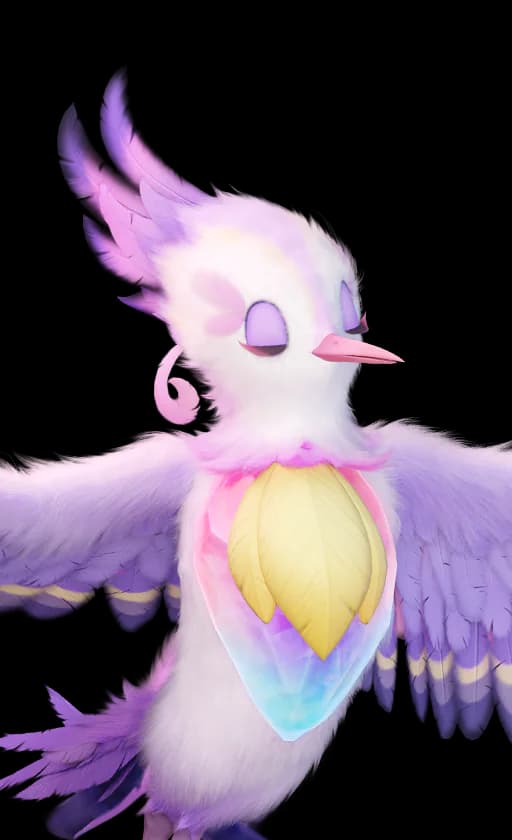

Hexxin groups targets, Fragrancier strengthens Dark pressure and supplies healing through Withering Bloom, and Rookey provides BREAK. For a safer setup, the guide includes Helmut and Glacy.
Magmarex can help a Fire team reach its damage window and can also become the creature that uses that window. The distinction depends on Lava Punch. Its base version removes every Fire Debuff stack; the upgraded description retains stack-scaled damage without that removal. That changes how you should build and play the team.
Before the upgrade, we would use the stack-preserving Lava Breath and Magma Surge package when supporting Infergon. After the upgrade, repeated Lava Punch becomes a more coherent carry plan alongside Flamerion. This prerequisite matters more than whether a general tier list calls Magmarex a breaker or a damage dealer.
How to make the pick work
- Confirm which Lava Punch version you have before choosing the rotation.
- Use Flamerion and Lava Breath to build Fire stacks. Magma Surge adds a one-second stun when the target has more than five stacks.
- For the upgraded carry loop, keep the target in the punch path and budget 20 EP per Lava Punch. Rebuild resources instead of chasing a target through empty casts.
Investment priority
The Lava Punch upgrade comes first for the carry build. Then invest in reliable physical damage, EP recovery and close-range survival. If the upgrade is unavailable, spend on the support job you can already perform.
Which form?
This recommendation uses Basic Form. Unlocking another form does not remove the need to check the specific skill upgrade.
A team to start from
This is the carry version: Flamerion maintains Fire stacks, Somniwing supports EP, and Glacy heals. To use Magmarex as a breaker for Infergon, follow the earlier Infergon team instead.
Hexxin earns a place by making other creatures’ attacks easier to use. Black Hole Domain groups and displaces targets, giving an area-damage carry a more useful target than a scattered pack. Its value depends on the follow-up: grouping enemies achieves little if you stay on Hexxin and never deliver the damage you prepared.
Prank also gives the rotation a resource angle. Every 18 seconds, the next skill applies a 10-second Curse; Dark basic hits against a cursed target restore 0.25 EP each. Oozing Malice adds a separate reason to bring Hexxin by reducing healing received by 50% for 10 seconds. We would choose it for those jobs, not treat its REGEN label as a substitute for team healing.
How to make the pick work
- Track the Prank window so the intended setup skill applies Curse.
- Place Black Hole Domain where it catches the pack, then follow with your area-damage carry while enemies remain grouped.
- Use Dark basics into Curse when you need EP recovery. Choose Oozing Malice when enemy healing is the problem you need to solve.
Investment priority
Prioritize a repeatable control cycle and enough durability to survive the setup. Add damage after the grouping and handoff work; a support build should not consume the resources needed to finish its carry.
Which form?
Basic Form has the grouping tools used here. Prismana’s larger-area Malicious Outburst is an option for healing reduction, not a requirement for Black Hole control.
A team to start from

Hexxin gathers the targets, Fenmane follows with area pressure, Dazmand supports the Lightning plan, and Glacy sustains the team. Stellarys is another natural follow-up for a Dark-focused lineup.
Somniwing is useful because it addresses a specific failure point: a carry with a strong attack but an incomplete resource budget. Energy Full adds 10 maximum EP, while Ethereal Light Wave raises EP recovery rate by 24% to 36% for 20 seconds for teammates along its path, scaling with Somniwing’s REGEN. That makes it a practical partner for Scorchhowl’s charge or Fulmintis’s longer sequence.
Hypnotic Spores can prepare a hit with a 25% damage-taken effect, but Hypnosis breaks when damage lands and Grass targets are immune. Treat it as a setup for the intended hit. An incidental attack can spend the opportunity before your carry arrives; it is not a permanent multiplier for the whole team.
How to make the pick work
- Aim Ethereal Light Wave through the teammates that need its recovery effect, then preserve the resulting EP for the carry.
- Set up BREAK and other damage buffs before using Hypnotic Spores for a planned hit.
- Hand over to the carry without letting filler damage consume Hypnosis first. Against an immune target, rely on the EP support rather than the sleep setup.
Investment priority
First check whether EP is actually limiting the rotation. If the carry is dying or missing its attack, adding EP support will not solve that. Keep a breaker and healer in the other slots instead of building a team made entirely of damage amplifiers.
Which form?
Basic Form supplies the support package discussed here. This recommendation does not depend on acquiring Prismana or assuming an ultimate guarantees a complete team EP refill.
A team to start from

Somniwing prepares the EP plan, Rookey creates BREAK, Glacy heals and buffs, and Scorchhowl spends the window on Burn Breaker. The full guide explains why a missed charge is expensive.
Gracewing is the swap we recommend when a damage-focused team needs to become more dependable. Phantom Dance supplies off-field cleanse, and Healing Dance restores 9% max HP over eight seconds. That combination protects the setup a carry has already invested in, rather than asking the player to abandon the damage plan for another attacker.
The tradeoff is opportunity cost. Glacy’s Glimmer Shot gives 15% team damage for 15 seconds and Healing Water provides team healing, so Glacy remains attractive when cleanse is not needed. Decide between them by what is ending your attempts: failed survival and disruptive debuffs favor Gracewing; a stable fight can justify Glacy’s offensive utility.
How to make the pick work
- Keep the carry’s core partners and change the healer slot first. That lets you assess whether sustain was the missing piece.
- Use Healing Dance with its eight-second recovery period in mind; healing over time needs room to do its work.
- Return to the carry or breaker once the team is stable instead of staying on the healer and letting the prepared damage window expire.
Investment priority
Invest enough in sustain to complete the encounter’s setup reliably, then return resources to the carry. Do not add a second healer by default when a breaker or resource support would address the actual bottleneck.
Which form?
The Basic Form healing and cleanse package is enough for this role. Our starter guide also follows the Flutternym line toward this longer-term team slot.
A team to start from
This is the Infergon team with cleanse replacing Glacy’s damage buff. Infergon and Flamerion keep the Fire plan, Magmarex supplies BREAK, and Gracewing helps the team finish the sequence.
Early in the game, availability and field utility matter alongside combat. Emberpup gives the opening roster a melee Fire damage slot and Hustle for ground travel. It is a practical starting point because it contributes before you have assembled the specialist teammates that make the other recommendations work.
Think of the catch as the start of a line rather than a promise that the base creature will outperform every later option. Emberpup evolves through Flameruff, with Scorchhowl offering an EP-funded burst direction. Inferlupa is another branch to compare before spending evolution materials. Your eventual choice should follow the role you want to play.
How to make the pick work
- Use Emberpup to cover melee Fire pressure and ground movement while you learn the opening routes.
- Round out the roster with ranged damage, healing and BREAK instead of catching four creatures for the same job.
- Before committing to an evolution branch, read the finished creature’s skills and resource demands. Scorchhowl’s full charge is an EP commitment, not a free extension of the starter playstyle.
Investment priority
Spend for the content you are currently clearing, then pause before expensive evolution and Resonance decisions. A future burst build needs support and a safe attack window; gathering only damage stats on the early catch is not the whole plan.
Which form?
Basic Form is the starting point. Regional typing and rare appearances should not distract from opening the routes and assembling a functioning early roster.
A team to start from



This opening roster spreads the jobs: Emberpup covers melee Fire, Celestis adds ranged damage and traversal, Flutternym supplies healing, and Helmut covers BREAK. Follow the starter guide for availability and progression.
What should you invest in first?
Choose one damage plan and make it work before funding a second carry. For Infergon, that means Fire stacks and a clean handoff. For Fulmintis, it means critical hits, EP and uninterrupted field time. For Stellarys, it means maintaining the clone and using the skill-basic rhythm. The right next upgrade is the one that removes the bottleneck in that plan.
- Secure the required skill or upgrade. Magmarex’s Lava Punch upgrade changes the rotation itself. Treat a prerequisite like that as part of the decision to build the creature.
- Fill the missing team job. Add BREAK if you cannot create a damage window, sustain if you cannot finish it, and EP support if the carry runs dry. Another attacker rarely fixes all three.
- Improve consistent damage before conditional bonuses. Compare Held Items at equal investment. An item that depends on high current EP may behave differently after an expensive cast.
- Revisit forms for matchups. Check the form’s typing and the element of the attacks you actually use. A coverage skill does not convert the rest of the kit to its element.
Still opening the map? Follow the starter catch guide before chasing a finished specialist lineup. If you are choosing a rare form, use the Prismana Picker to compare it with the roster you already own.
Before you commit to a pick
Is there one best Aniimo overall?
Infergon is our Fire burst recommendation, but it needs a different team from Fulmintis or Stellarys. Choose the carry whose setup you can support and whose playstyle you want to use. A healer or breaker can be the better investment when your existing carry already covers damage.
Do I need Prismana for these builds?
The example teams use Basic Forms. Some alternatives add coverage or change a skill, such as Fulmintis’s Light option or Stellarys’s Water and Ice forms. Read those differences against the encounter and your current roster before spending resources to obtain a variant.
Does this list apply to PvP?
This shortlist focuses on progression and PvE team building. Against another player, interruption, mobility and counterplay can change the value of a long channel or a prepared burst. We are not assigning competitive PvP ranks from these kit comparisons.
Why do these picks differ from the community tier list?
The community tier list records player ratings. Here, we choose a creature for a specific job and explain the costs of making it work. That is why a setup-sensitive pick can earn a recommendation for one team without being declared the strongest creature in every encounter.