

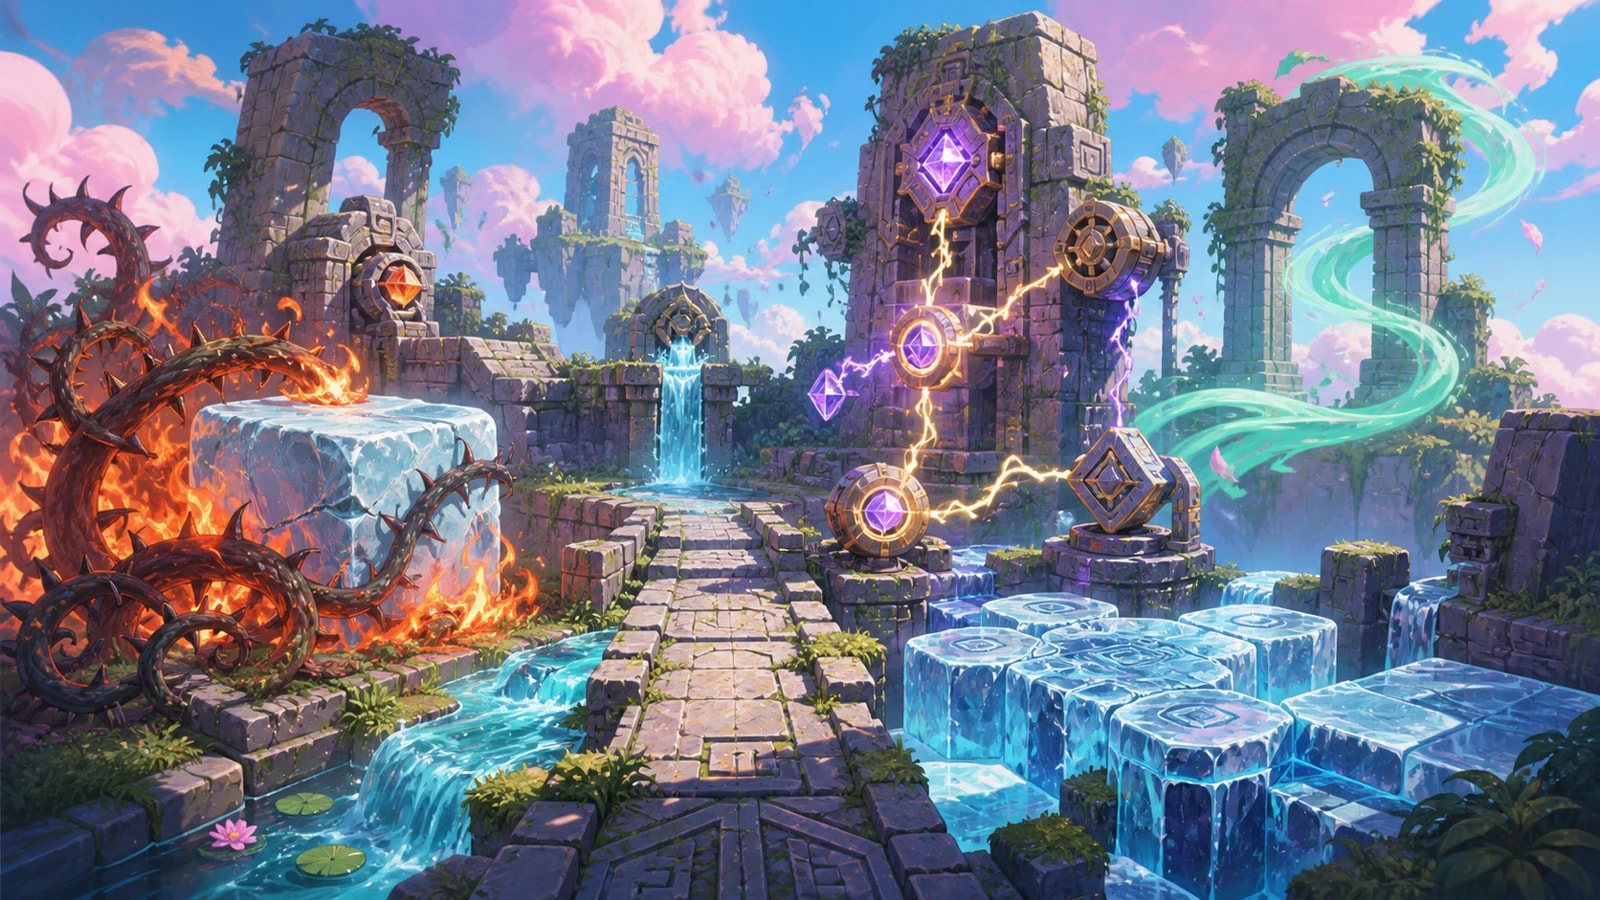


Identify the puzzle in ten seconds
Do not start by attacking everything. Match the most distinctive visible clue to one row, equip that tool and change one state. If nothing reacts, step back and check whether the real target is a socket, camera angle, route marker or second-player switch.
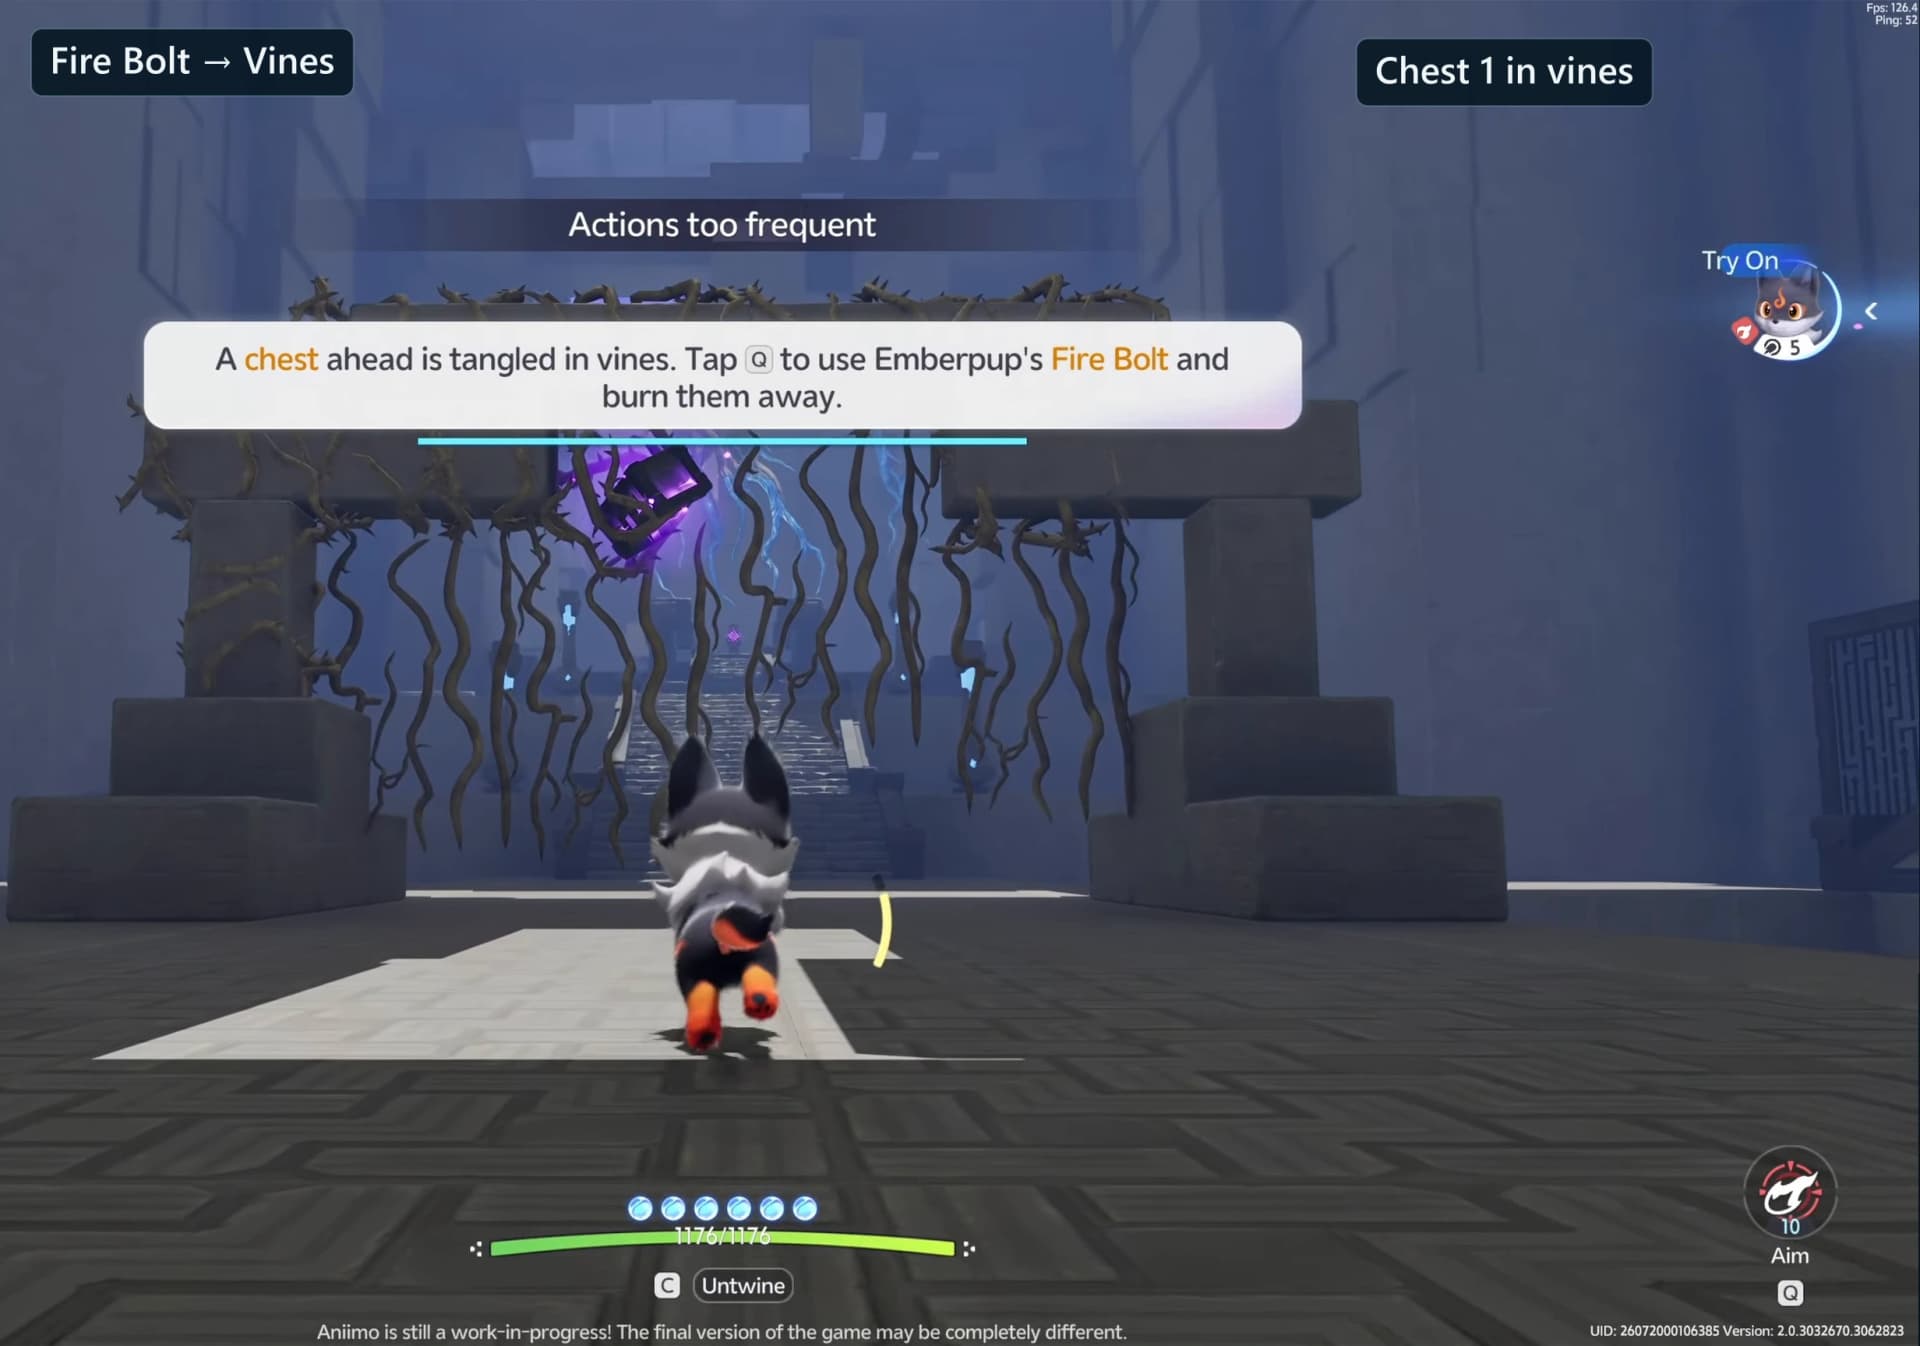
Vines, brambles, marked ice or an unlit bonfire
Fire interaction
Aim at the marked obstruction or fire fixture and trigger the Fire action.
Hitting nearby scenery, stopping before large ice fully melts, or leaving a room-specific updraft unused.
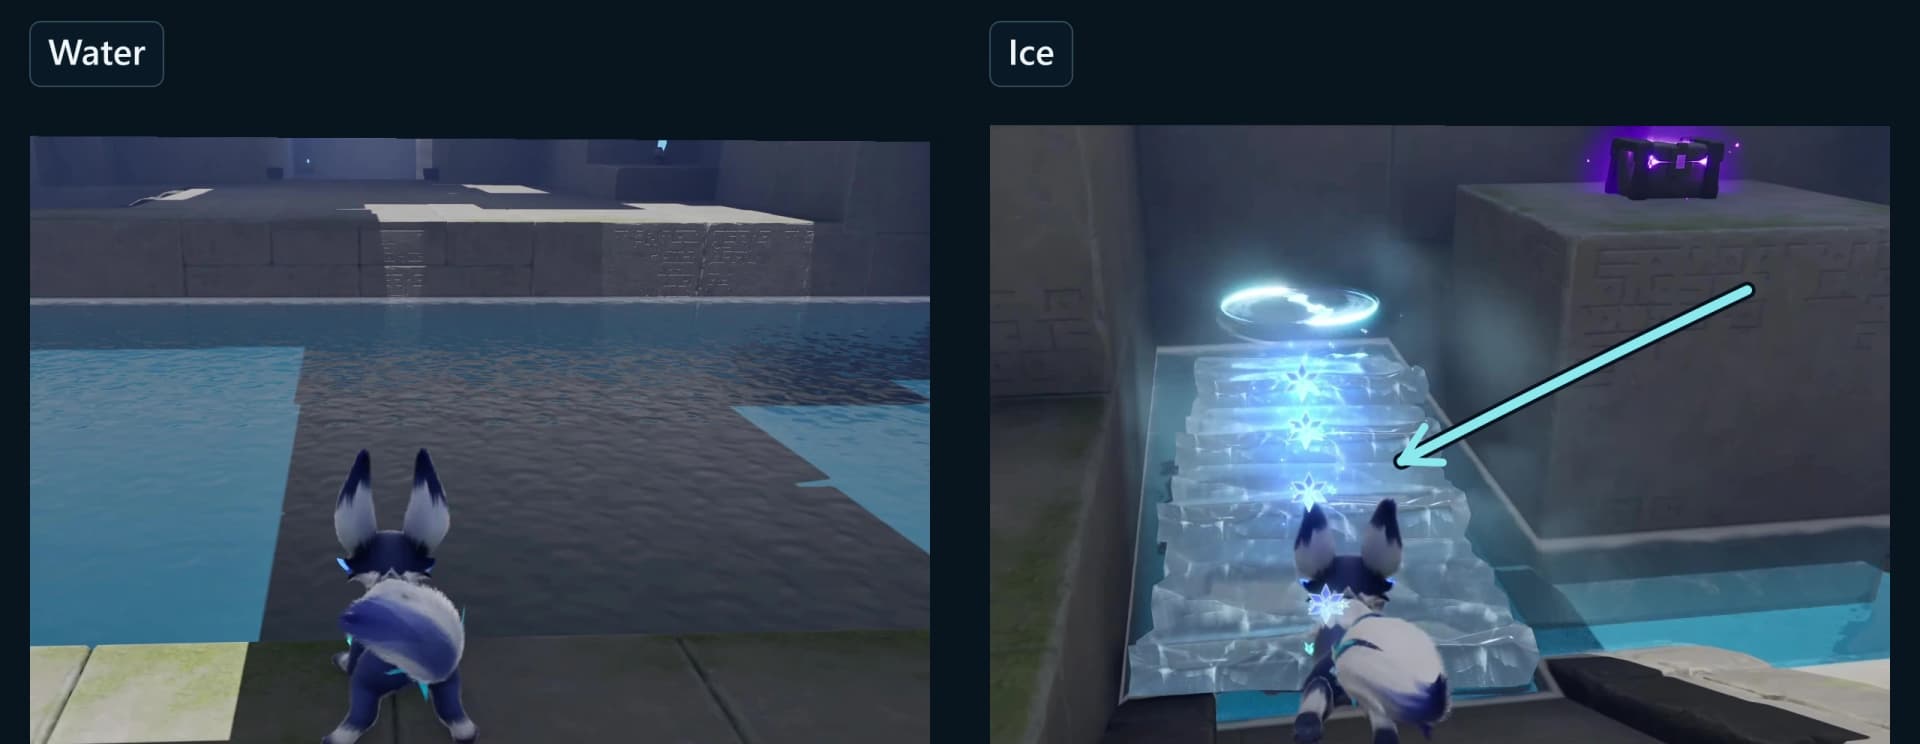
Marked water plus a freeze tutorial, snowflake state or supplied Fenrier
Ice interaction in Frigid Waters
Generate ice from the indicated patch, then check whether the route needs climbing or a whole block placed on a receiver.
Treating ordinary water as a freeze target or forgetting that the generated ice melts.
A flame barrier or a withered Bouncy Pad with a Water prompt
Water interaction
Extinguish the marked flame or water the plant until it grows into a springy platform.
Assuming every plant or fire accepts Water when no target, prompt or reaction appears.
A Lightning-marked conductor, battery or explicit charge prompt
Lightning interaction
Charge the marked device, then trace the powered route from source to destination.
Using Lightning on every nearby cube even when the room expects Pathfinder object placement.
Ancient-patterned cube, crate or portable Power node beside a socket
Pathfinder Gravity Pull or Manipulate
Move the nearest component into the matching socket and orient it as the route demonstrates.
Dropping every object in the center without reading which floor branch it completes.
Glowing floor pad beside a closed gate
Movable object, trial Aniimo or second player
Put one weight on the pad and watch which gate or bridge changes.
Removing the weight before the affected mechanism no longer needs the held state.
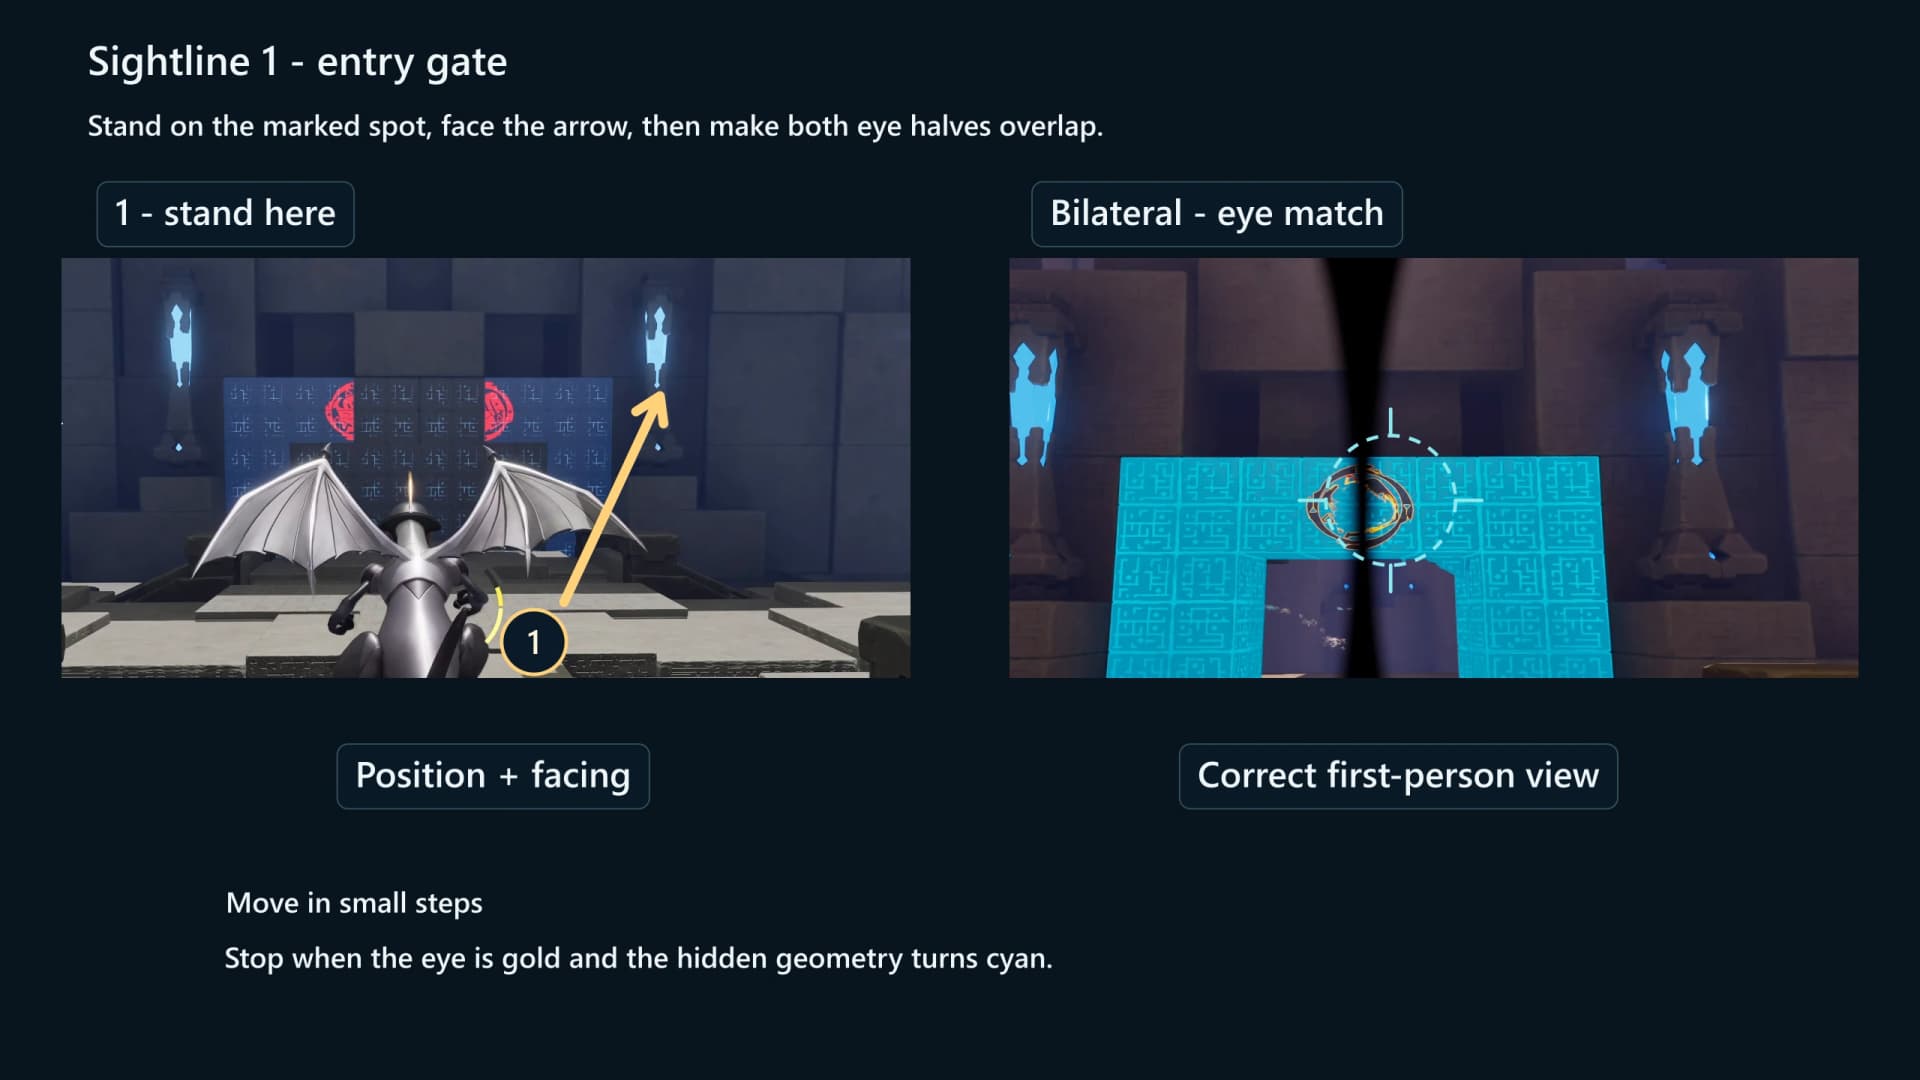
Separated eye halves that overlap from one viewpoint
Helgon Bilateral and free camera in Vigilant Eyes
Clear the sightline, then move the camera in small steps until the aligned eye confirms.
Moving the room geometry when only the viewpoint is wrong.
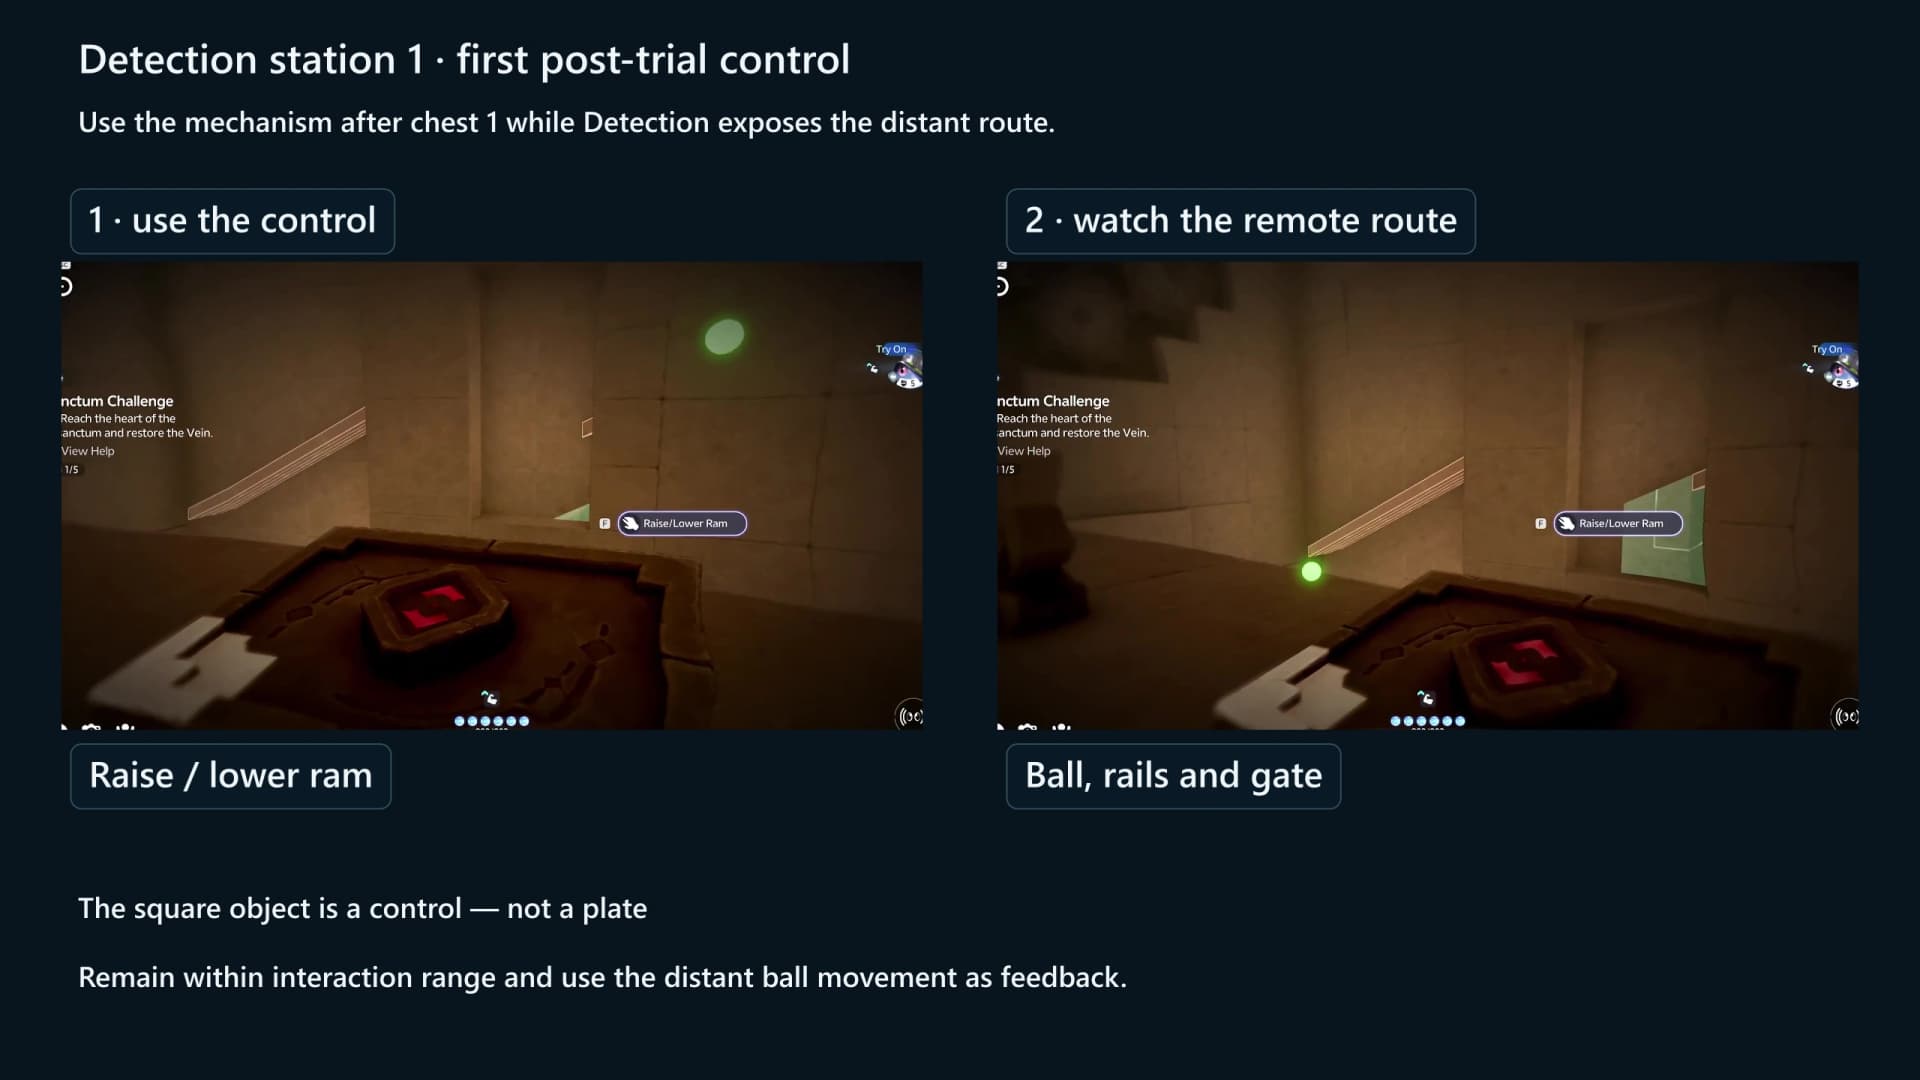
Hidden rails and a green ball beside a ram control
Helmut Detection and linked ram controls in First Sight
Use Detection to reveal the route, then operate the nearby control to move the distant ram and guide the ball into its socket.
Waiting for a Bilateral command that this room does not use.
Course gate, yellow route markers and a rank timer
Surf or the supplied trial mobility
Follow the first marker and read the course color language before chasing rank.
Restarting for score before learning the safe route and chest detours.
Cracked wall, fragile obstacle or targetable breakable
Combat ability
Face or target the marked object and use the attack or contextual action the room demonstrates.
Assuming every rope-like prop is interactive when no target or prompt appears.


Before you start a puzzle route
- Twining and Pathfinder actions: elemental and movement actions depend on the controlled Aniimo. Ancient-patterned object movement instead uses the Pathfinder’s Gravity Pull or Manipulate action. Follow the live action label before switching forms.
- Mobility setup: check both the active party and the Pathfinding setup that can switch to exploration Aniimo for climbing, flying and swimming. The Argent ascent uses Celestis; Nimbi has the same Fly Lv. 1 tier.
- Field coverage: before an open-world route, carry the element named by its prompt instead of assuming every party needs all four. Most Sanctums supply one or more trial forms for their own mechanic.
- Camera and lock-on: release combat lock-on before a perspective puzzle such as Vigilant Eyes, which uses Helgon Bilateral plus camera alignment. First Sight is different: Helmut Detection reveals hidden rails while nearby controls move distant rams that guide balls into sockets.
- Nearby fast travel: activate the closest Transporter or Bloom first. A first interaction with a discovered Sanctum entrance also activates that entrance and unlocks its Transport destination; completion is not required.
- Gravity Pull gate: the Argent ruin requires Gravity Pull, a Student II (level cap 35) active that costs one Report Card and requires one Report Card in already learned active talents. The cap is not the promotion exam-entry level. Check the Pathfinder skill guide before following the map’s Lv 16–30 chest marker.



Use the interaction tied to the prompt
Fire
- Use
- Fire ignites vines, unlit bonfires and flammable wood, melts ice and detonates explosive barrels. In First Spark that means vines, an ice-suspended chest above a bonfire and an explosive barrel.
- Reliable rule
- Aim at the marked target. In First Spark, lighting the bonfire below the ice melts the shell and drops chest 2; the route then continues on ordinary stairs.
Water
- Use
- Water skills extinguish flames and grow or revitalize Water-reactive plants; a withered Bouncy Pad becomes a trampoline after watering.
- Reliable rule
- Work from a target, prompt or visible reaction. Not every plant or flame accepts Water.
Ice
- Use
- Ice skills extinguish flames and create floating ice. In Frigid Waters, trial Fenrier generates temporary steps and complete movable blocks from marked water.
- Reliable rule
- Freeze only a marked surface or prompted target. Vigilant Eyes uses Pathfinder Q Manipulate on its water-drop raft after Untwining, then follows the context prompts to Drag and Drop it; it is not an Ice action.
Lightning
- Use
- Client text verifies charging batteries and machinery. In Electric Flow, use trial Bolty where the room displays its electric or BREAK interaction.
- Reliable rule
- Use Pathfinder Manipulate to position maze-faced cubes and one round component that moves between two pedestals. Gold fixed feeds and cyan doorways confirm local routing; submerge the Wet Wooden Chest, then Drop it on the downstream blue node.
Pathfinder and combat abilities
- Use
- Gravity Pull moves ancient-energy objects, Mega Mallet can smash solid objects, and room-demonstrated attacks break clearly targetable barriers.
- Reliable rule
- There is no reusable rope-cutting interaction. Treat decorative ropes and props as scenery unless a target or prompt appears.
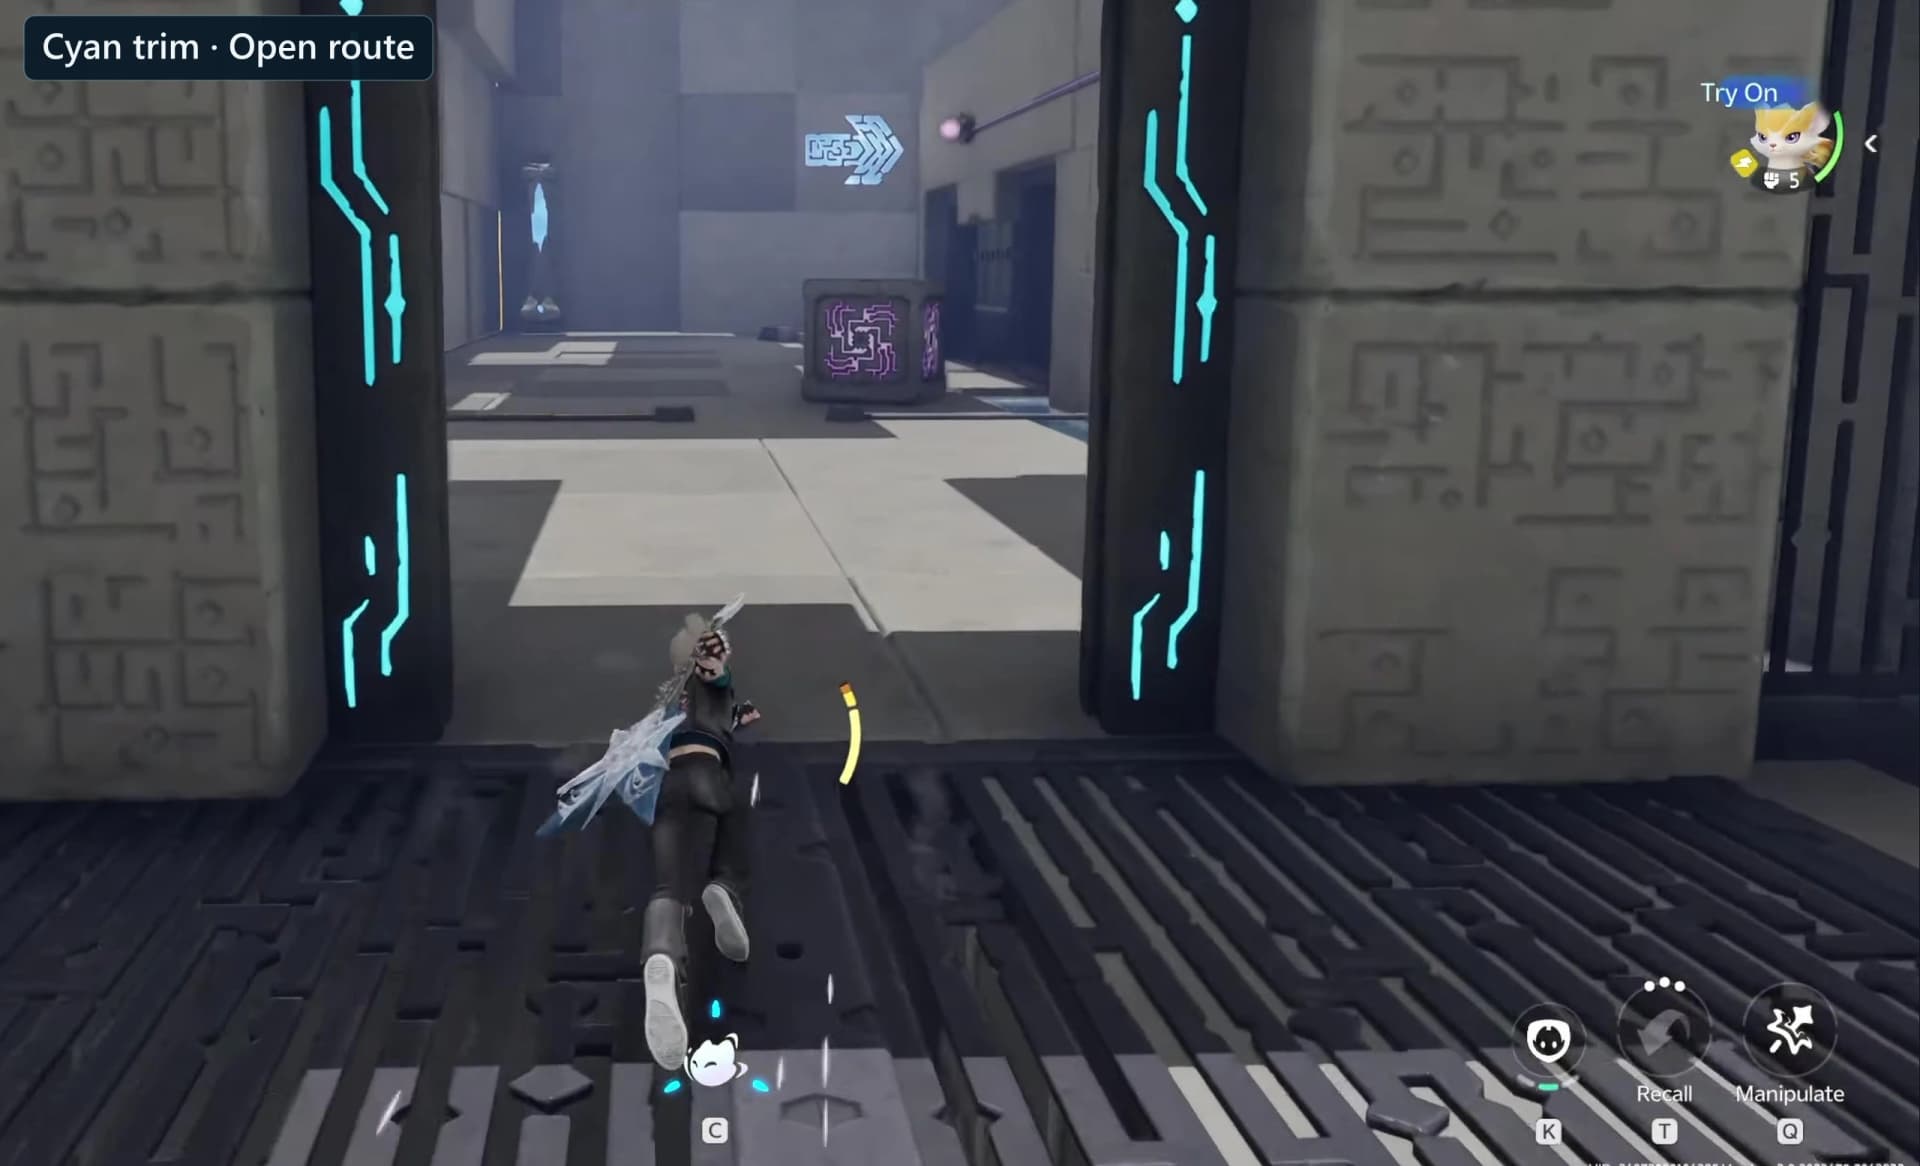
These are environmental verbs, not the combat type chart. A Fire interaction can solve a room even when Fire would be a poor damage matchup. Read the object and the prompt before reading enemy weakness.
White Nimbi formation and the Sleeping Nimbies label
White Nimbis are a Nimbus Fields regional form, while the Aniilog lists Basic, Rainstorm, Cloudmist and Plateau as form names and no White entry. Follow the live objective and its reward preview when the task appears in your Log. For the control itself, review how Twining changes your active creature and mobility.

Recognize patterns across ruins and Sanctums
These are identification patterns, not a canonical in-game taxonomy. The ruin notes below describe the southwest Argent Strait route; the pressure, perspective, course and co-op patterns come from the named Sanctums. Other ruins use different layouts.
Argent Strait Ancient Ruin and Shielded Chest
The compact open-world example sits in the southwest of The Argent Strait. Use the exact Chest (Lv 16-30) marker at 1019, 2085, then open the Ancient Ruin route for the switch and Power node actions, the fixed-line color checks and the chest ascent.
| Component | What you see | Reliable check |
|---|---|---|
| Elemental switch | One exterior activation is visible. | The brambles are gone and the short exterior pillar glows gold. |
| Ancient Iron Crate | The clear uses two accepted placements: one beside the seated node and one beside the large terminal. Spare crates remain visible. | The fixed line beneath an accepted connection changes from violet to gold. |
| Portable Power node | One is seated in an inner socket; a second distinct labeled node appears outside the low wall. | A seated cylinder remains upright while its socket ring and connected line glow gold. |
| Shielded chest | One raised chest begins inside a violet dome. | Its violet dome disappears after the fixed floor circuit is gold/yellow. |
Use the Sanctums directory for named rooms
The 16 documented interiors use separate optional-chest counters and a Sanctum Terminus (Tesseract) that restores the Vein, and most supply one or more trial Aniimo. The directory lists 17 rooms (14 solo and 3 co-op); Stonebound Sword remains in preparation. Twisted Roots and Stonebound Sword are the exceptions: neither room supplies a trial Aniimo, so both run on the Aniimo you brought. Activated entrances remain Transport destinations, but do not count on returning for a skipped chest, so finish the exact counter before Touching the Terminus.
Older guide notes may show 15 rooms or call First Spark “Fresh Fire.” The legacy 15-name list omitted Shattering Stone and Courageous Wit; use the current directory for the complete set.
- Element, object and movement routes: Rising Wind uses wind launches, two balls, crate barriers and a fixed-pedestal updraft; Soaring Glide uses Celestis and lifting wind fields; Rising Flames pairs timed flame jets with trial Flameruff and a carried, non-flammable Ancient Metal Chest; Electric Flow separates Bolty interactions from Pathfinder object placement; and Frigid Waters alternates temporary ice, swimming and Manipulate.
- Detection, perspective and timed routes: First Sight maps four Detection sequences across three remote-ram controls and five chests; Vigilant Eyes maps eleven Bilateral alignments, two Mechanical Ball runs and a Pathfinder-controlled drag-and-drop raft; and Rushing Rapids maps trial Popota Jump and Dash against the 2:00 and 2:30 chest deadlines, then a clean post-result route to all three chests.
- Co-op routes: name the holder, runner or operator for each mechanism and call out the next safe state. Lightning Gale uses room-local roles across pads, wind launches, conductor routing and paired cubes; Blazing Wings uses a stable two-player split; and Courageous Wit covers discrete target toggles, timed hazards, paired inputs and moving-component handoffs. Use the multiplayer guide for party setup.

Choose the focused tutorial
Frequently asked
How do I tell which kind of puzzle I found in Aniimo?
Read the object and live prompt together. Vines or marked ice can suggest Fire; a marked water patch plus a freeze tutorial suggests Ice; a battery or charge prompt suggests Lightning; ancient-patterned objects suggest Pathfinder Gravity Pull; separated viewpoint fragments suggest Helgon Bilateral; and hidden rails with a green ball beside a ram control suggest Helmut Detection.
Do I need every element in my party for puzzles?
No. Follow the obstacle’s live prompt, check your Pathfinding exploration setup and keep useful mobility available for the route. Most Sanctums supply one or more trial forms, while ancient-object puzzles may require a Pathfinder skill instead of an element.
What are Sleeping Nimbies?
“Sleeping Nimbies” is a legacy search label. The game says Find the missing white Nimbi and tells you to Twine with one and blend into the group; related text describes the Nimbis falling asleep. The Aniilog lists Basic, Rainstorm, Cloudmist and Plateau forms, with no White form name.
How many Sanctums are there in Aniimo?
The directory has 17: 14 solo and 3 co-op, with 54 total optional-chest slots. The Sanctums guide has 16 walkthroughs and 1 entry marked In preparation.