


Location and requirements
Open the exact Rising Wind atlas pin. The marker sits at 1286, 2365 on the AniimoVerse atlas. The map footer names the surrounding region Breezy Plains, while the local area record names The Argent Strait.
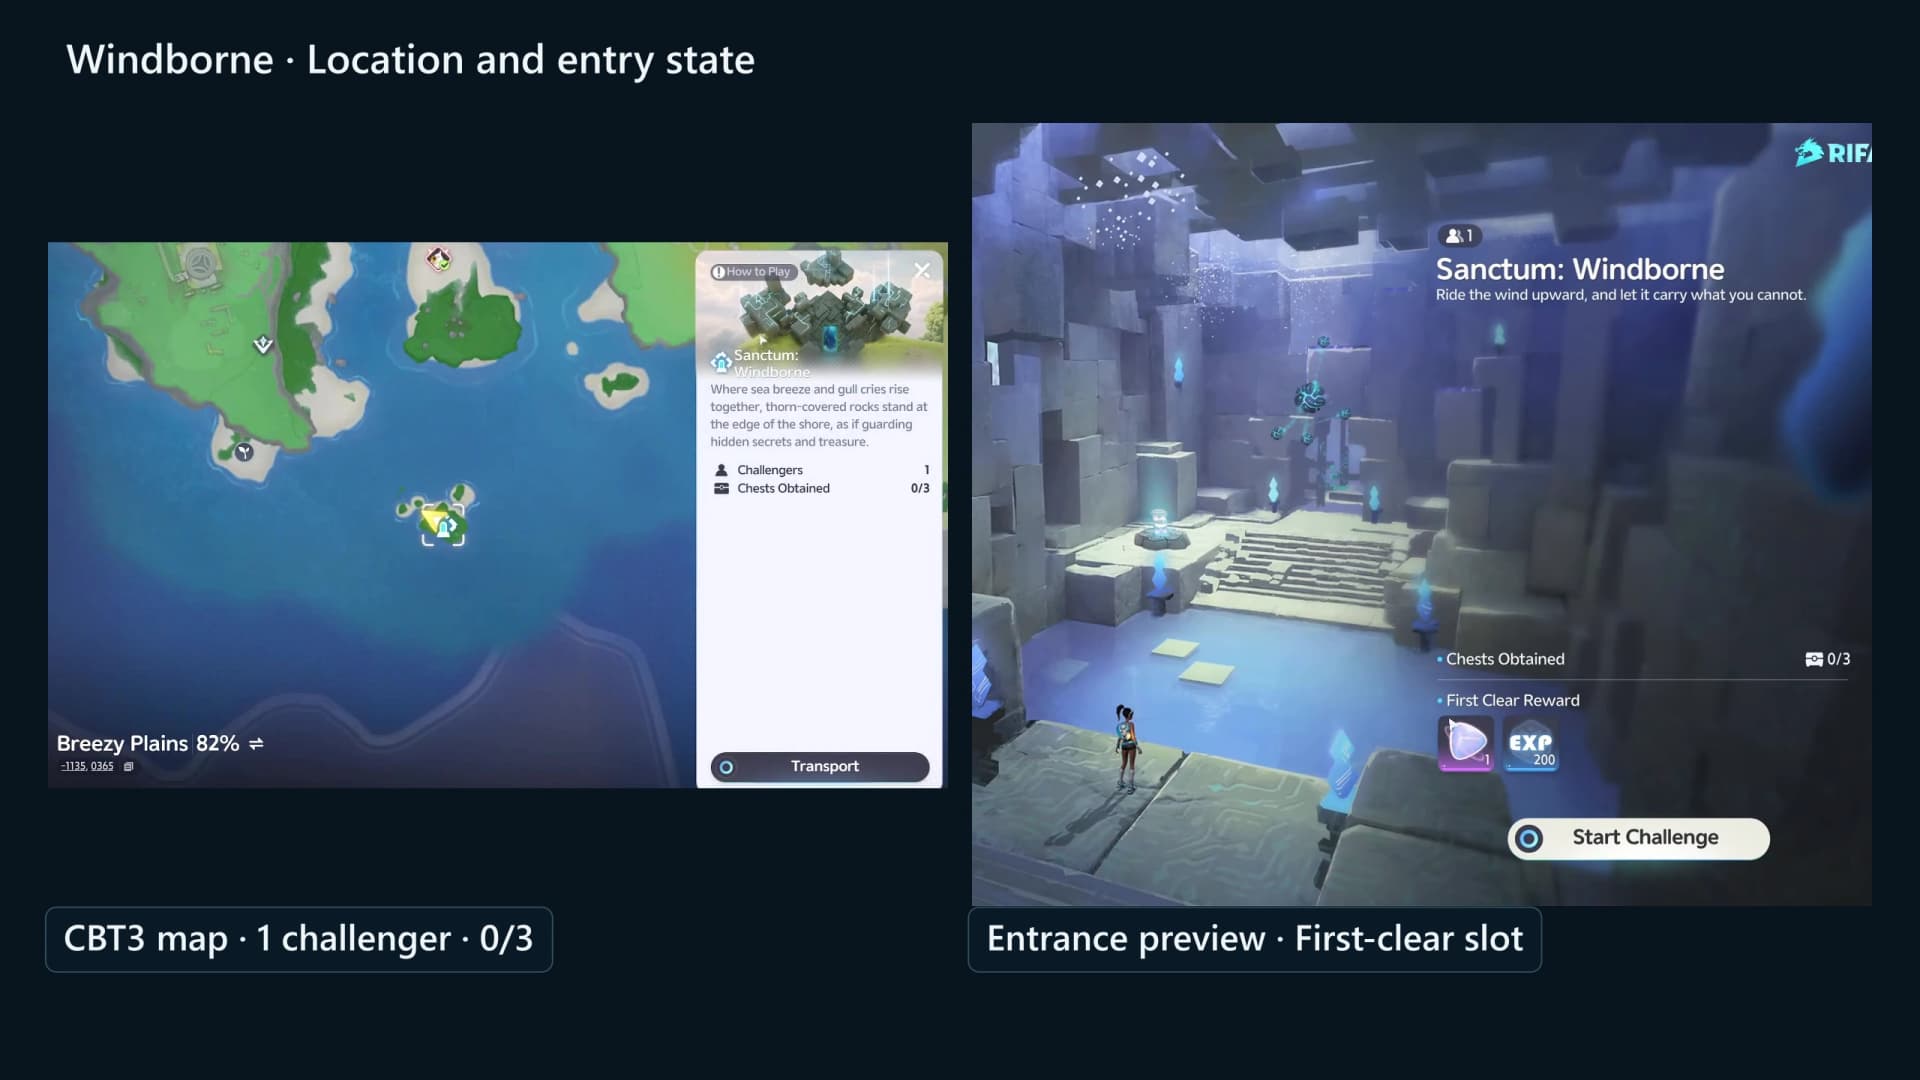
Breezy Plains
Name shown on the map footer
Local area
- Value
- The Argent Strait
- Notes
- Local area record
AniimoVerse atlas marker
- Value
- 1286, 2365
- Notes
- Use the pin link to jump straight to it
Party and chests
- Value
- 1 challenger · 0/3 at entry
- Notes
- Run it solo
First-clear reward
- Value
- Lumin Amber: Breezy Plains ×1 · EXP 500
- Notes
- Paid once, on your first clear
Route, step by step
The room runs south to north along one rising axis: two light balls into two sockets, one battery onto one charging plate, and four lifts that carry you forty metres from the entrance pad to the Sanctum Terminus. Read the plan below in order and let each ball seat before you walk on.
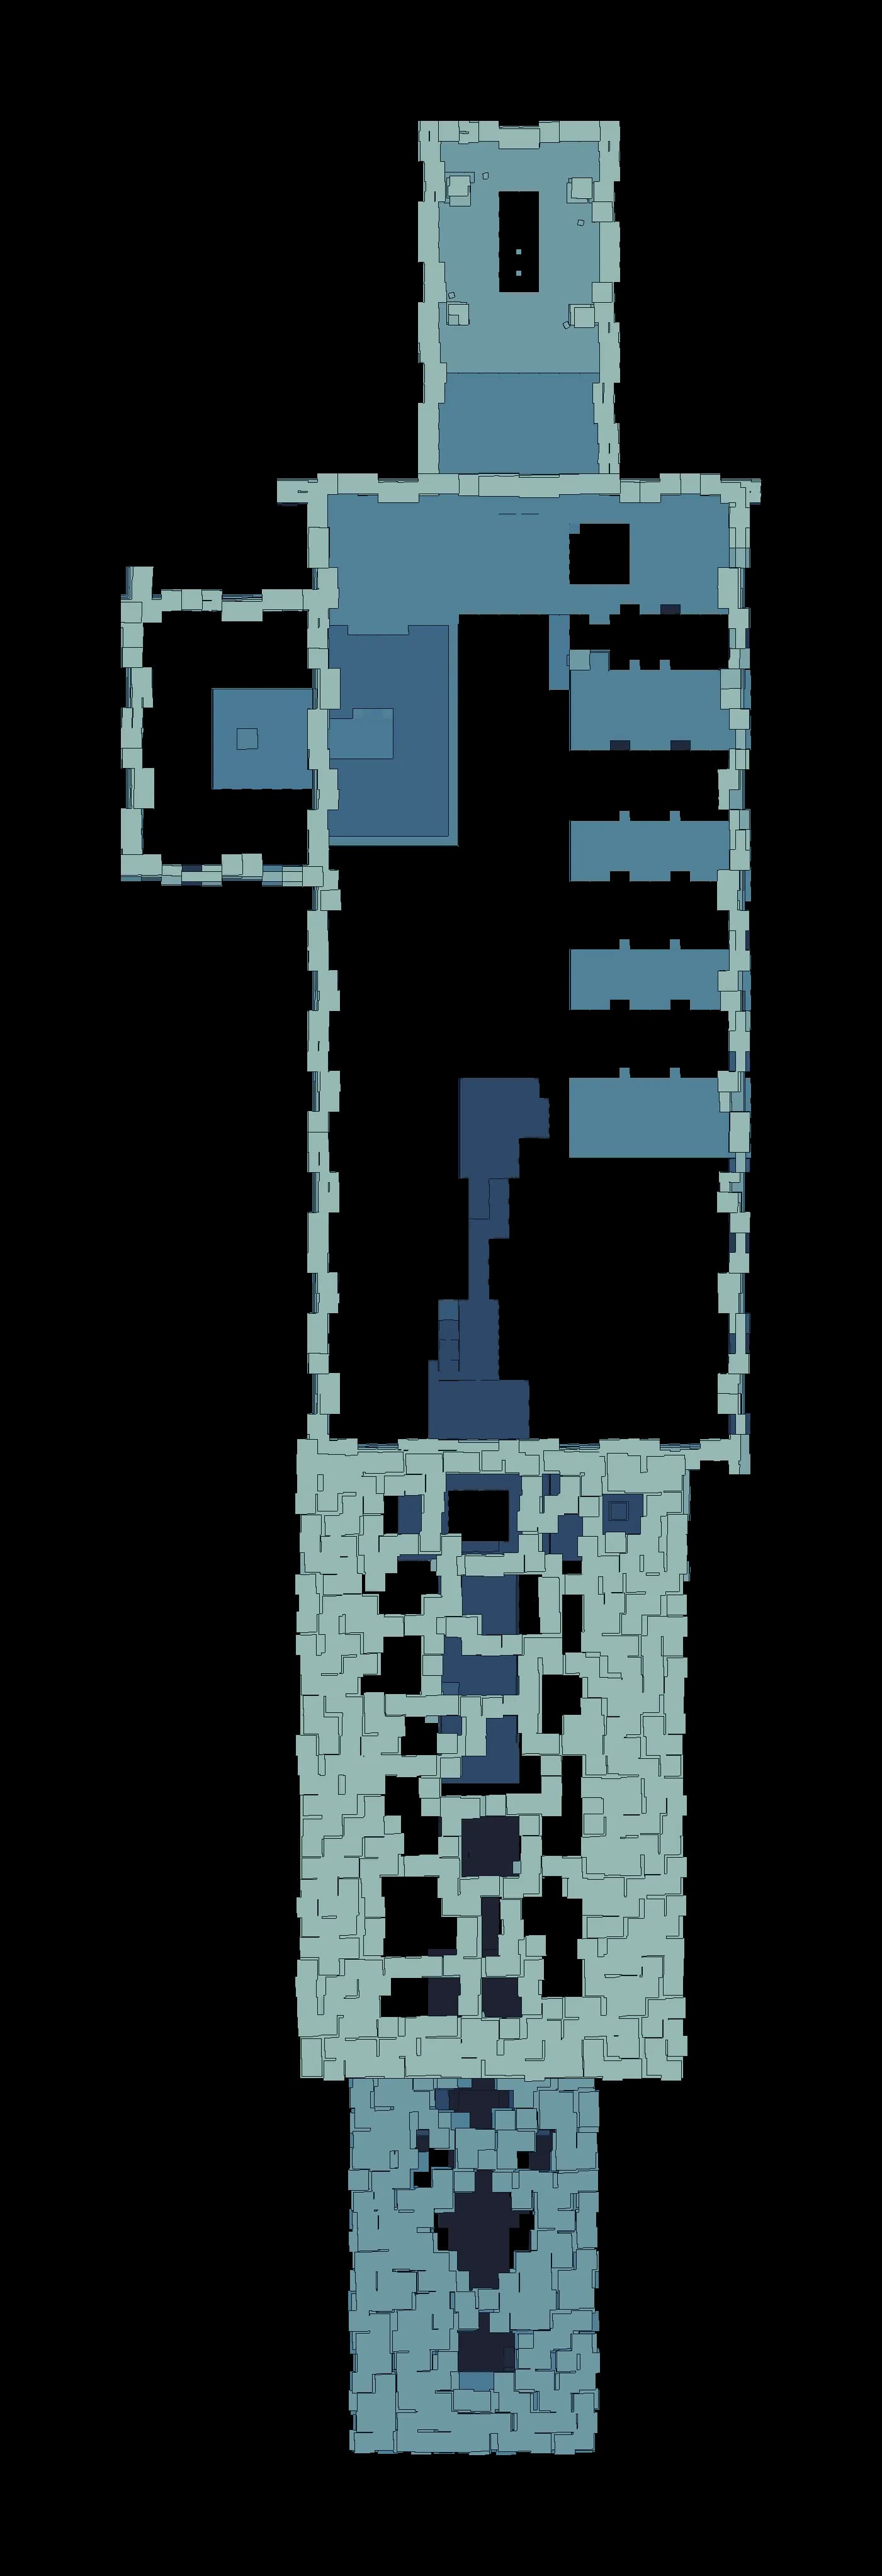 TX132AAAAAA
- Entrance
- Trial statue
- Terminus
- Chest
- Control
- Mechanism
- Element device
- Hazard
- 1Drop in at the Sanctum entranceRoom 0
You arrive on the entrance pad at the south end of a long straight hall. Every respawn pad in this Sanctum is already live, so a fall sends you back a few metres rather than to the start.
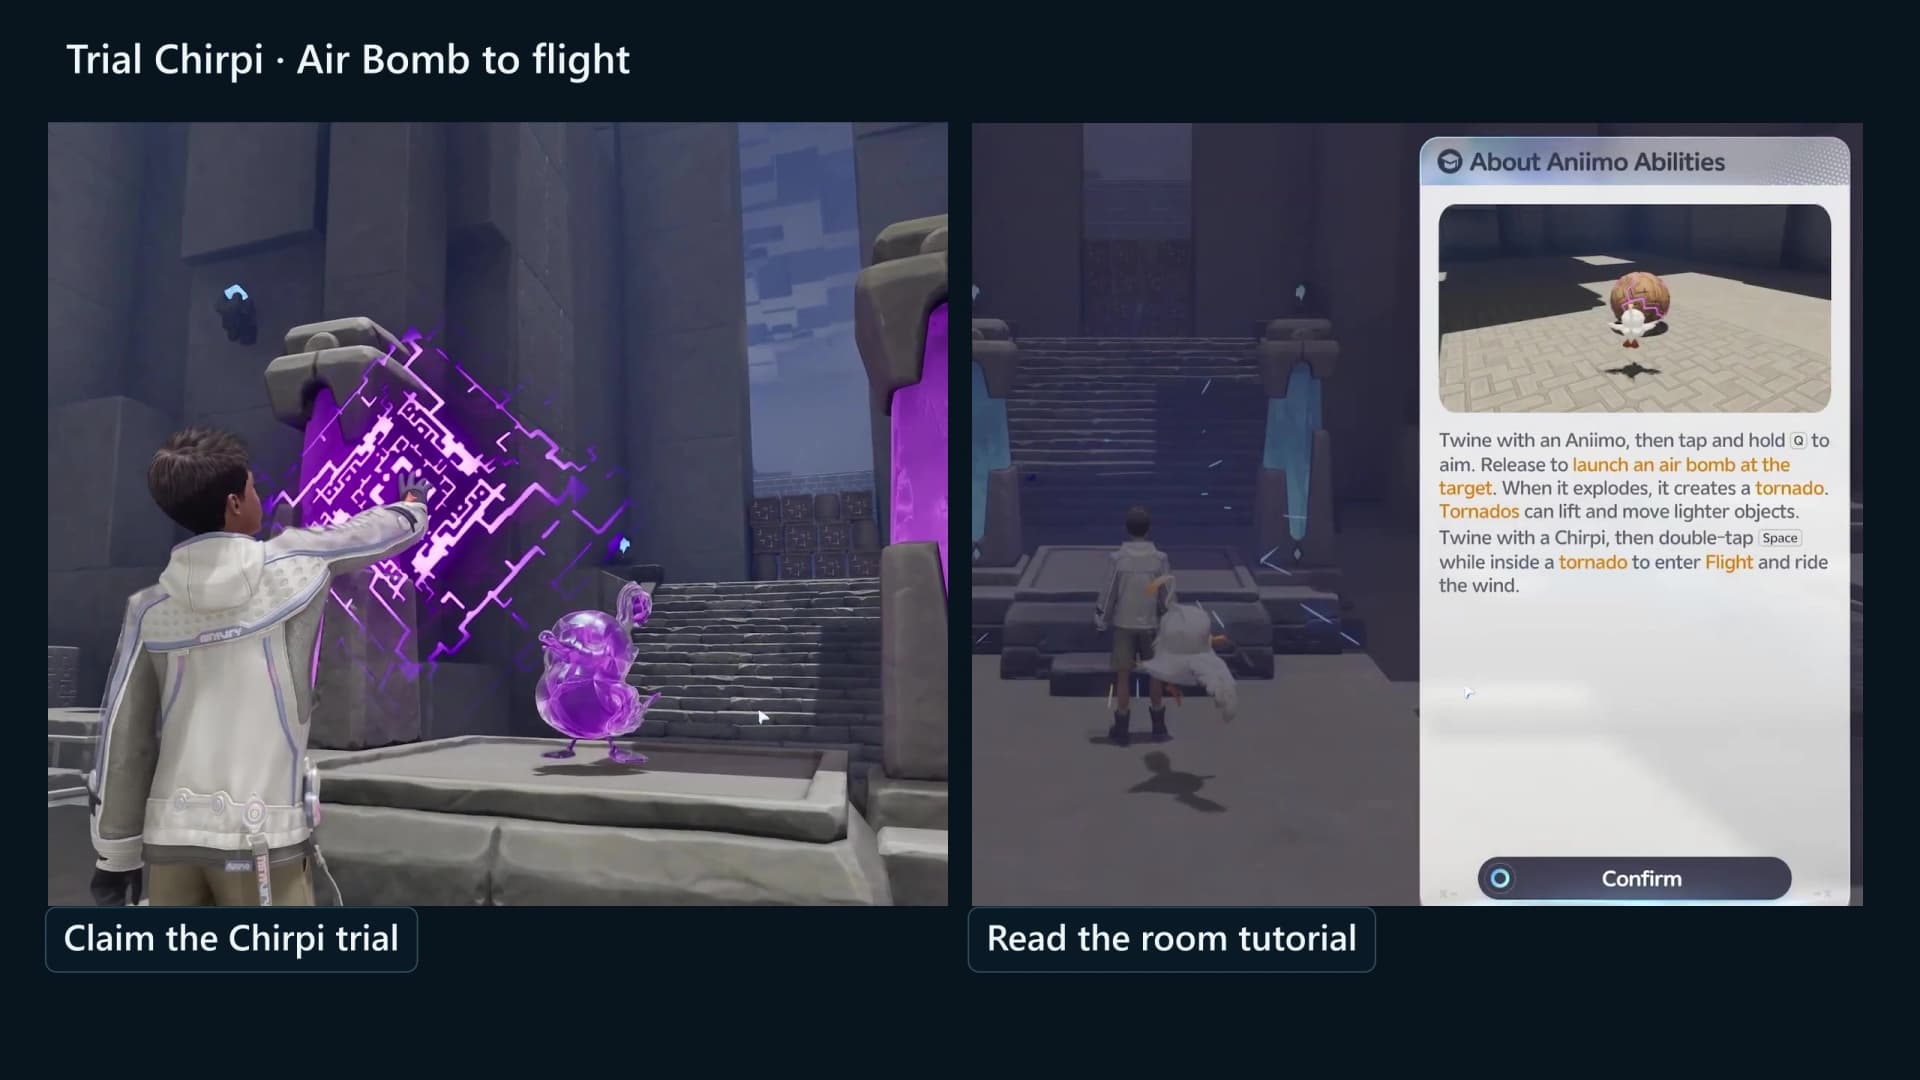
- 2Twine with trial Chirpi at the statueRoom 0
Walk north to the stone statue base and interact to claim trial Chirpi. The card that follows teaches the whole room: hold to aim, release an air bomb, and the explosion leaves a Tornado that lifts lighter objects. Stand in the middle of that Tornado and tap jump twice to enter Flight.
- 3Blow the crate barricade apartRoom 0
A wall of small crates stacked four high, with three barrels wedged among them, blocks the hall. Put an air bomb into it: the crates are light enough for the Tornado to scatter, and the Tornado it leaves behind is your first ride. Enter the centre, double tap jump and settle on the round pad ahead.
- 4Take the standing fan over the first chasmRoom 1
Past the pad the floor gives out. The ancient fan here runs on its own and never needs switching on, and its column lifts you sixteen metres from the entrance floor to the ledge on the far side. The pit underneath is lethal, so line the column up before you commit.
- 5Push the first light ball into the cyan bowlRoom 2
A wooden ball rests on the ledge just past the landing. Work it north with short air bombs fired from the side opposite the bowl, letting it stop between pushes, until it drops into the recessed socket in the floor. The plate under the socket takes the weight the moment it seats.
- 6Chest 1: the elevated chest at the barred cornerOptionalChest 1Room 2
With the ball seated, the current at the barred corner comes alive. The first chest sits on a shelf east of the socket, seven metres above the plate, so ride that current up to it. An air bomb at the foot of the shelf makes a Tornado that does the same job. Leave only once the ledger reads 1/3.
- 7Pass the mechanism door onto the walkwayRoom 2
The mechanism door fourteen metres north of the socket stands open once the ball is home. Step through onto the walkway and past the respawn pad beyond it. Crossing that line also puts the round battery ahead of you back on its shelf, so a botched attempt there costs nothing.
- 8Float the perpetual battery onto the charging plateRoom 3
The round battery rests on a shelf against the west wall, and its charging plate sits twelve metres south and seven metres lower. It is the lightest thing in the Sanctum, so one air bomb underneath carries it off the shelf and small corrections walk it onto the plate. Seat it and the wire run along the wall lights.
- 9Follow the powered fan northRoom 3
The wires run from the plate north along the wall to the big circular fan set into the passage. Dead until the battery lands, it now pushes hard enough to carry you along the passage to the stairs beyond it.
- 10Ride the main launch to the high landingRoom 3
Climb the stairs to the round pad under the upward glyph. The launch fan here throws you seventeen metres straight up to the landing and respawn pad at the top. Face the landing before you enter the column, and stay clear of the second pit, which sits directly under the launch.
- 11Wind Ride the standing TornadoRoom 4
A Tornado stands on its own north of the landing, already at ride height. Step into the middle, tap jump twice to enter Flight and carry the lift forward rather than climbing it. This one never moves, so use it to set your line.
- 12Catch the travelling Tornado and cross the poolRoom 4
The next Tornado rides a platform that sweeps twenty-one metres west and back, so take it as it comes toward you instead of chasing it. Hold Flight across the wide pool beyond, which is a long drop with no floor, and land on the far side.
- 13Lift the second ball over the fence into its socketRoom 6
The second wooden ball waits on a high ledge behind a short fence, eleven metres above the cyan-outlined socket in the floor below it. Stand opposite the socket, use repeated air bombs to raise the ball over the fence, then drop to floor level and finish with small pushes until it settles.
- 14Head back over the pool to the crate barrierOptionalRoom 5
Cross back south over the pool to the vine garden on the west side. A stack of seven crates in two columns blocks the way further west. An air bomb usually scatters them, and if the stack holds, stay Twined and climb it instead.
- 15Chest 2: the premium chest on the fixed pedestalOptionalChest 2Room 5
Past the crates the pedestal carrying the second chest stands seventeen metres further west and two metres above the garden floor. It never moves, so do not try to push it. Fire at the floor beside its base, ride your own Tornado up and take the premium chest for 2/3.
- 16Chest 3: the recessed alcove on the east wallOptionalChest 3Room 6
Cross the pool once more and land on the wide platform on the east side. The last chest sits in a recessed alcove on the narrow right-hand route, a little below the ball ledge. Confirm the ledger reads 3/3 here, because the Terminus ends the run.
- 17Pass the large door and touch the TerminusRoom 6
The large door fourteen metres north of the socket stands open once the second ball is home. Follow the stairs through it to the square Sanctum Terminus at the far end and interact. That sets the Terminus to its completion state, restores the Vein and clears the Sanctum.
Trial Chirpi movement tutorial
The trial device and the room tutorial identify Chirpi. It has Fly Lv.2, and its skill is Tornado Wind Orb: the orb explodes on impact and creates a forward-propelling tornado. The room tutorial calls the shot an air bomb and says the tornado lifts and moves lighter objects.
Numbered chambers
Treat the layout as six chambers. The chest ledger only moves forward: 1/3 → 2/3 → 3/3. Verify each update before advancing.
1. Entry and trial Chirpi
Start the solo challenge with 0/3 visible. Follow the straight opening path to the purple trial device, interact, claim Chirpi and Twine. The tutorial appears before the first crate wall; read it once because every later puzzle uses the same air-bomb-to-tornado loop.
2. First current, round pad and ball platform
Release an air bomb into the stacked crates. The impact clears the obstruction and leaves a tornado. Enter its center, double-tap the shown jump input to start Flight and settle on the round pad ahead. From there, use the blue glyphs to face the wide platform with the curved half-height rail; that platform holds ball 1.

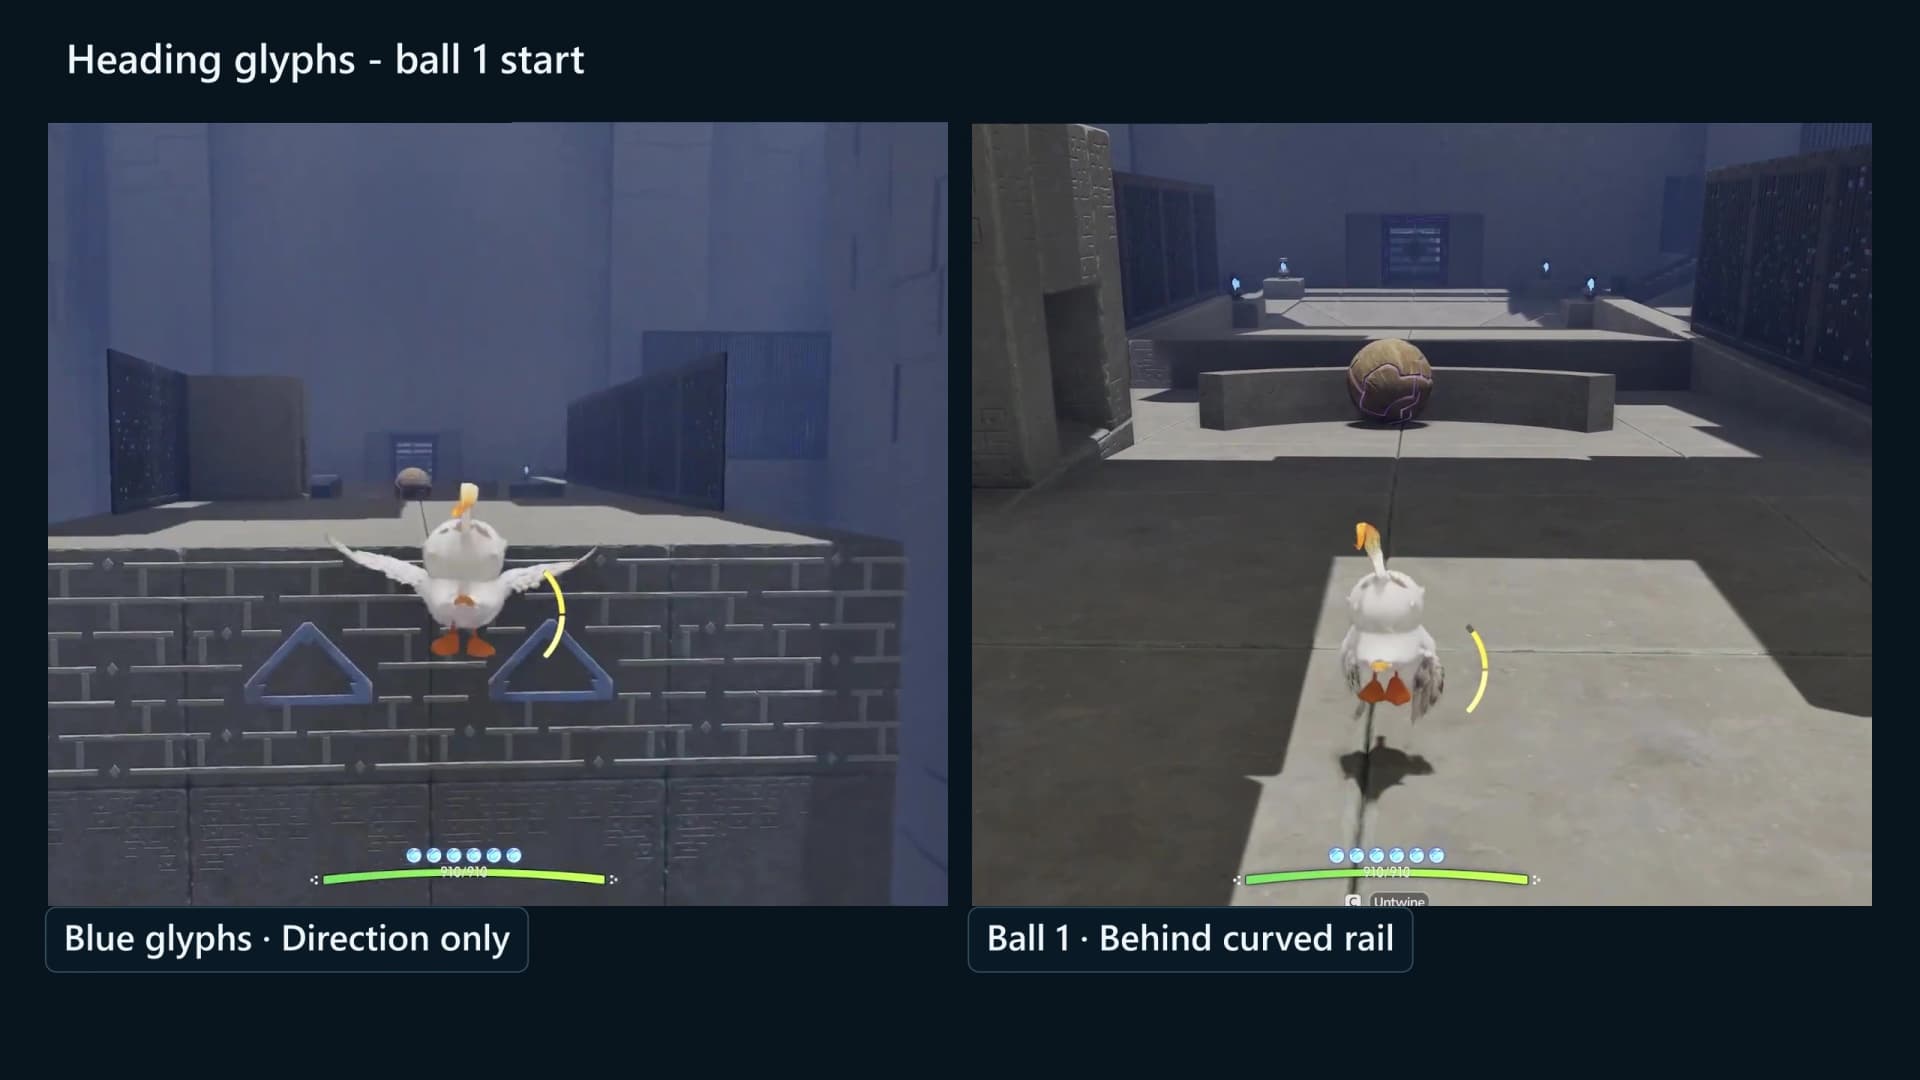
3. Ball 1, cyan bowl and elevated chest 1
Move to the side opposite the recessed cyan bowl and use short air-bomb bursts to push the ball around the curved rail. Let it stop between corrections. Once the ball sits in the bowl, the floor circuit lights and the current at the nearby barred corner activates. Ride that current up to the elevated chest, open it and verify 1/3 before continuing through the opened route.
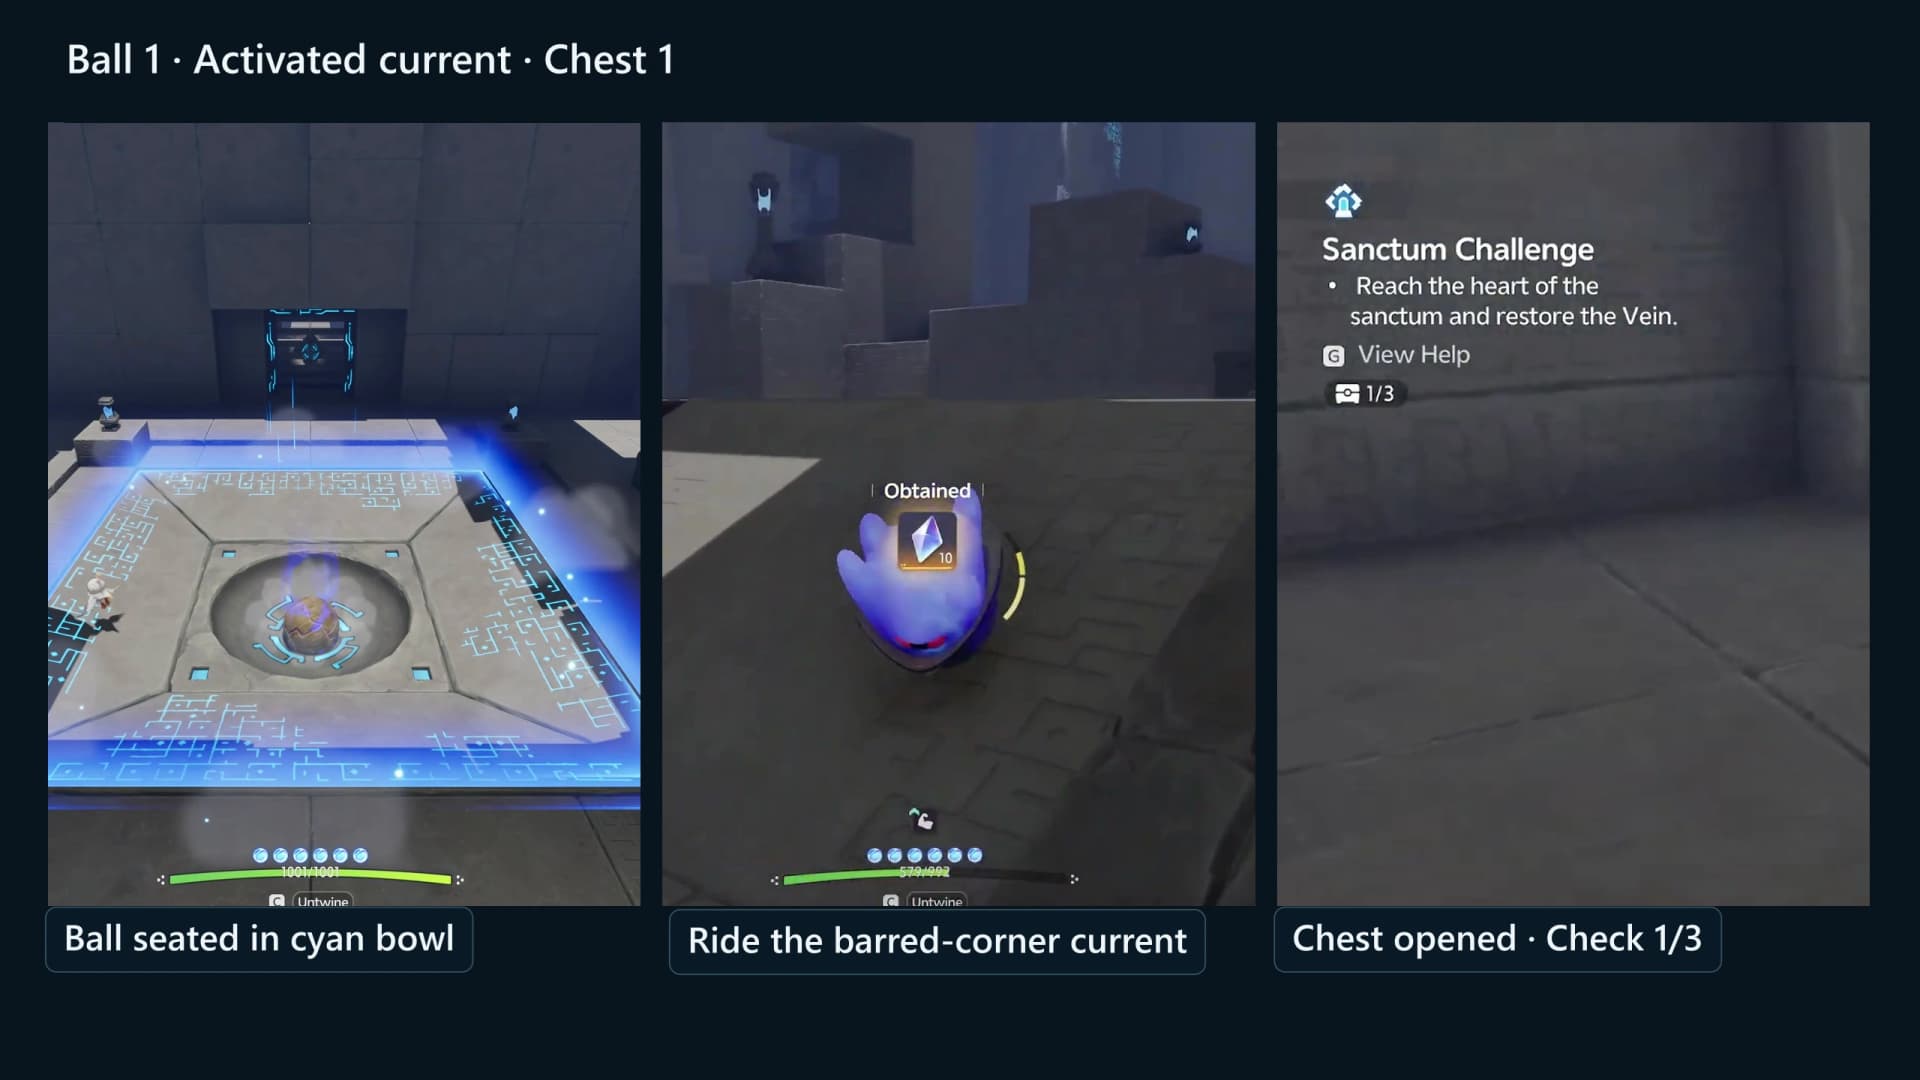
4. Main launch path and ball 2
Beyond chest 1 the mechanism door opens onto a walkway, and the passage past it is barred by a giant circular fan that starts dead. Its power sits on a shelf against the west wall: the round Perpetual Battery is the lightest object in the room, so one air bomb underneath floats it off the shelf and small corrections walk it onto the charging plate twelve metres south and seven metres lower. Once the wire run along the wall lights, the circular fan carries you to the stairs. Climb them to the round pad beneath the large upward glyph, which launches you toward the wide white walkway directly ahead. Face that landing before entering the current, and land on it rather than reaching for a later mid-flight platform.
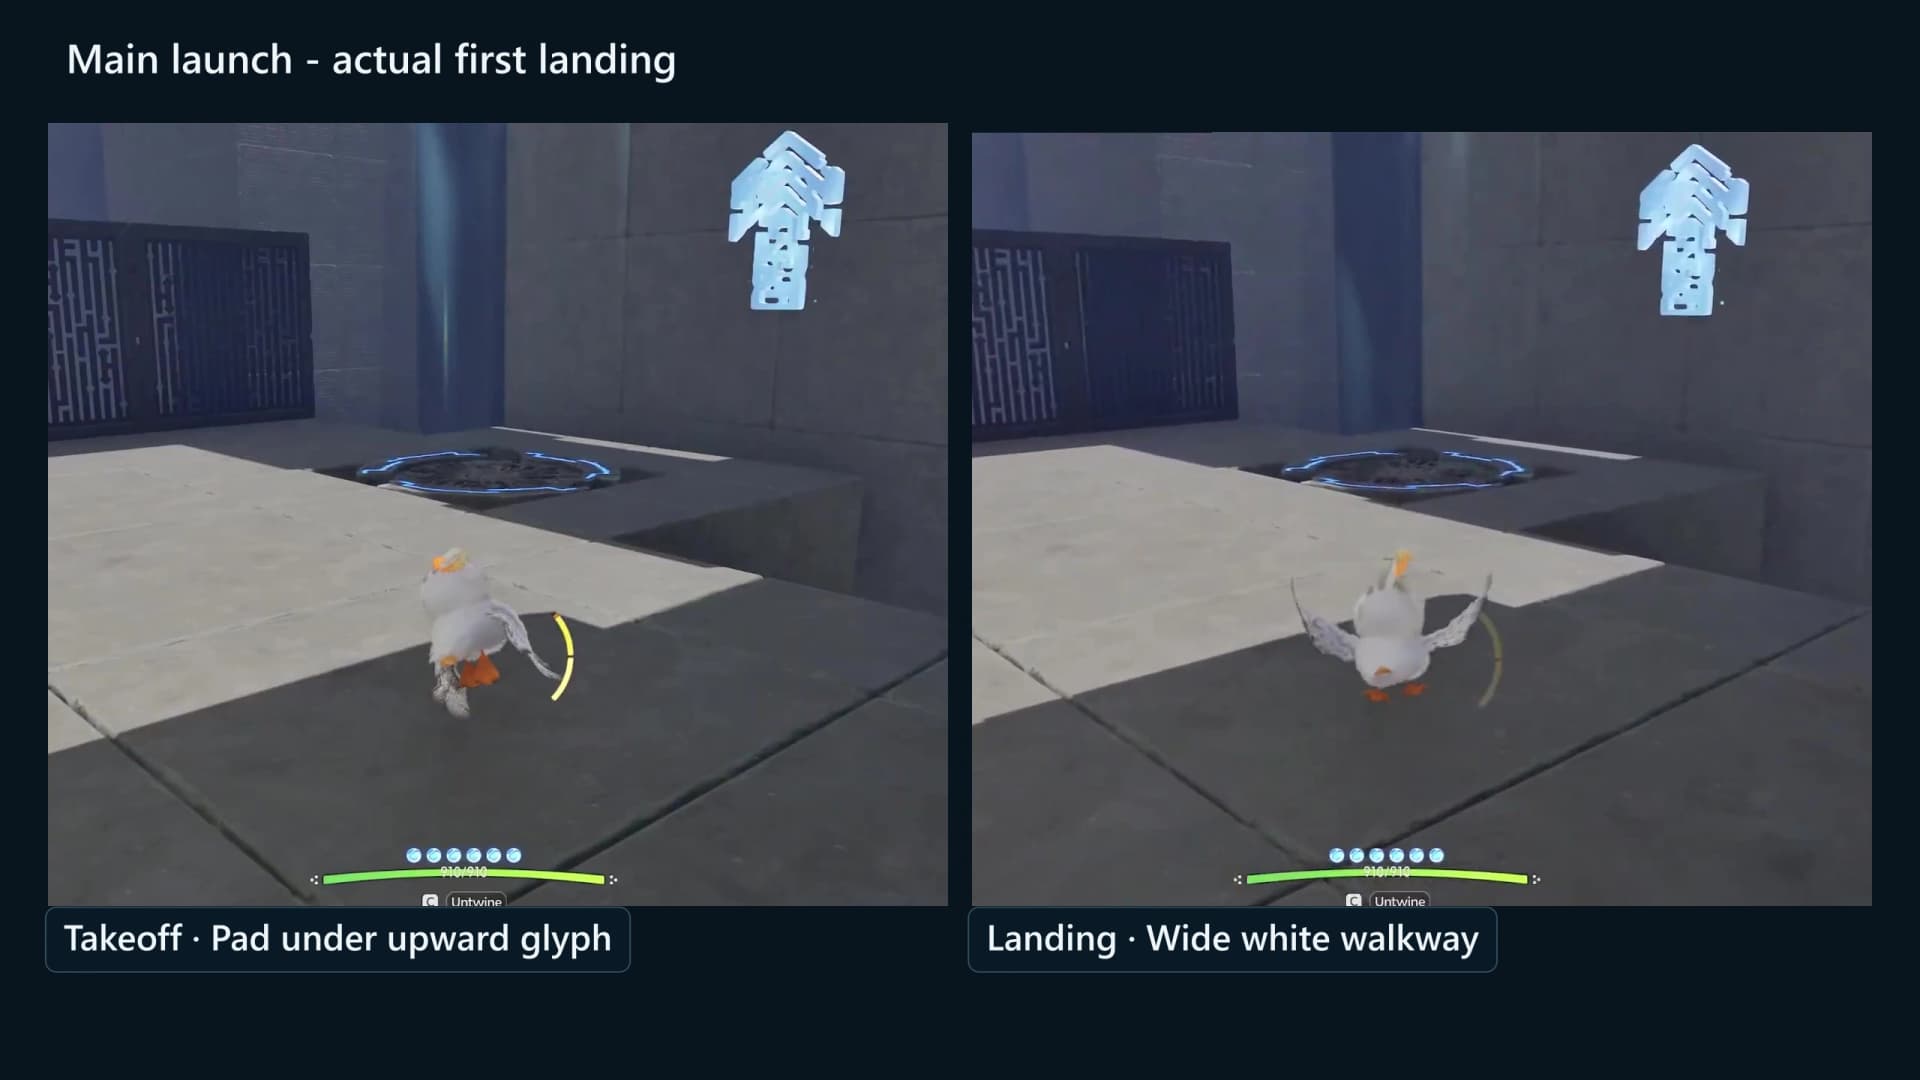
The first Tornado past the landing stands still, so use it to set your line. The second one rides a moving platform that sweeps twenty-one metres west and back, so take it as it comes toward you rather than chasing it, and hold Flight across the open pool beyond. Continue until you reach ball 2 beside a short black-bar fence. Stand on the side opposite the round floor socket, use repeated air bombs to lift the ball over the barrier, then finish with small pushes until it rests in the cyan-outlined socket below.

5. Crate barrier and fixed-pedestal chest 2
Follow the opened side route to the next pool chamber and cross to the stacked-crate barrier. You have two ways through. Fire an air bomb from the approach to lift or clear the boxes, which is the faster option. If the stack survives the shot, stay Twined and jump or clamber Chirpi up the intact stack, then clear the remaining boxes from the far side. Neither route needs you to Untwine at the bottom.
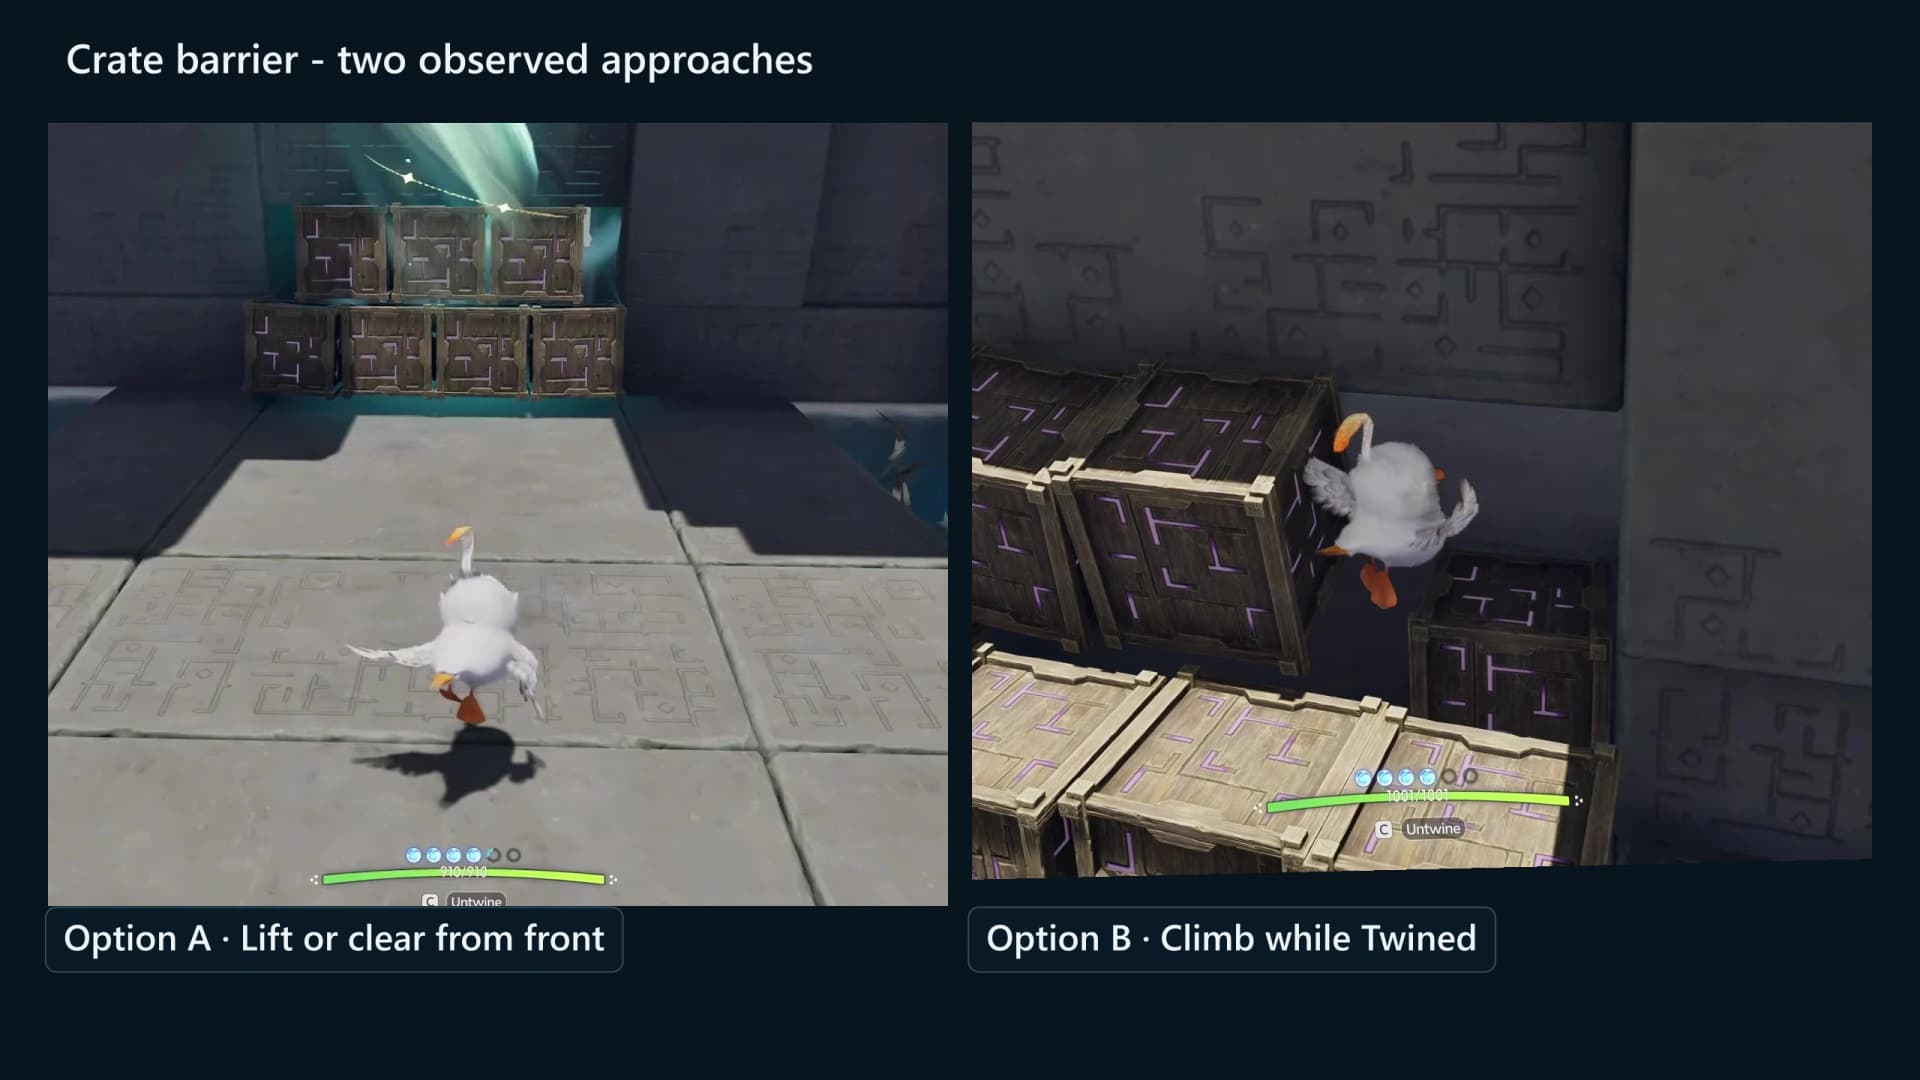
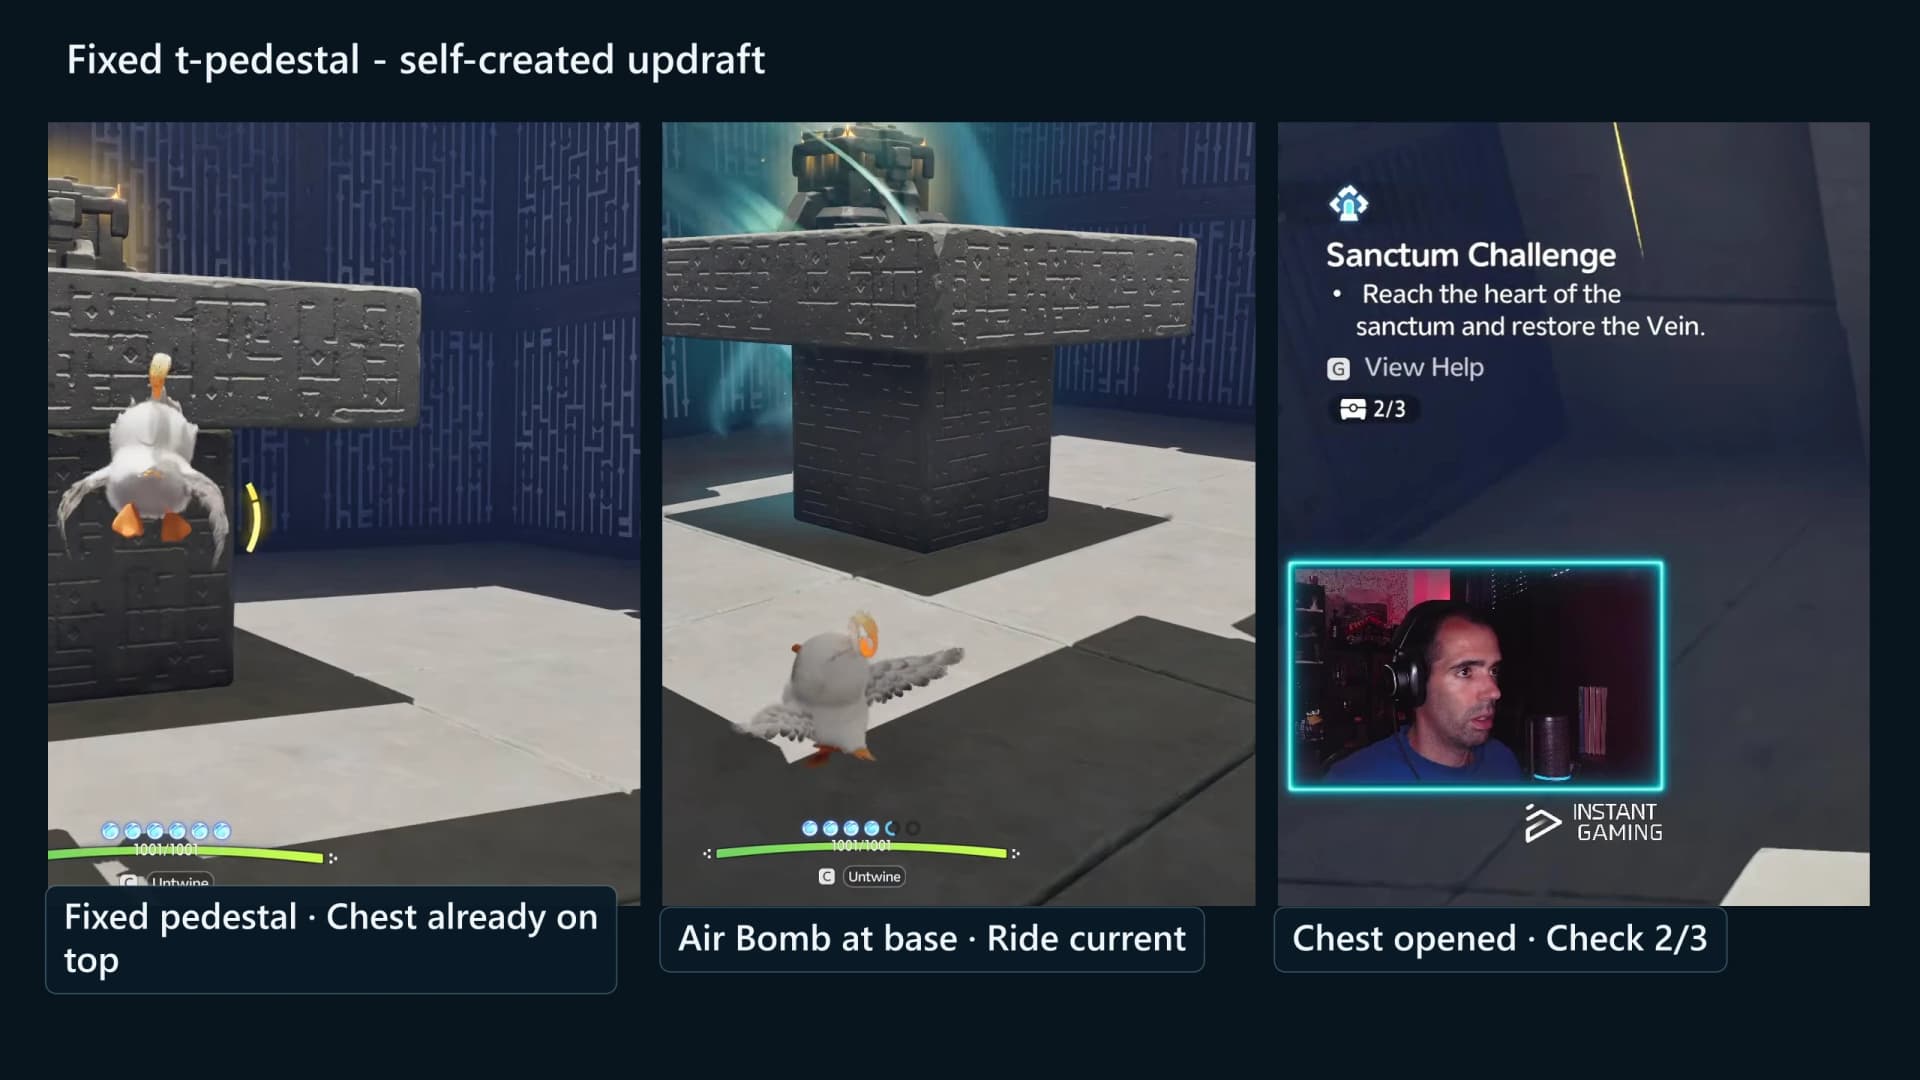
The object beyond the crates is a fixed T-shaped chest pedestal, not a movable block and not a pressure-pad puzzle. Fire an air bomb at the floor beside or just behind its base. Enter the tornado you created, rise to the chest already mounted on top and open it for 2/3.
6. Final pool crossing, chest 3 and the Terminus
Leave the chest-2 pedestal and follow the route back into the water-filled chamber. From the near platform, fire at the floor to make the next tornado, enter Flight and cross the pool toward the wide white landing platform on the far side. Settle there before turning onto the narrow right-hand route.
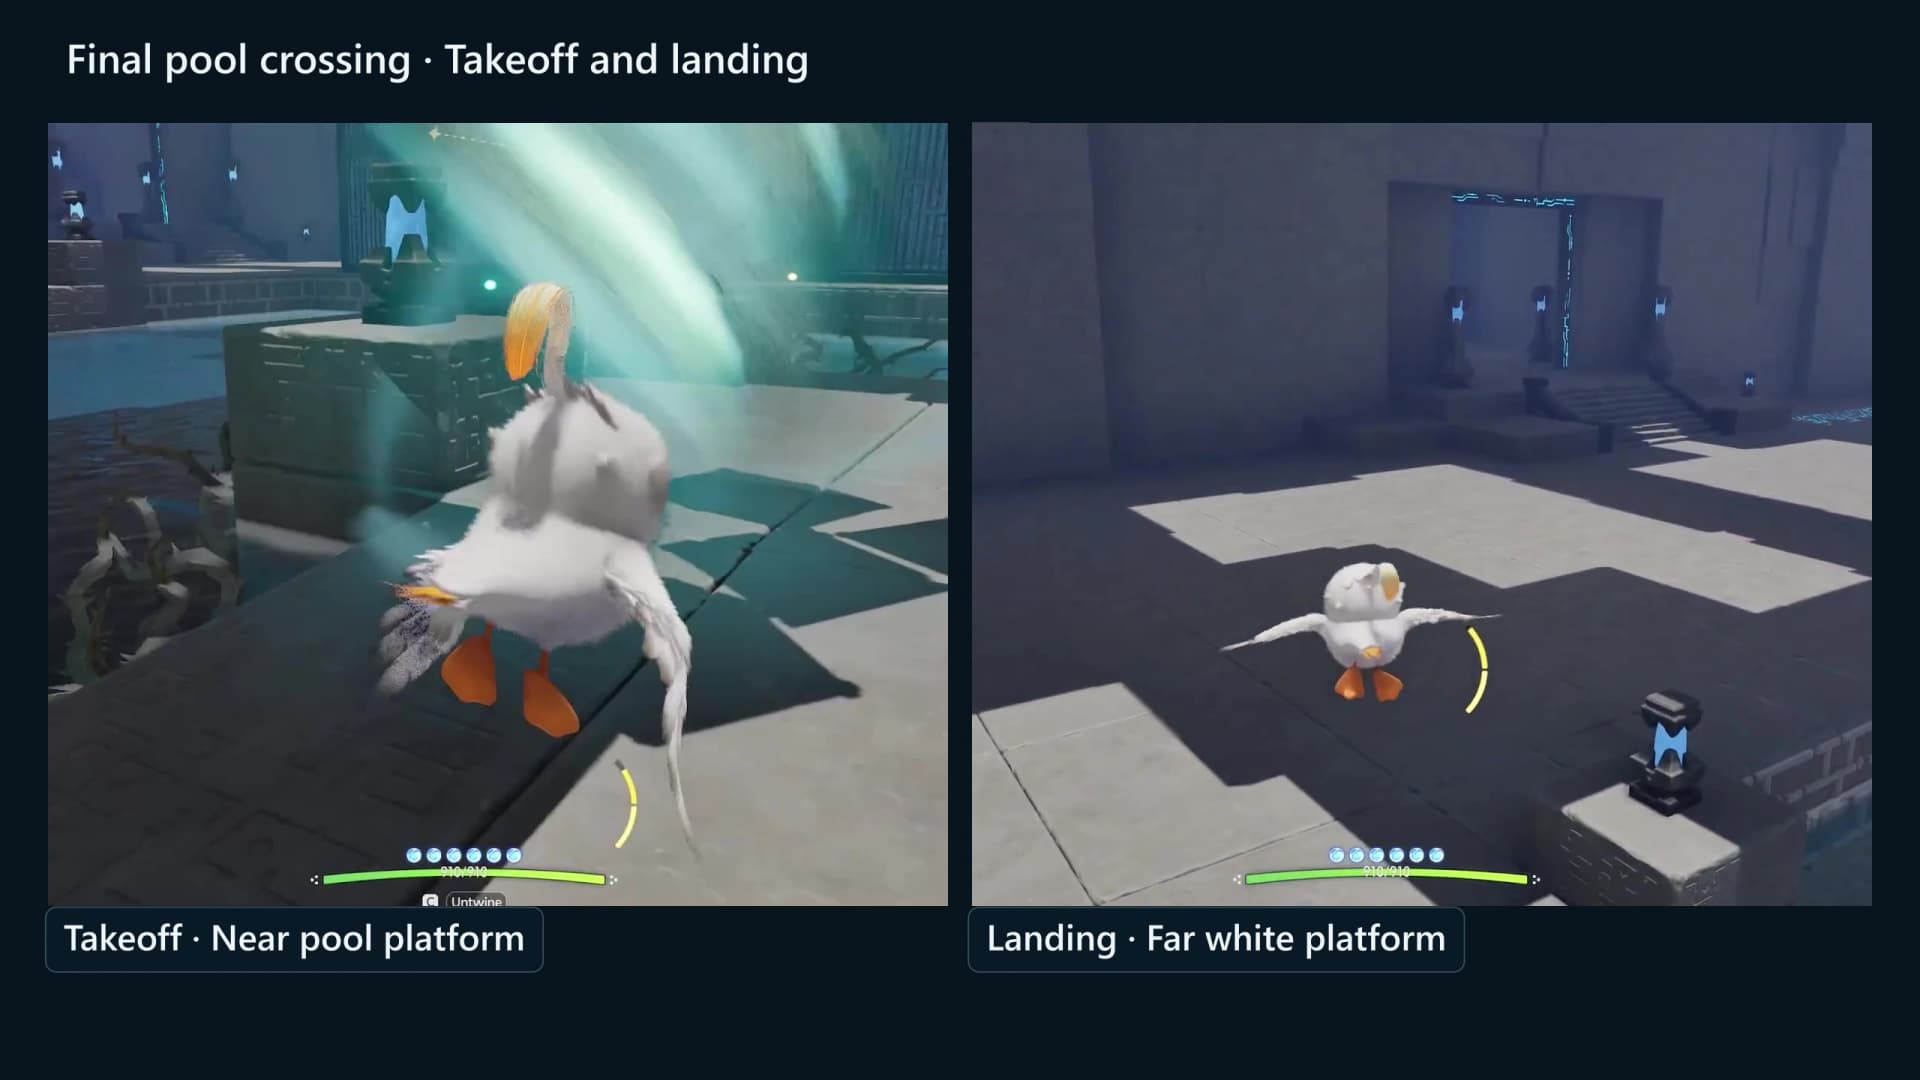
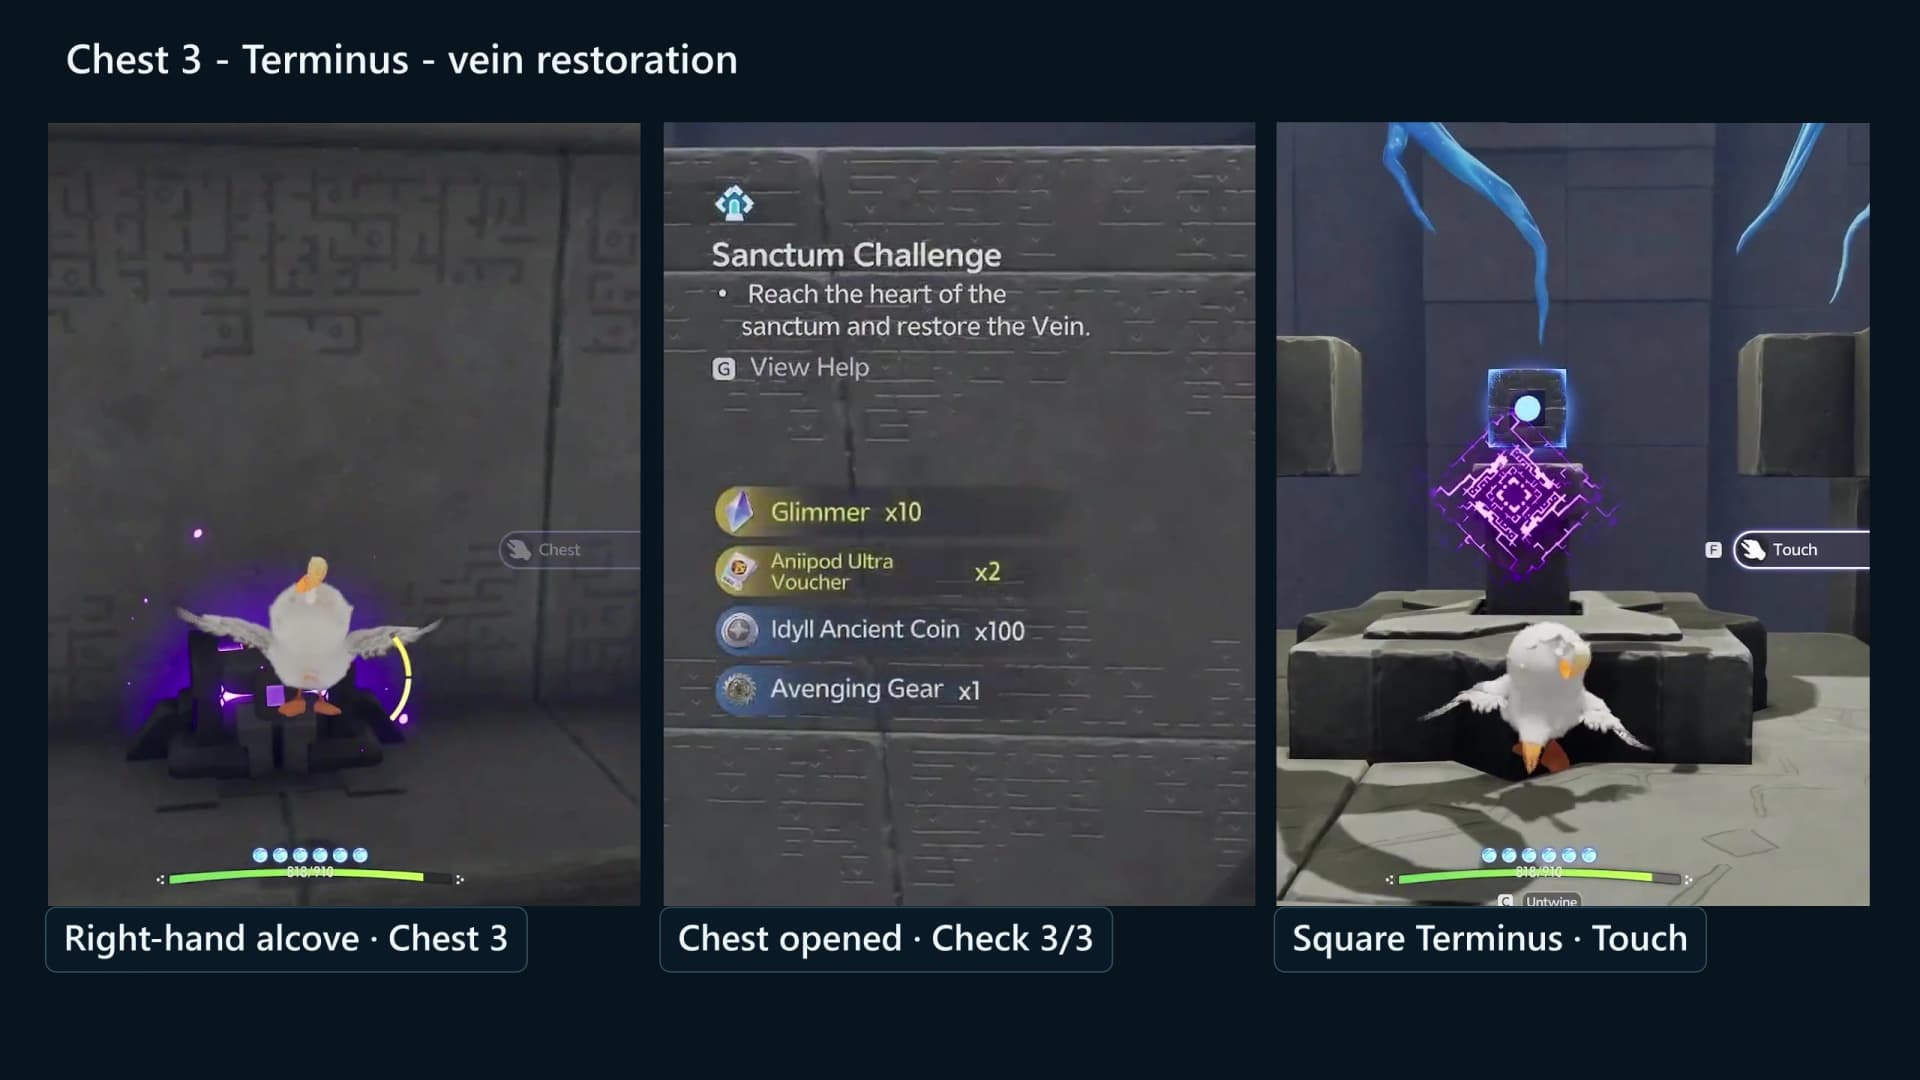
Follow the narrow ledge and blue heading glyph into the recessed right-hand alcove. Open chest 3 and verify 3/3. Then follow the stairs to the square core, interact with the Sanctum Terminus/Tesseract, and let the resulting Vein-restoration sequence finish.
Three-chest checkpoint ledger
The counter only moves forward: 1/3 → 2/3 → 3/3. Chest 1 sits on the shelf above the first socket, chest 2 is the premium one behind the crate barrier and chest 3 hides in the alcove across the pool.
| Chest | Tier | Contents |
|---|---|---|
| Chest 1 | Standard | Glimmer x10, Credits x10000, Sparkling Crystal x10, one Rare held item |
| Chest 2 | Premium | Glimmer x20, Credits x20000, Sparkling Crystal x15, one Epic held item |
| Chest 3 | Standard | Glimmer x10, Credits x10000, Sparkling Crystal x10, one Rare held item |
| First clear | Reward | Lumin Amber: Breezy Plains, EXP x500 |
Every held item: Spirited Feather, Fission Needles, Echoing Grimoire, Ferocious Fang, Miraculous Fleece, Lightning Needle, Gargantuan Horn, Marching Flask, Capacitous Battery, Heartseeker Pendant, Avenging Gear, Heritage Amulet, Explosive Gloves, Giant Tortoise Shell, Auspicious Bell.
Checkpoints and hazards
Rising Wind has no checkpoints to unlock. All six respawn pads are live from the moment you load in, so a fall puts you back on the nearest one instead of at the door. What the room does have is three unfenced drops, and every one of them kills instantly.
- Six respawn pads, all live at load. Three sit along the entrance hall, one on the ledge past the first chasm, one on the walkway beyond the first mechanism door and one on the high landing at the top of the main launch.
- The first chasm, under the standing fan. Line the lift column up before you step off the entrance floor; the floor of that gap is a kill plane, not a ledge.
- The pit under the main launch. It sits directly beneath the launch pad, so a missed column drops you straight into it.
- The pool on the wind ride. The wide water crossing between the two Tornadoes has no floor. Hold Flight the whole way across rather than dipping to look for a platform.
- No timers. Nothing in this room is on a clock, so take each ball and each landing at your own pace.
Launch and object troubleshooting
- Name the landing first. The key destinations are the first round pad, the main wide white walkway and the far white platform across the final pool.
- Use glyphs as headings. Align the camera with the blue arrow shape, but spend the air bomb on the crate wall, ball or floor that needs a tornado.
- Enter the middle of the tornado. Start Flight while centered, make small corrections while rising and avoid a hard turn at the landing edge.
- Let balls stop between pushes. Reposition to the side opposite the socket and use short bursts; for ball 2, clear the fence before making floor-level corrections.
- Do not push the T-shaped pedestal. It never moves. Fire beside its base and ride the current to the chest on top.
Completion and reward
The square object at the end is the Sanctum Terminus, also called a Tesseract, a device tied to fractured Vein energy. Interacting with it restores the Veins; the device itself is not the Vein. Reach 3/3 first, then interact and wait for the restoration sequence.
The first clear pays Lumin Amber: Breezy Plains ×1 plus 500 EXP, once. Clearing the room also lights its node on the Leyline Tree and counts toward the Sanctum Delver badges at 3, 5, 10 and 15 clears. Repeat runs pay nothing, so the chests are the only reason to come back, and chest contents are separate from that first-clear award.
Frequently asked
Where is Rising Wind, and which coordinates should I use?
Rising Wind is in The Argent Strait within the Breezy Plains map region. Its marker sits at 1286, 2365 on the AniimoVerse atlas. Open the exact Rising Wind atlas pin.
Do I push a T-shaped block onto a pressure pad in Rising Wind?
No. The T-shaped chest pedestal is stationary. Fire an air bomb at the floor beside its base, ride the resulting tornado to the chest already mounted on top and confirm 2/3.
What do I interact with after collecting all three Rising Wind chests?
After the counter reaches 3/3, follow the stairs to the square Sanctum Terminus, also called the Tesseract. Interacting with that device restores the Veins; the device itself is not the Vein.
What reward does Rising Wind give, and can I return for a missed chest?
The first clear pays Lumin Amber: Breezy Plains ×1 plus 500 EXP, lights a Leyline Tree node and counts toward the Sanctum Delver badges at 3, 5, 10 and 15 clears. Repeat clears pay nothing, so reach 3/3 before you use the Terminus.