

Location and party requirements
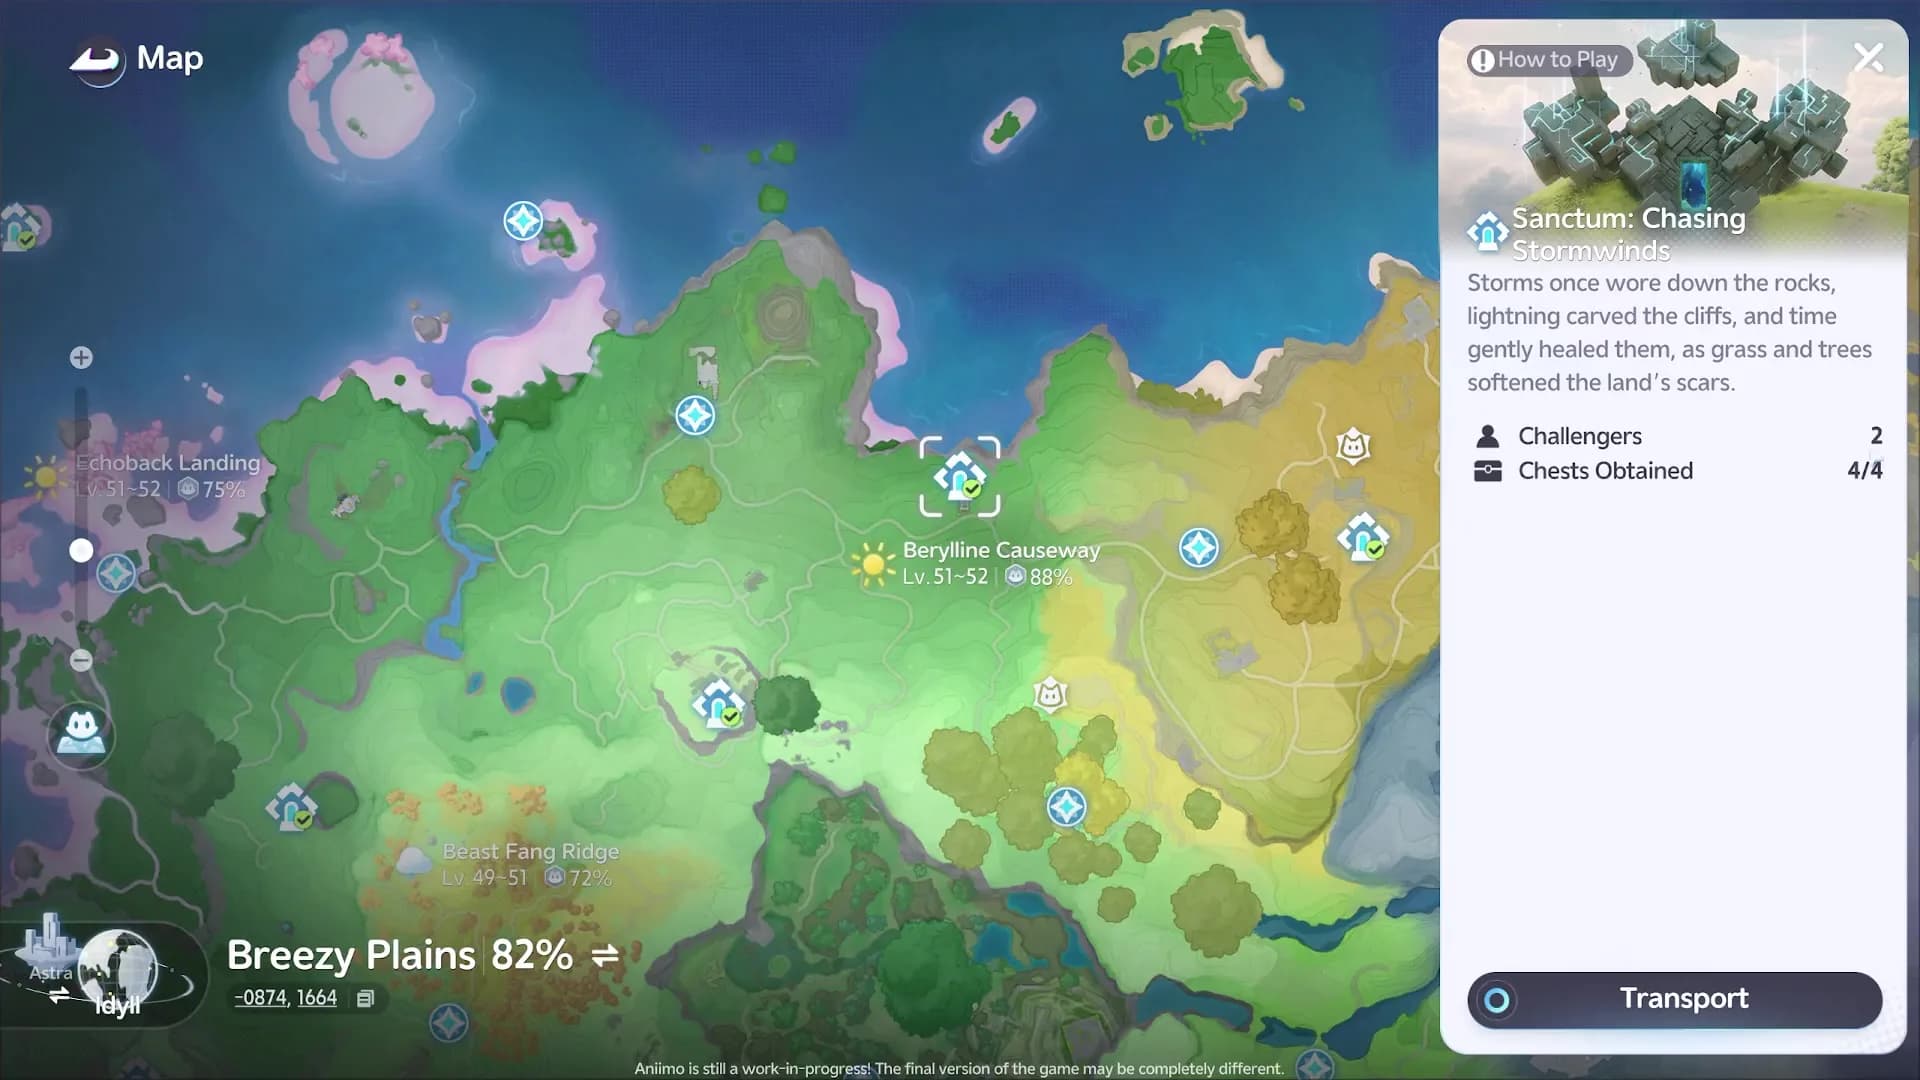
Open the exact Lightning Gale atlas pin in Berylline Causeway. The marker sits at 1640, 596 on the AniimoVerse atlas.


| Mechanism | Useful callouts | Handoff rule |
|---|---|---|
| Batteries, power sources and fans | Charger · rider | Player A charges, Player B rides the updraft once the bulb is gold. |
| Pads and moving platforms | Holder · runner | Holder keeps the pad occupied until the runner calls safe. |
| Two-player pillars | Left operator · right operator | Each player takes one side and reports the state on their own face. |
| Bolty wire and the fault crossing | Wire operator · glider | Player A holds the wire live while Player B rides the fan lanes. |
| Conductor placement | Crate carrier · plate watcher | One player sets a crate or battery, the other reads the bulbs. |
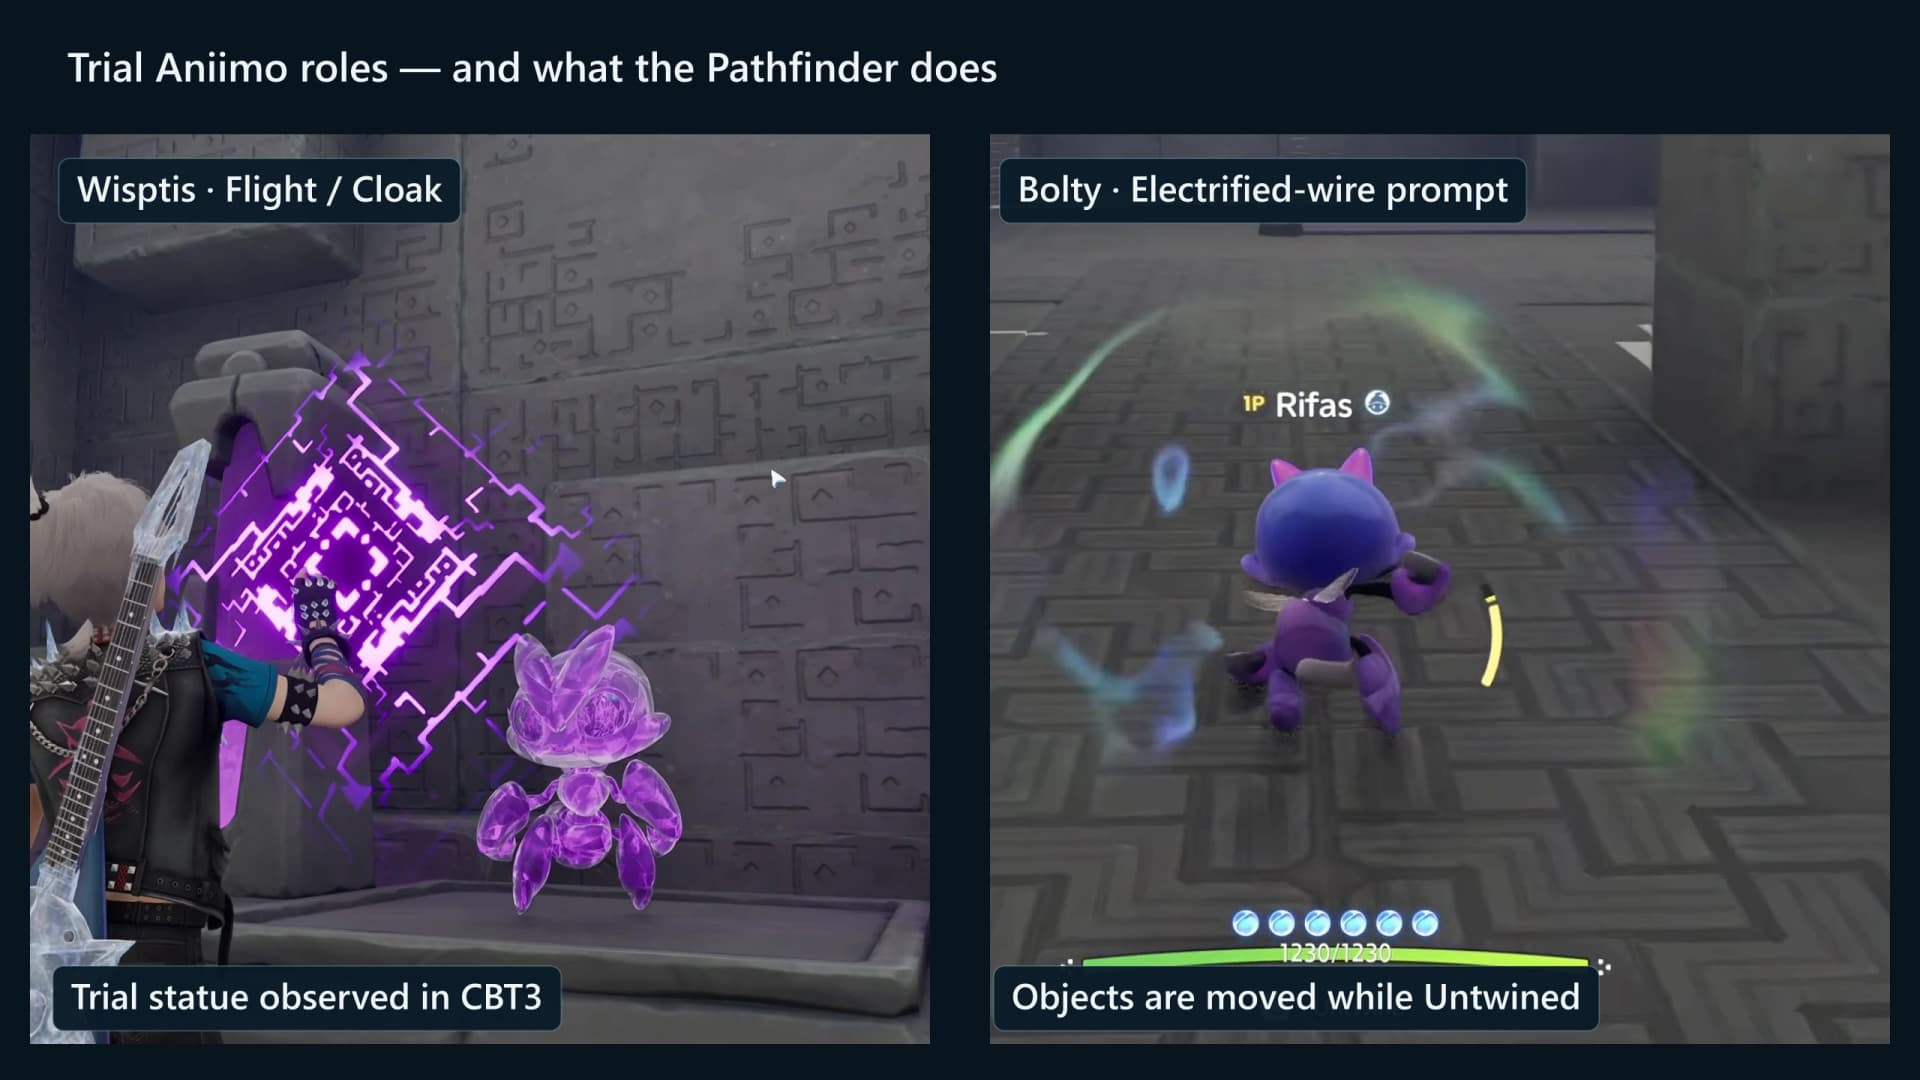
The room supplies Wisptis and Bolty. Wisptis provides flight and Cloak traversal; the room later tells the Bolty player to electrify a wire. Gravity Pull is a Pathfinder skill; its tutorial says Grab, while the actionable HUD prompt says Manipulate before Drop or Throw. Untwine and use that Pathfinder action on the metal crates and the wooden crate instead of attributing object control to Wisptis. The room has exactly two two-player pillars; the panels at the finish are the Sanctum Terminus itself, not a third puzzle.
Route, step by step
Lightning Gale is a hairpin, not a corridor: the outbound half runs east along the high gallery, folds at the far end and returns west above the Maharba Fault to the Terminus. Player A carries Bolty and charges batteries, power sources, fans and the wire; Player B carries Wisptis and takes every flight, updraft and glide. Swap the statues if you prefer, but keep the pairing for the whole run, because a statue touched twice seals its Aniimo back inside.
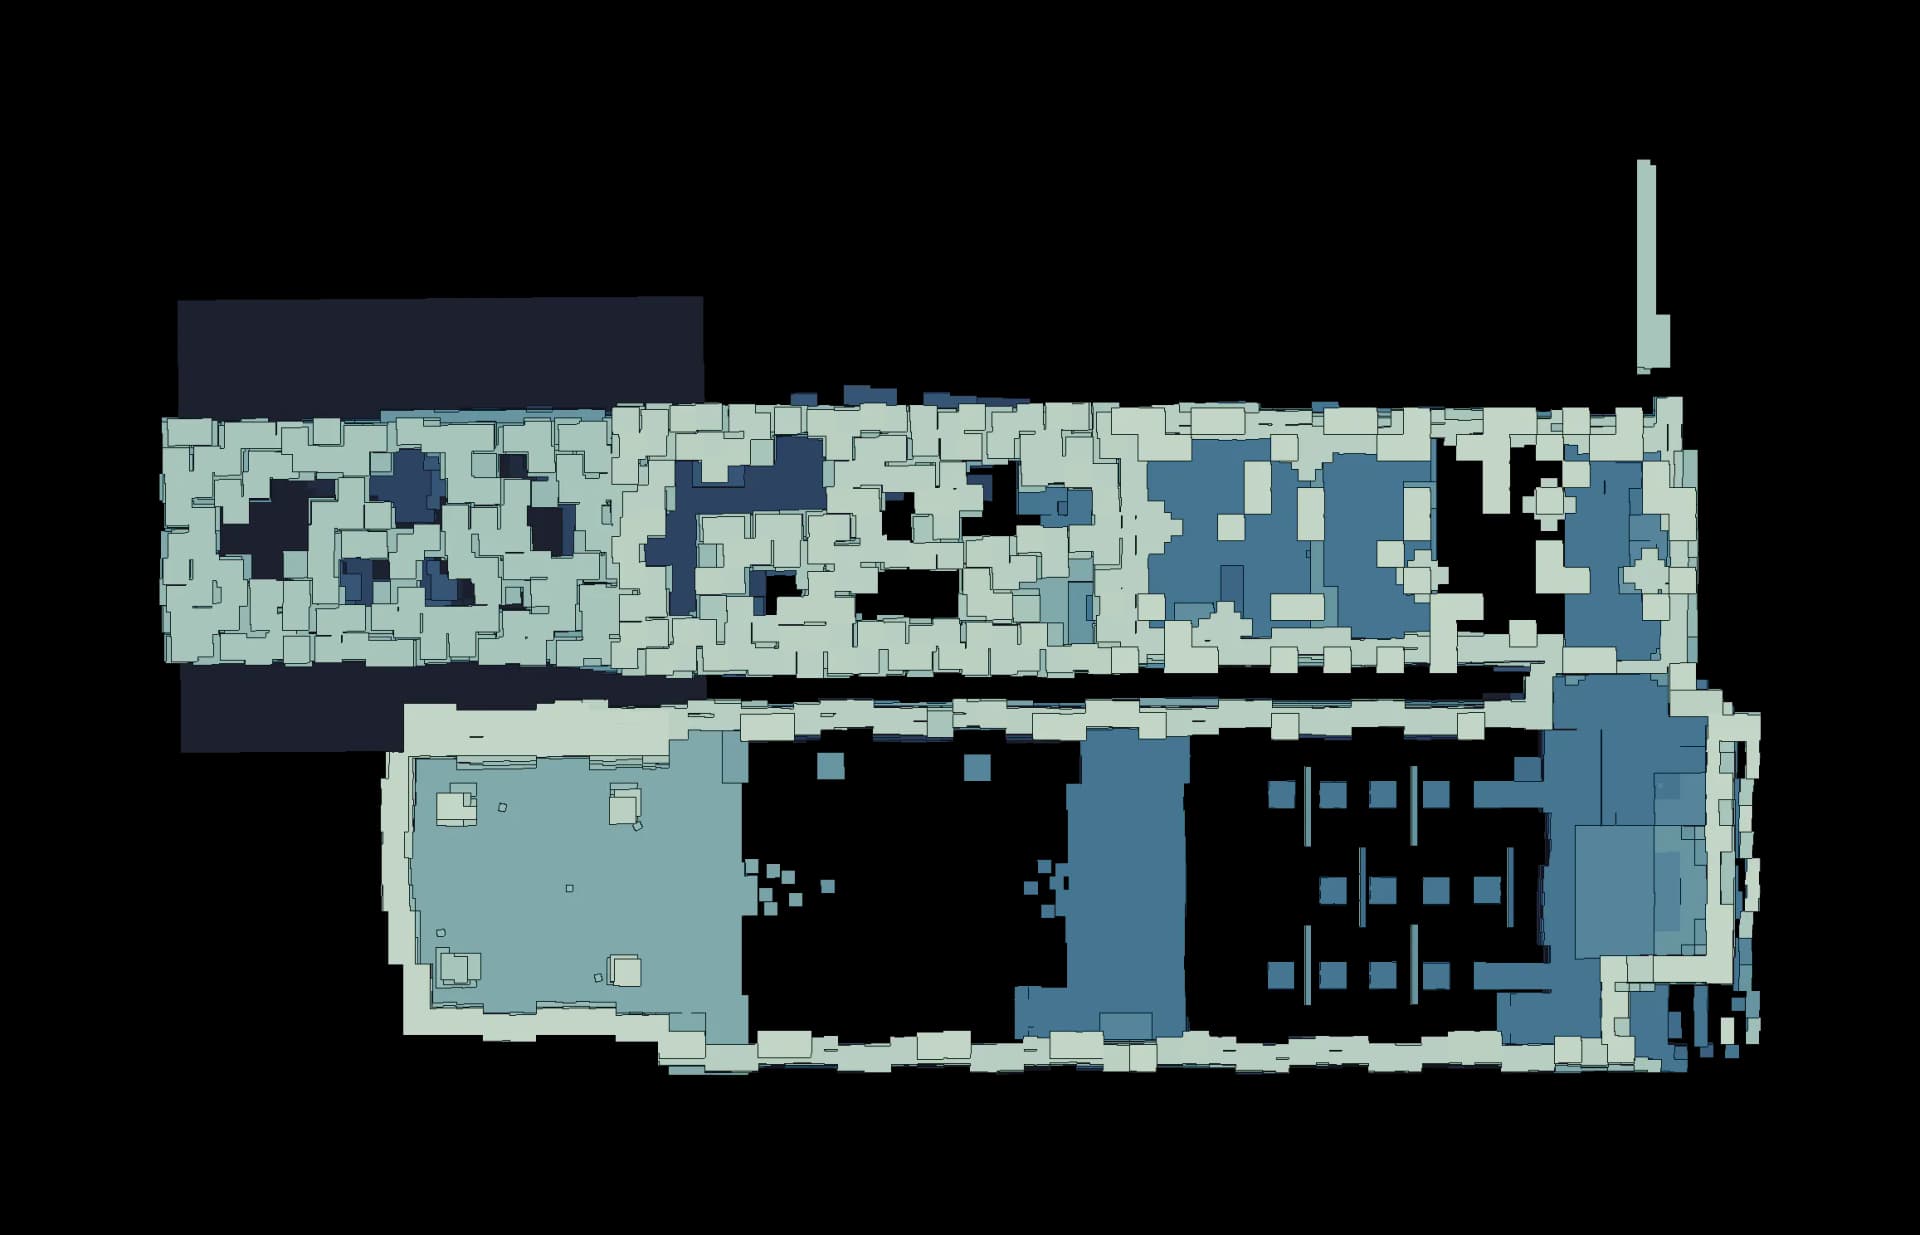 TTXCCC1234AACCCCCCCCCC
- Entrance
- Checkpoint
- Trial statue
- Terminus
- Chest
- Control
- Mechanism
- Element device
- Hazard
- 1Drop in and take one trial statue eachRoom 1
Both challengers land on the entrance pad at the west end of the low hall. Player A (Bolty) Twines at the south statue and Player B (Wisptis) Twines at the north statue, one Aniimo each. Touching a statue a second time seals that Aniimo back inside, so claim them and leave them claimed.
- 2Power the entrance fan and call the platform downRoom 1
Player A charges the fan against the west wall so Player B can ride the updraft to the ledge overhead. Player B then holds the floor pad up there, which sends the moving platform all the way down to the hall floor for Player A.
- 3Charge the twin power sources and open the first doorRoom 2
An Aniipod battery sits on a charging plate at the west end of the gallery, with two power sources on the wall beside it. Player A charges the pair until the bulb over the doorway goes gold, and the mechanism door below it opens.
- 4Bank the record point and collect the perpetual batteryRoom 2
Step through the doorway to the record point just beyond it. Crossing that line opens the Grab tutorial for the Pathfinder carry action and sets a permanent Aniipod battery back on its charging plate behind you, so fetch it before moving on.
- 5Ride the electric lift to the battery shelfRoom 2
Player A electrifies the short platform on the north side of the gallery so it climbs to the upper shelf. Two more power sources, a charging plate and a second perpetual battery sit up there, and the metal crate on the shelf is worth carrying down.
- 6Chest 1: the raised alcove off the shelfOptionalChest 1Room 2
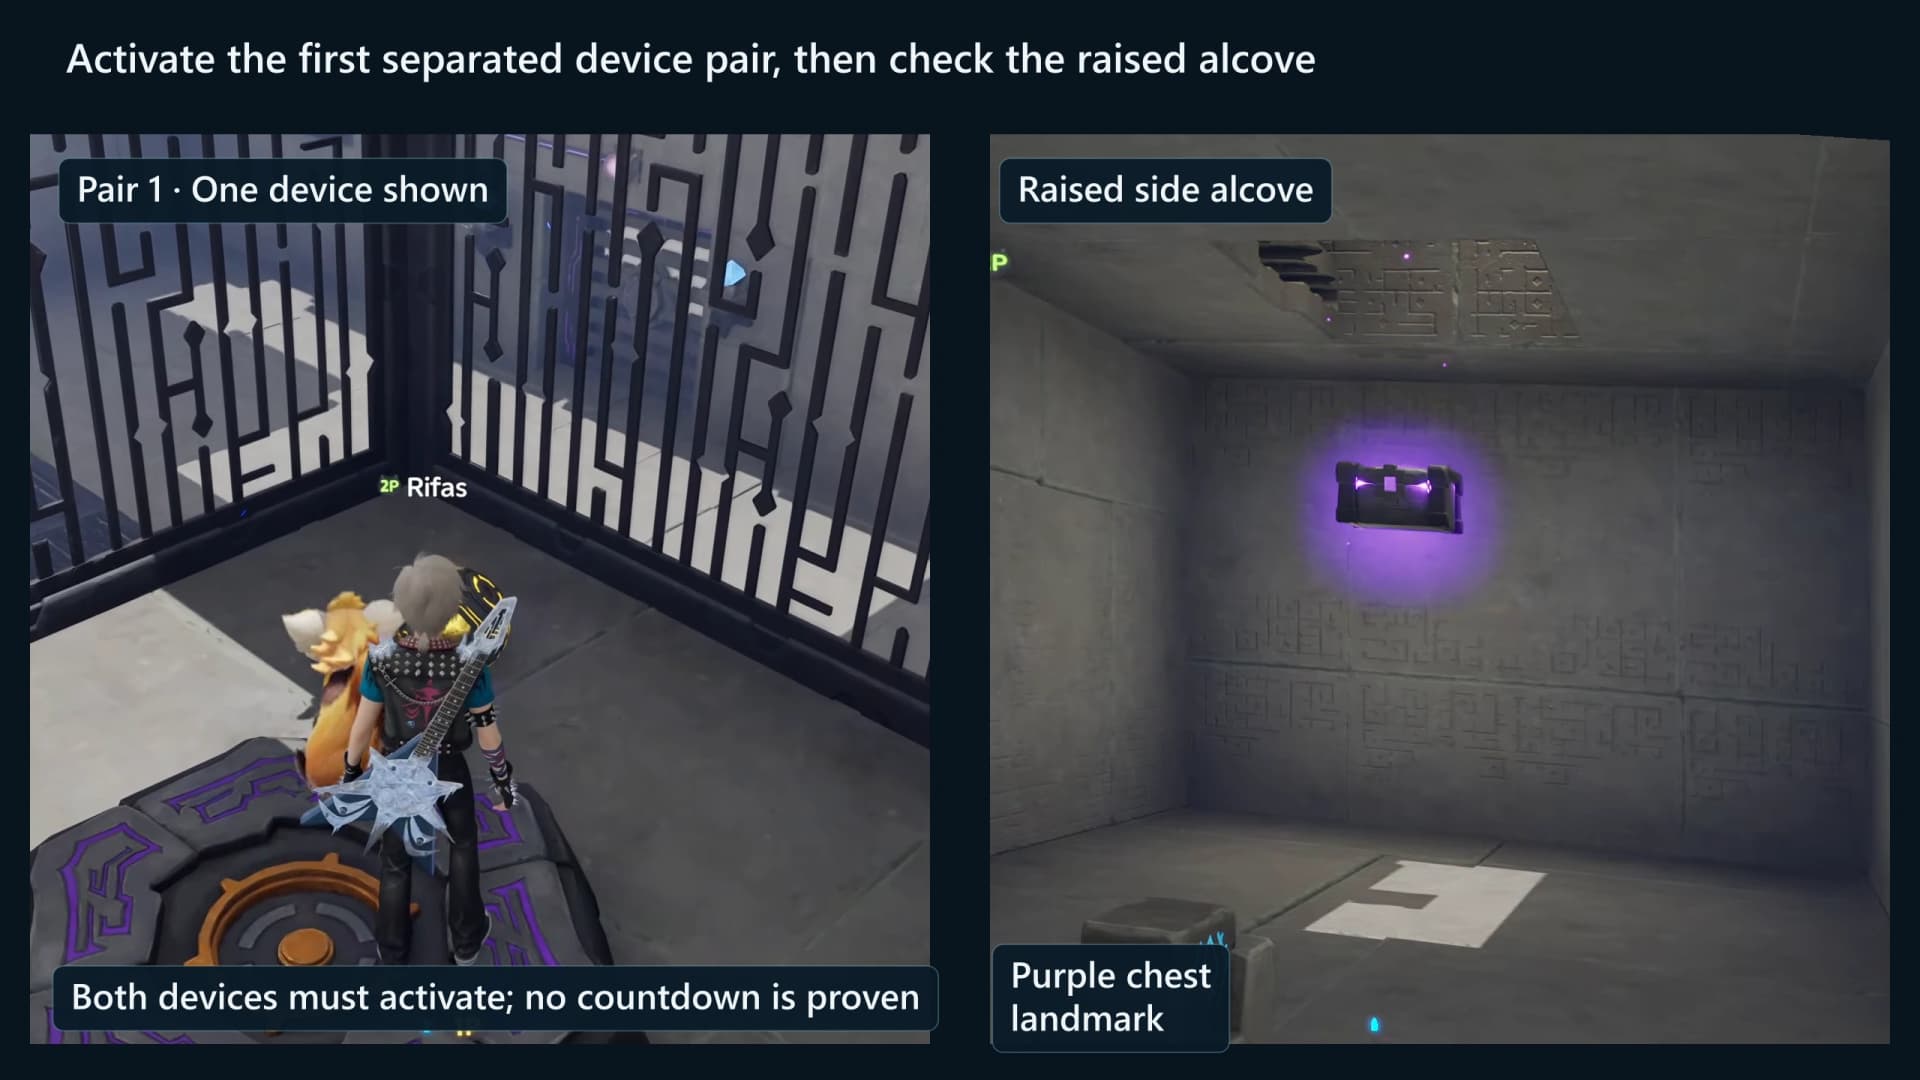
East of the battery shelf a small alcove sits above the gallery floor. The basic chest waiting in it is the first of the four, and it costs nothing but the climb you have already made.
- 7Feed both sides of the floor junctionRoom 2
The junction set into the gallery floor only passes current when both of its feeds are live, so keep one power source charged while your partner tops up the other. Gold lines running east out of the junction mean the wind route beyond it is armed.
- 8Climb the first wind routeRoom 3
Five fans step east in two short flights, lifting you from the gallery floor to the upper walkway. Player B rides the wind route up while Player A follows as far as the fans reach.
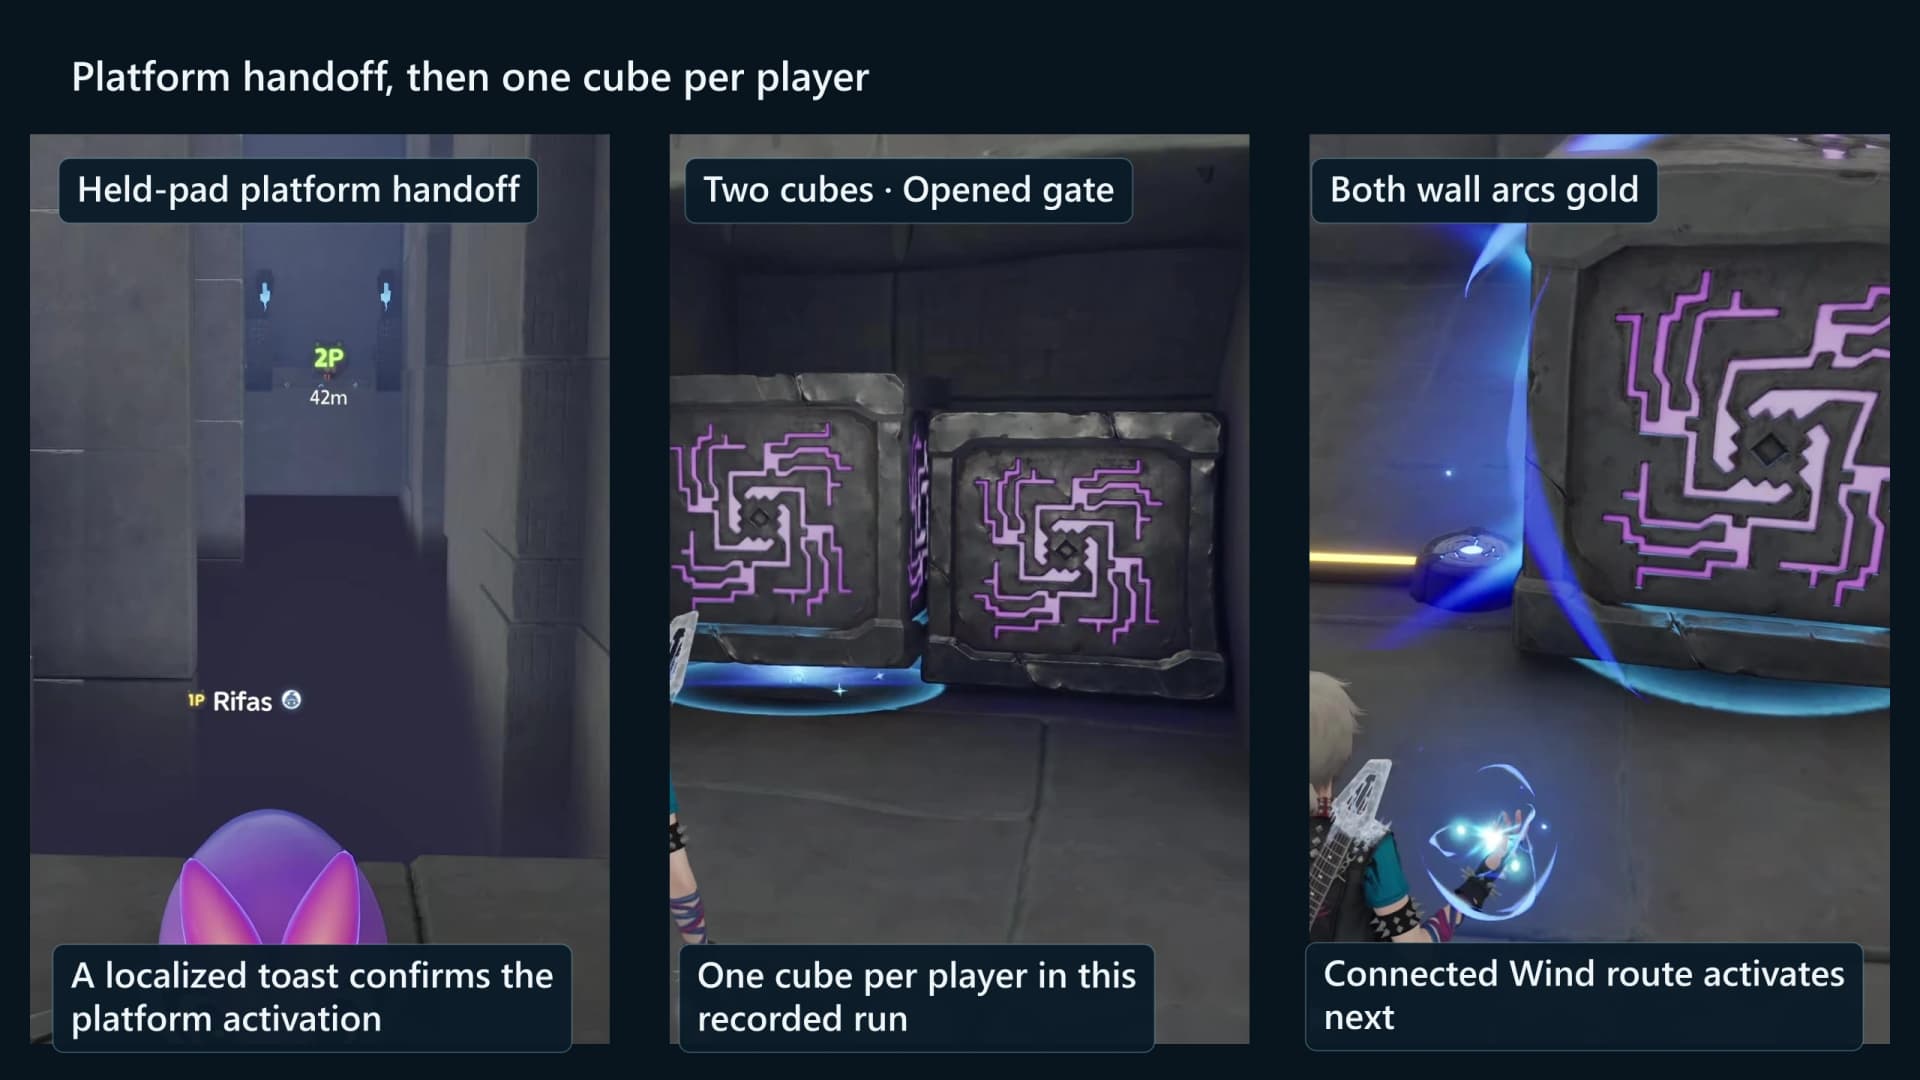
- 9Hold the ledge pad and ferry your partner upRoom 3
Whoever reaches the walkway first stands on the pad above the ferry and holds it. The other player gets a toast saying the platform is active, boards it on the gallery floor and rides up and east to the same walkway.
- 10Chest 2: the high route past the mezzanine bulbOptionalChest 2Room 4
A bulb on the mezzanine drops the fence underneath it once it turns gold. Follow the high route south along the ledge to the barred alcove and take the standard chest there before the two of you regroup at the pillar below.
- 11Work the first two-player pillarRoom 4
The pillar in the middle of the walkway needs one challenger on each side at once. Once both sides read as accepted the mechanism door just east of it slides open, and the record point beyond is the halfway bank.
- 12Chest 3: raise the water and drop into the channelOptionalChest 3Room 5
Player A holds the pad on the north bank and the water column in the channel rises. Player B drops to the channel bed on the south side for the standard chest, keeping clear of the gap under the column, which kills outright.
- 13Soak the wooden crate and load both charging platesRoom 5
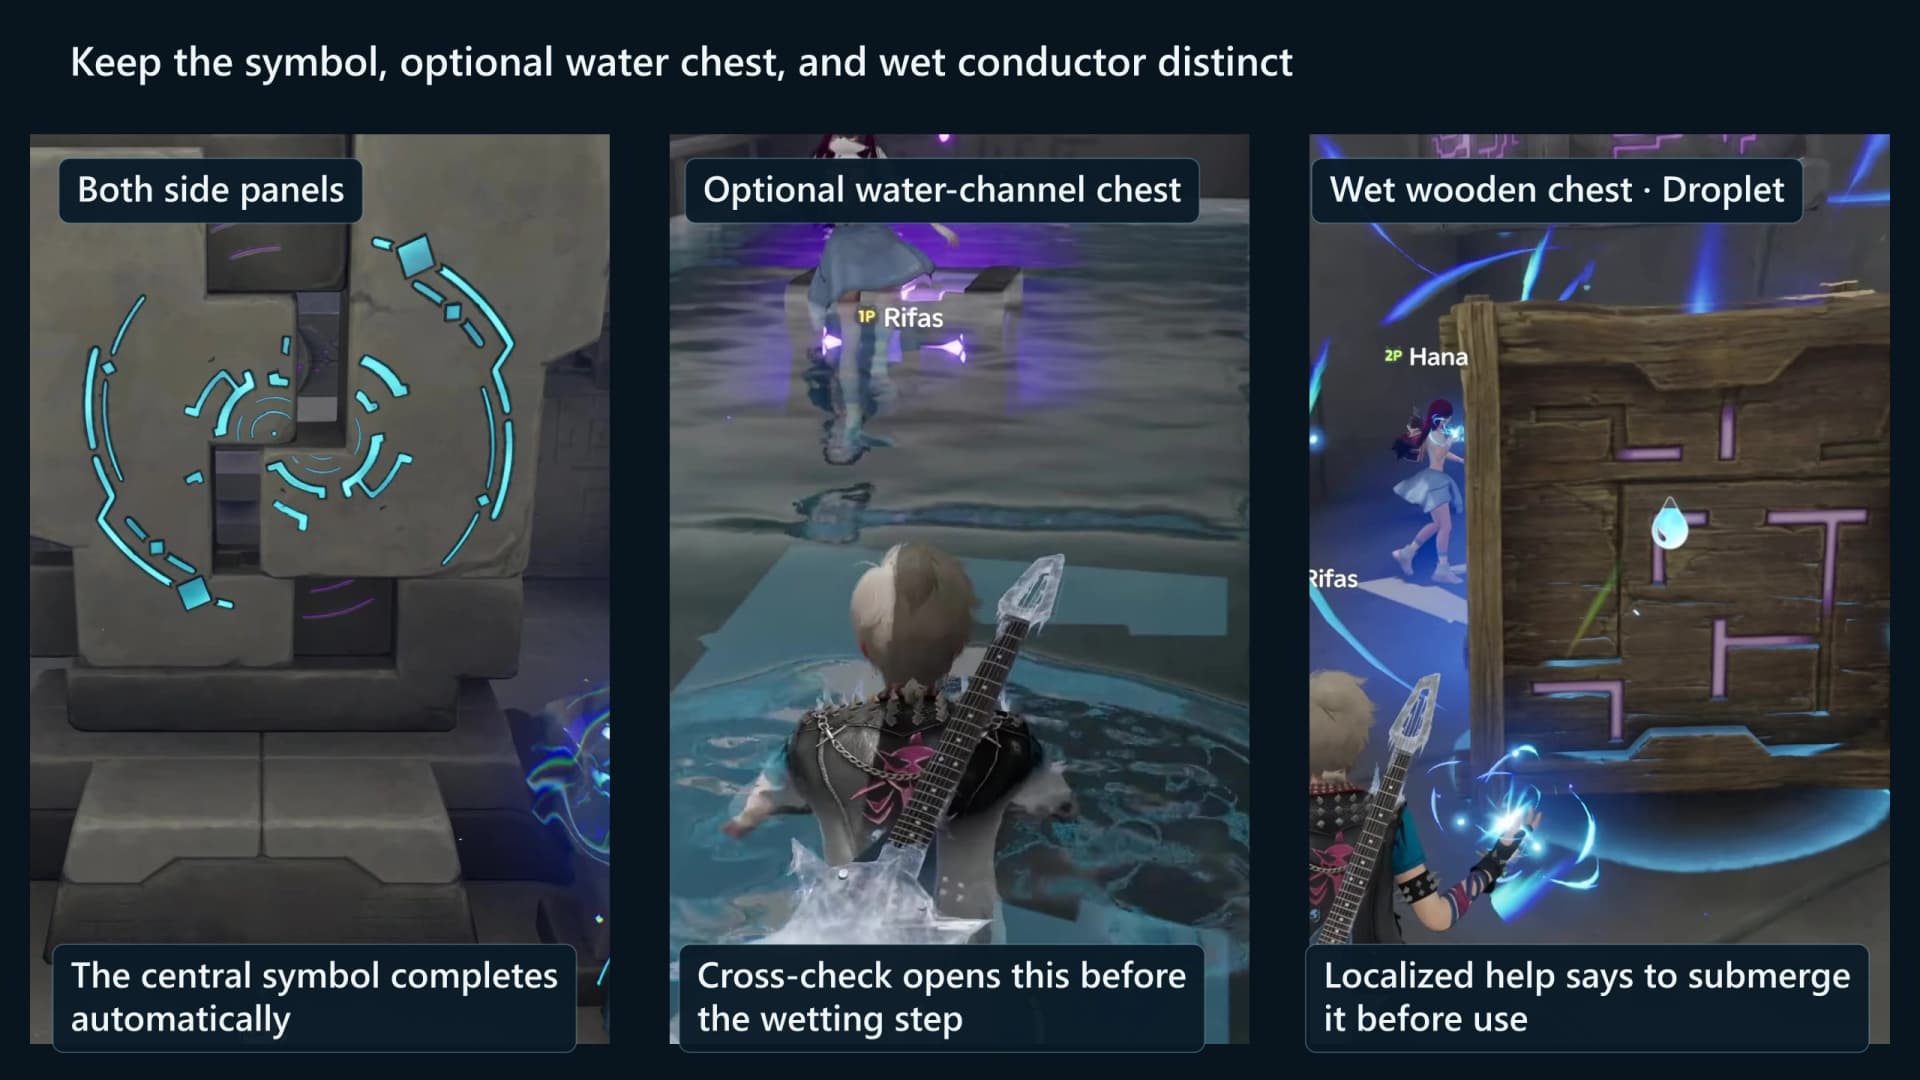
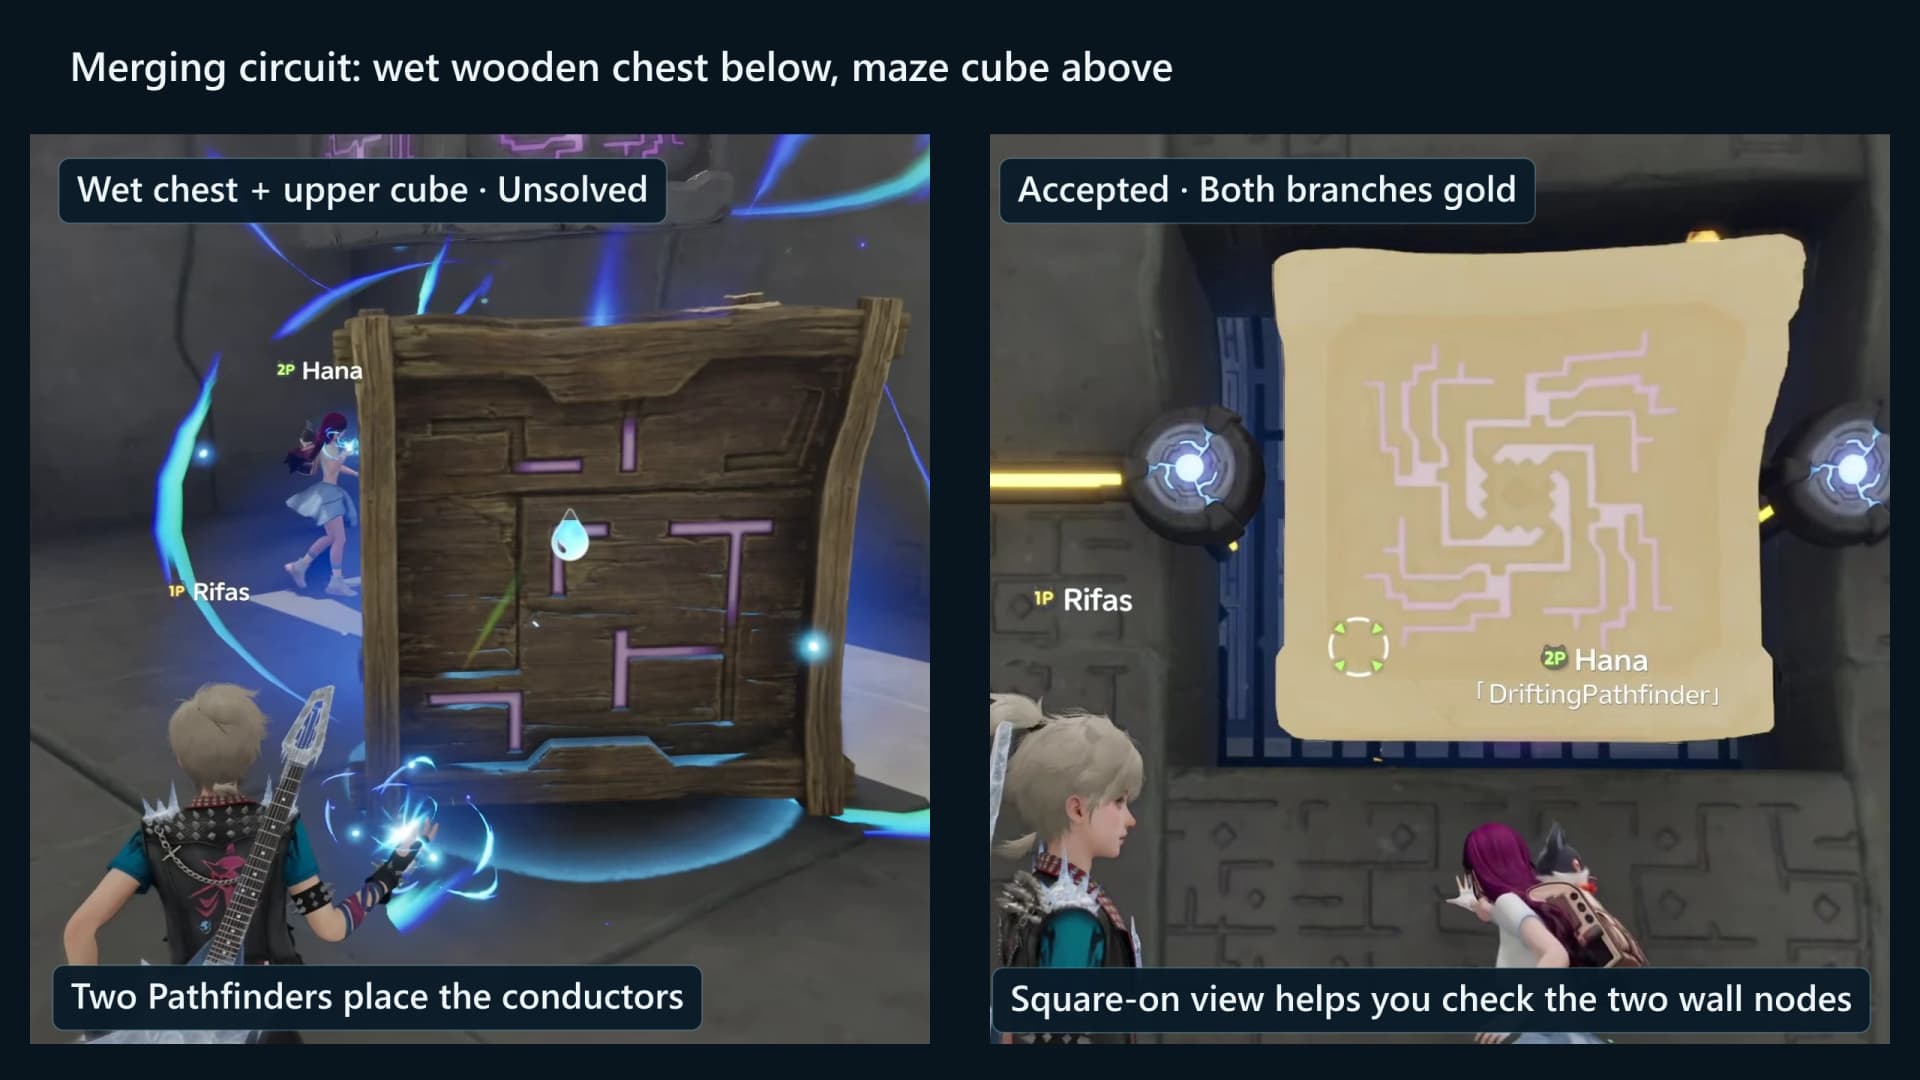
Dunk the wooden crate in the channel until the droplet mark shows, because a damp crate carries current the same way metal does. Set it and a charged battery on the two charging plates, one at walkway height and one on the shelf above, so both feeds of the junction go gold.
- 14Open the twin gates past the junctionRoom 6
The junction above the channel drives two bulbs on the far wall. One drops the fence over the metal crate alcove and the other opens the mechanism door on the walkway, so hold both feeds live until each bulb reads gold.
- 15Ride the lift and glide the wind gapRoom 7
Player A electrifies the lift east of the doorway so it rises to the upper fan on the ledge. Player B rides that fan into the rolling wind field over the gap and glides to the far side, well clear of the pit below.
- 16Hold the far pad and ferry the second player overRoom 7
Player B lands beside the pad on the far ledge and stands on it. The long platform swings back out over the gap until it sits level with the upper fan, so Player A can step aboard and ride across.
- 17Work the second two-player pillarRoom 8
The second pillar stands in front of the large mechanism door at the east end. Take one side each again, then bank the record point behind the door before you turn south towards the fault.
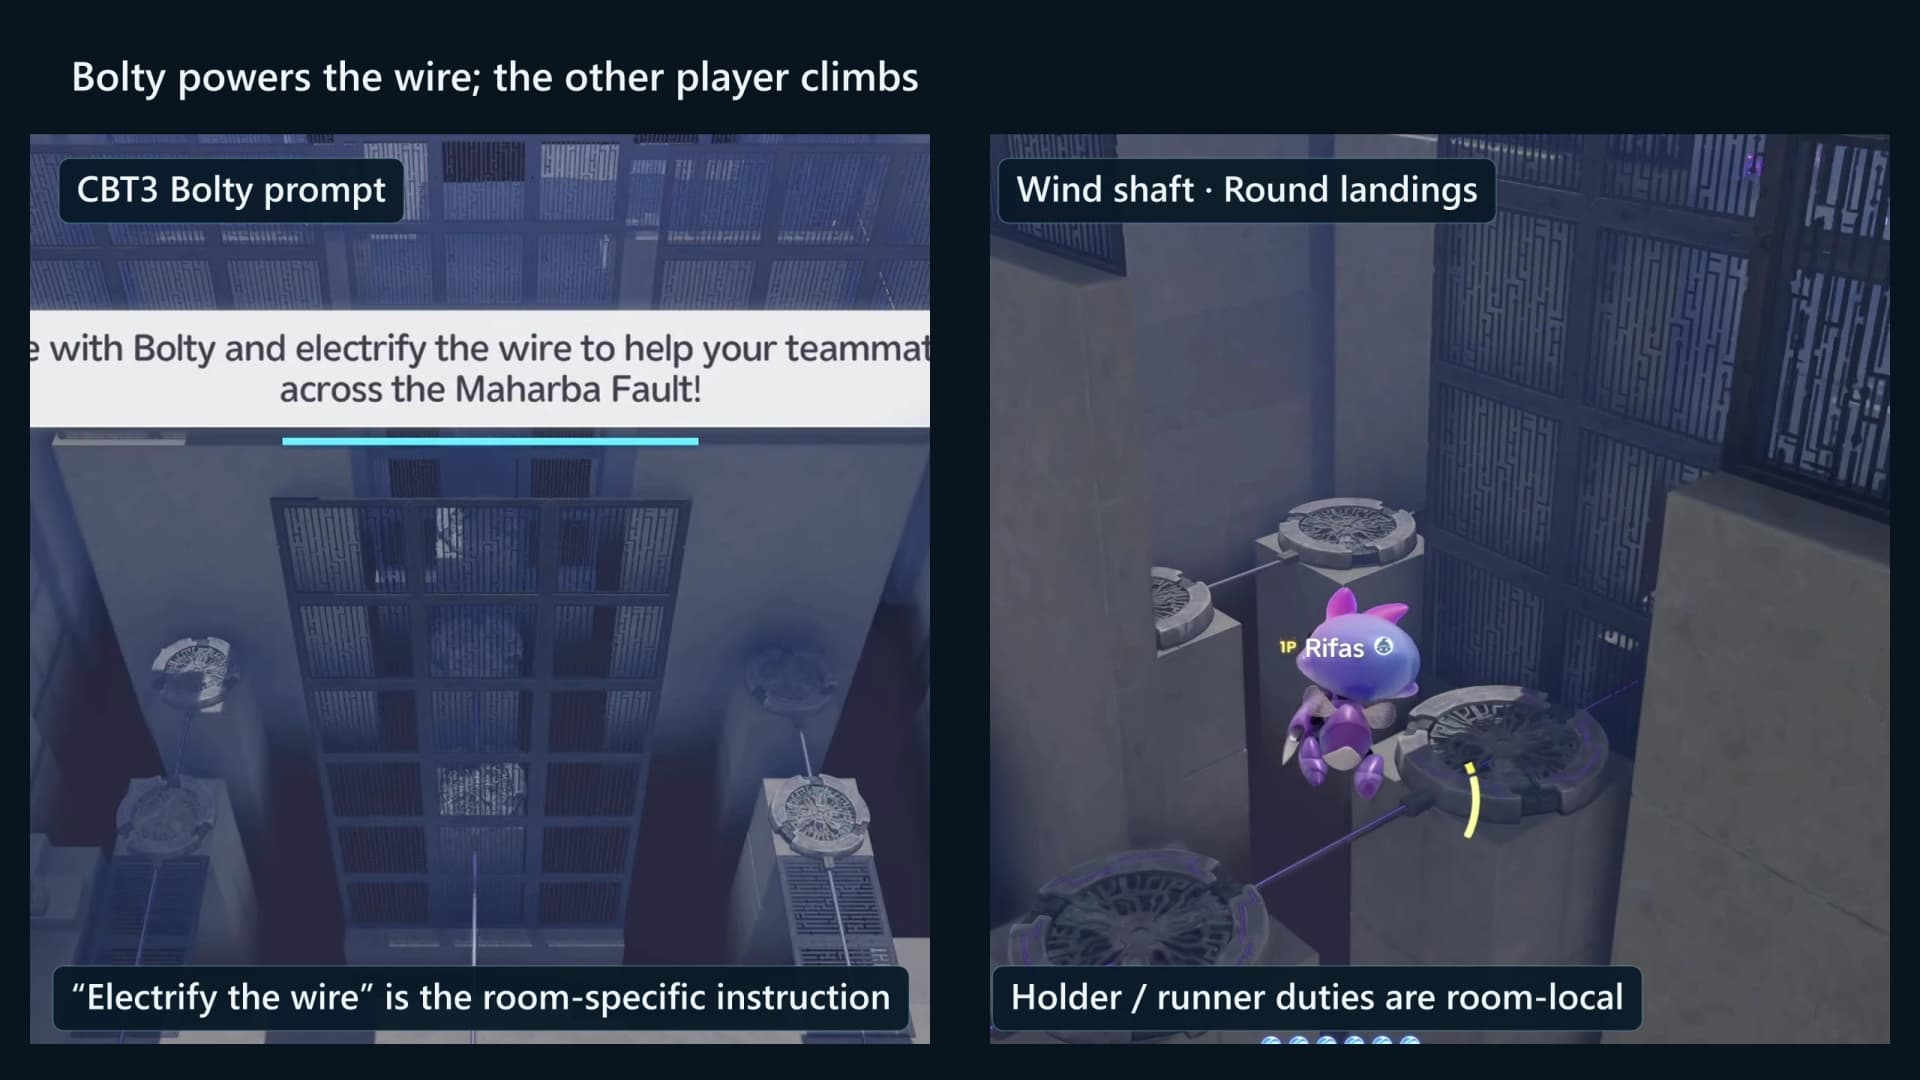
- 18Electrify the wire ports on the fault lipRoom 9
Stepping onto the lip tells Player A to Twine with Bolty and electrify the wire so Player B can glide across the Maharba Fault. Three wire ports stand in a row along the edge, one for each lane of fans strung out over the chasm.
- 19Glide the fan lanes to the west bankRoom 9
Bank the checkpoint on the launch ledge, then Player A keeps the wire live while Player B launches and rides one lane of fans west, hopping the updrafts in column order. Everything under the lanes is a straight drop.
- 20Hold the landing pad and ferry the wire operator acrossRoom 9
Player B lands on the west bank and stands on the pad there. A toast tells Player A the platform is active, and the ferry reaches the full width of the fault to collect them.
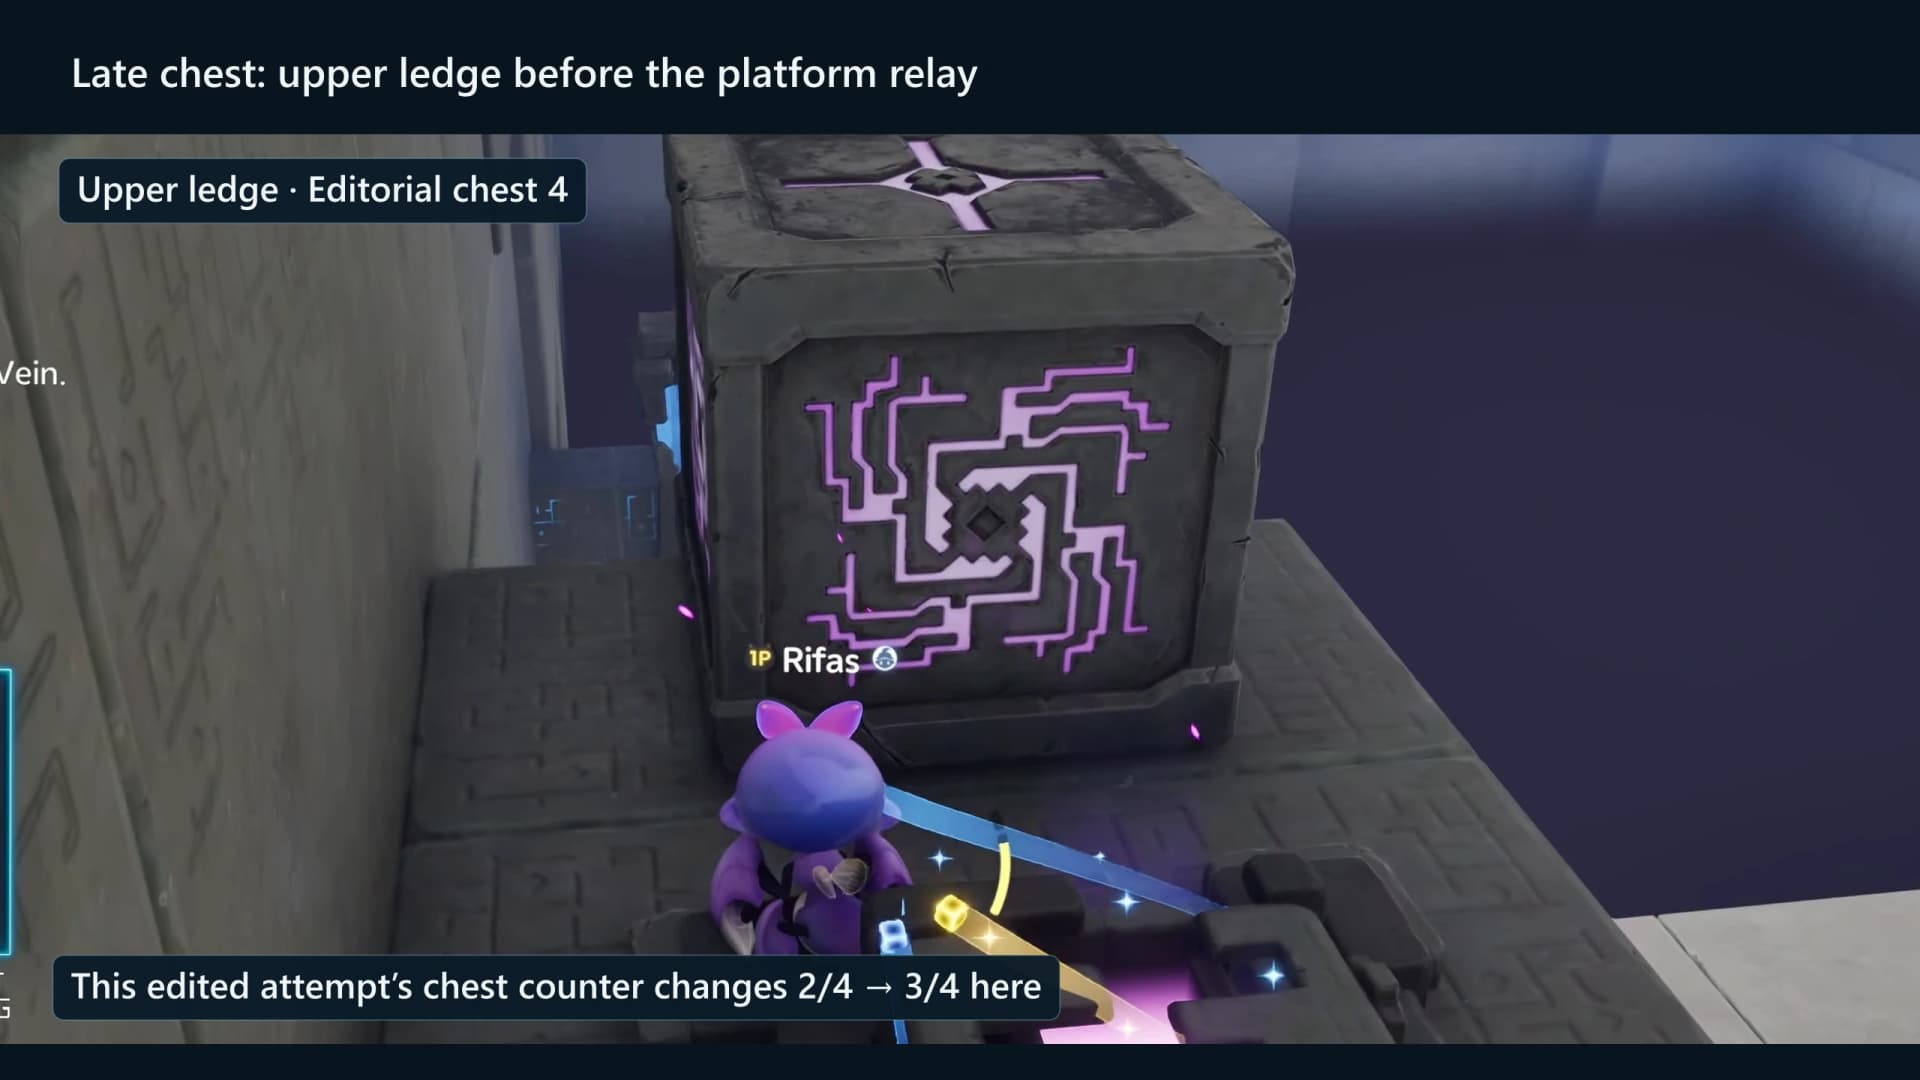
- 21Chest 4: light the vault bulb on the west bankOptionalChest 4Room 10
An Aniipod battery sits on a charging plate in the vault behind the landing. Player A charges it until the bulb above the barred alcove turns gold, the fence drops and the last standard chest is yours. Three metal crates in the same vault are spare conductors if a feed goes out.
- 22Climb the last wind staircaseRoom 11
Three fans step west and upward out of the vault, each one higher than the last. Player A charges them in turn and Player B rides them to the high landing, where the final checkpoint sits.
- 23Drop the final platform for your partnerRoom 11
Player B holds the pad on the high landing and the last platform runs down and east to fetch Player A off the lower ledge. Ride it back up and regroup on the landing.
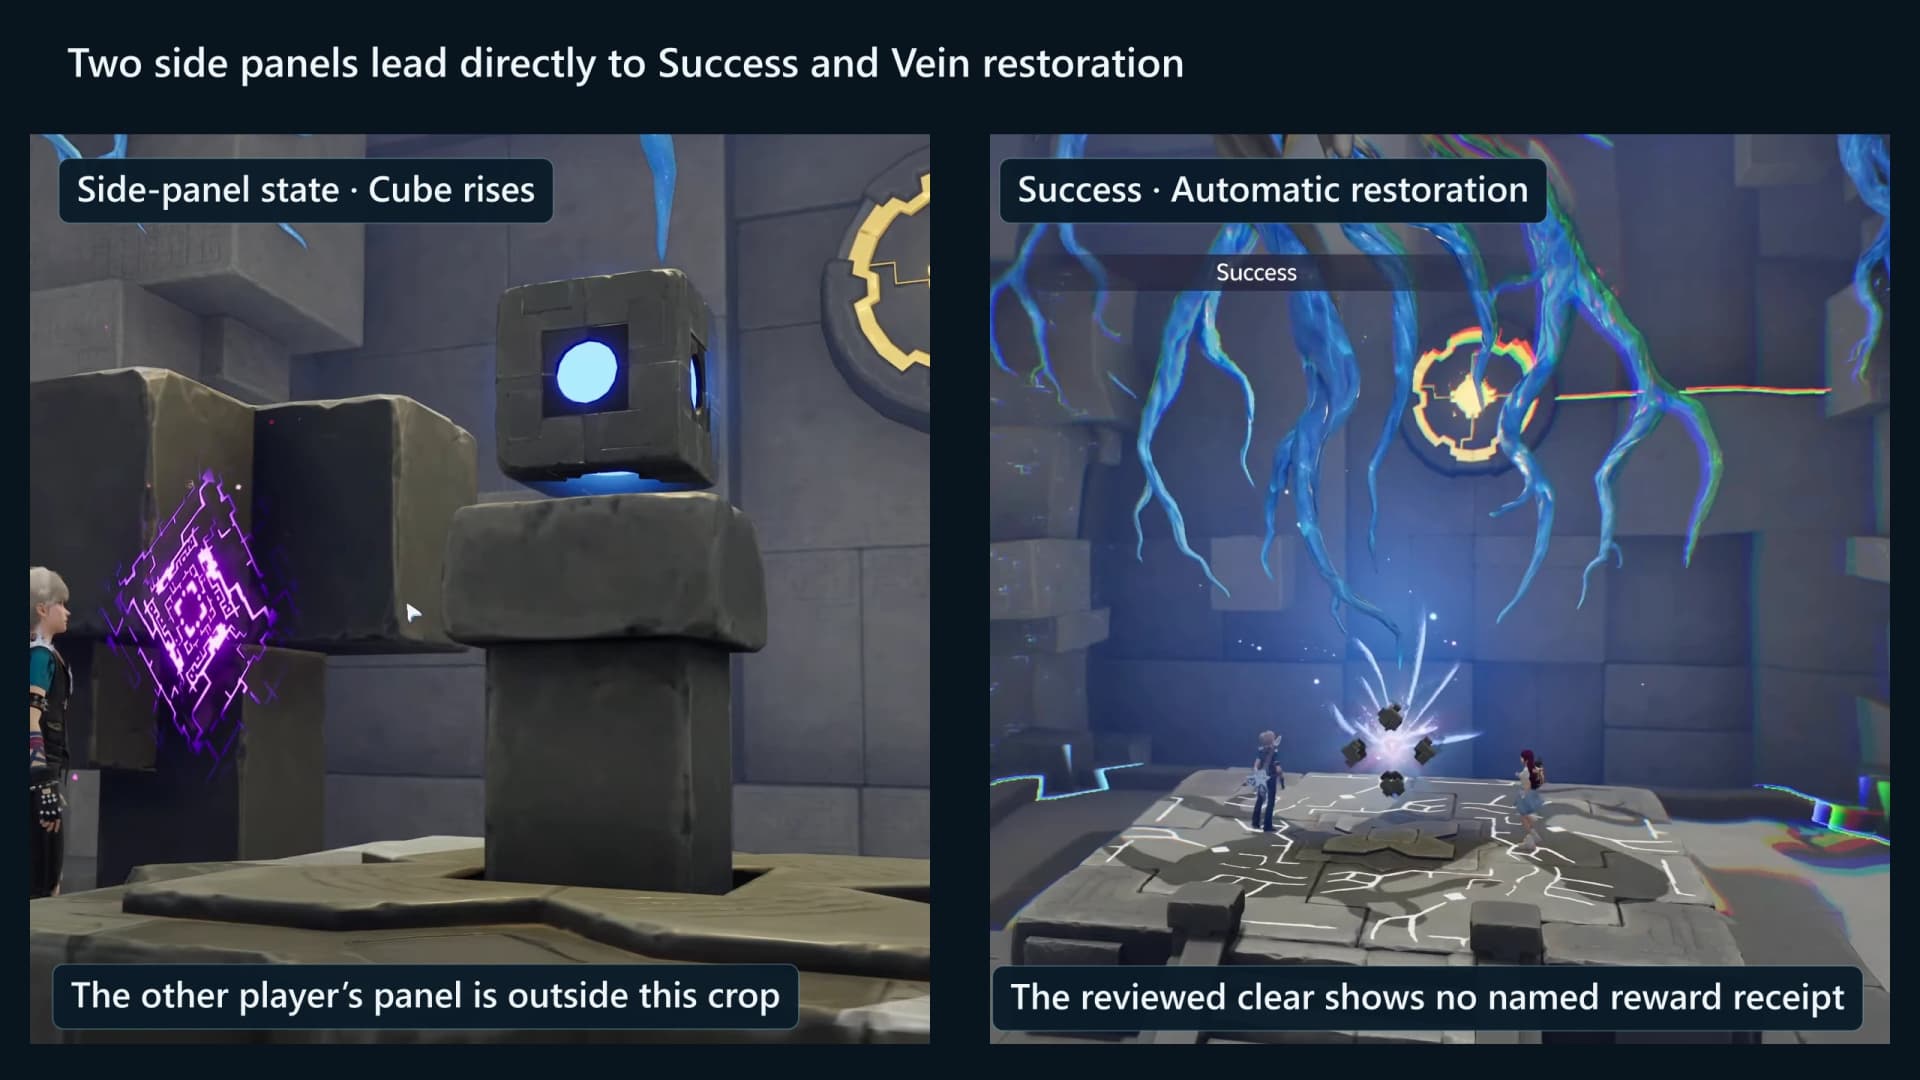
- 24Touch the Terminus togetherRoom 11
The Terminus stands on the western spur beyond the landing. Both challengers interact at once, Success appears and the Vein restoration runs on its own, so confirm all four chest slots are cleared before either of you touches it.
Checkpoints and hazards
Lightning Gale banks progress generously. Past the entrance pad there are ten checkpoint portals, and each one arms itself the moment a challenger crosses its line, so a fall sends you back to the last one rather than to the door. Five instant-death boxes sit under the route, and every one of them is a gap you are meant to cross rather than a floor you can stand on.
- Gallery doorway checkpoint. Crossing it opens the Grab tutorial and puts a permanent Aniipod battery back on its charging plate behind you.
- Upper walkway checkpoints. The pair above the first wind route bank the climb before the mezzanine bulb and the high-route chest.
- Halfway bank past the first pillar. The record point behind the first two-player pillar is the midpoint of the outbound half.
- Water-channel and lift checkpoints. They cover the chest in the channel bed and the glide over the wind gap.
- Fault lip and launch ledge. The last outbound banks sit either side of the Maharba Fault crossing, which is the longest fall in the room.
- West bank and high landing. The return leg banks again at the vault and once more on the landing before the Terminus.
Read the circuit states
| Visible state | What it means | Safe response |
|---|---|---|
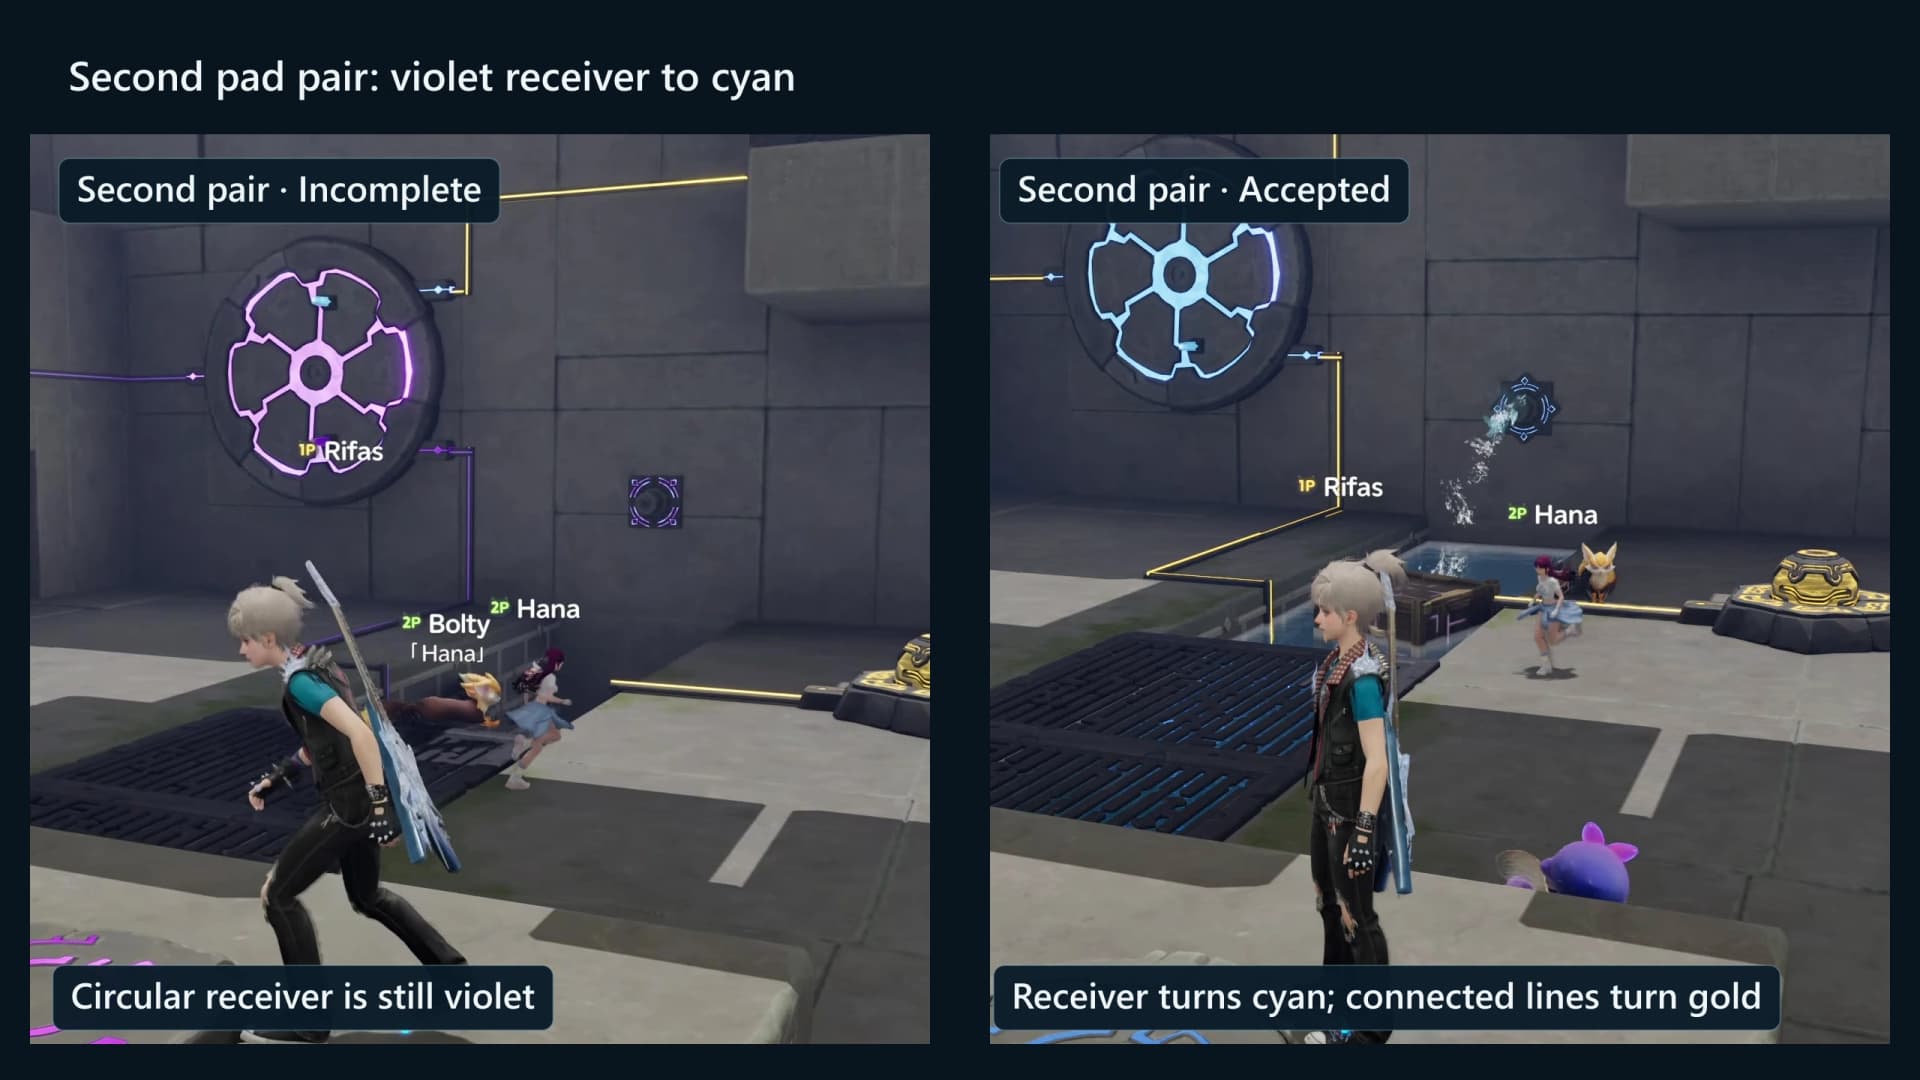
| Violet circuit or receiver | The mechanism is not accepted yet. | Check the relevant pad, device, wire or physical object again. |
| Gold connected lines | That circuit branch is powered or accepted. | Look for the linked receiver, gate, platform or Wind field to change. |
| Cyan receiver or route | The linked state is active in that room. | Keep the required held state while the other player crosses. |
| Blue or pale-gold object effect | A Pathfinder is holding the object with Grab/Manipulate from Gravity Pull. | Release it, then check the circuit rather than treating the carry effect as success. |
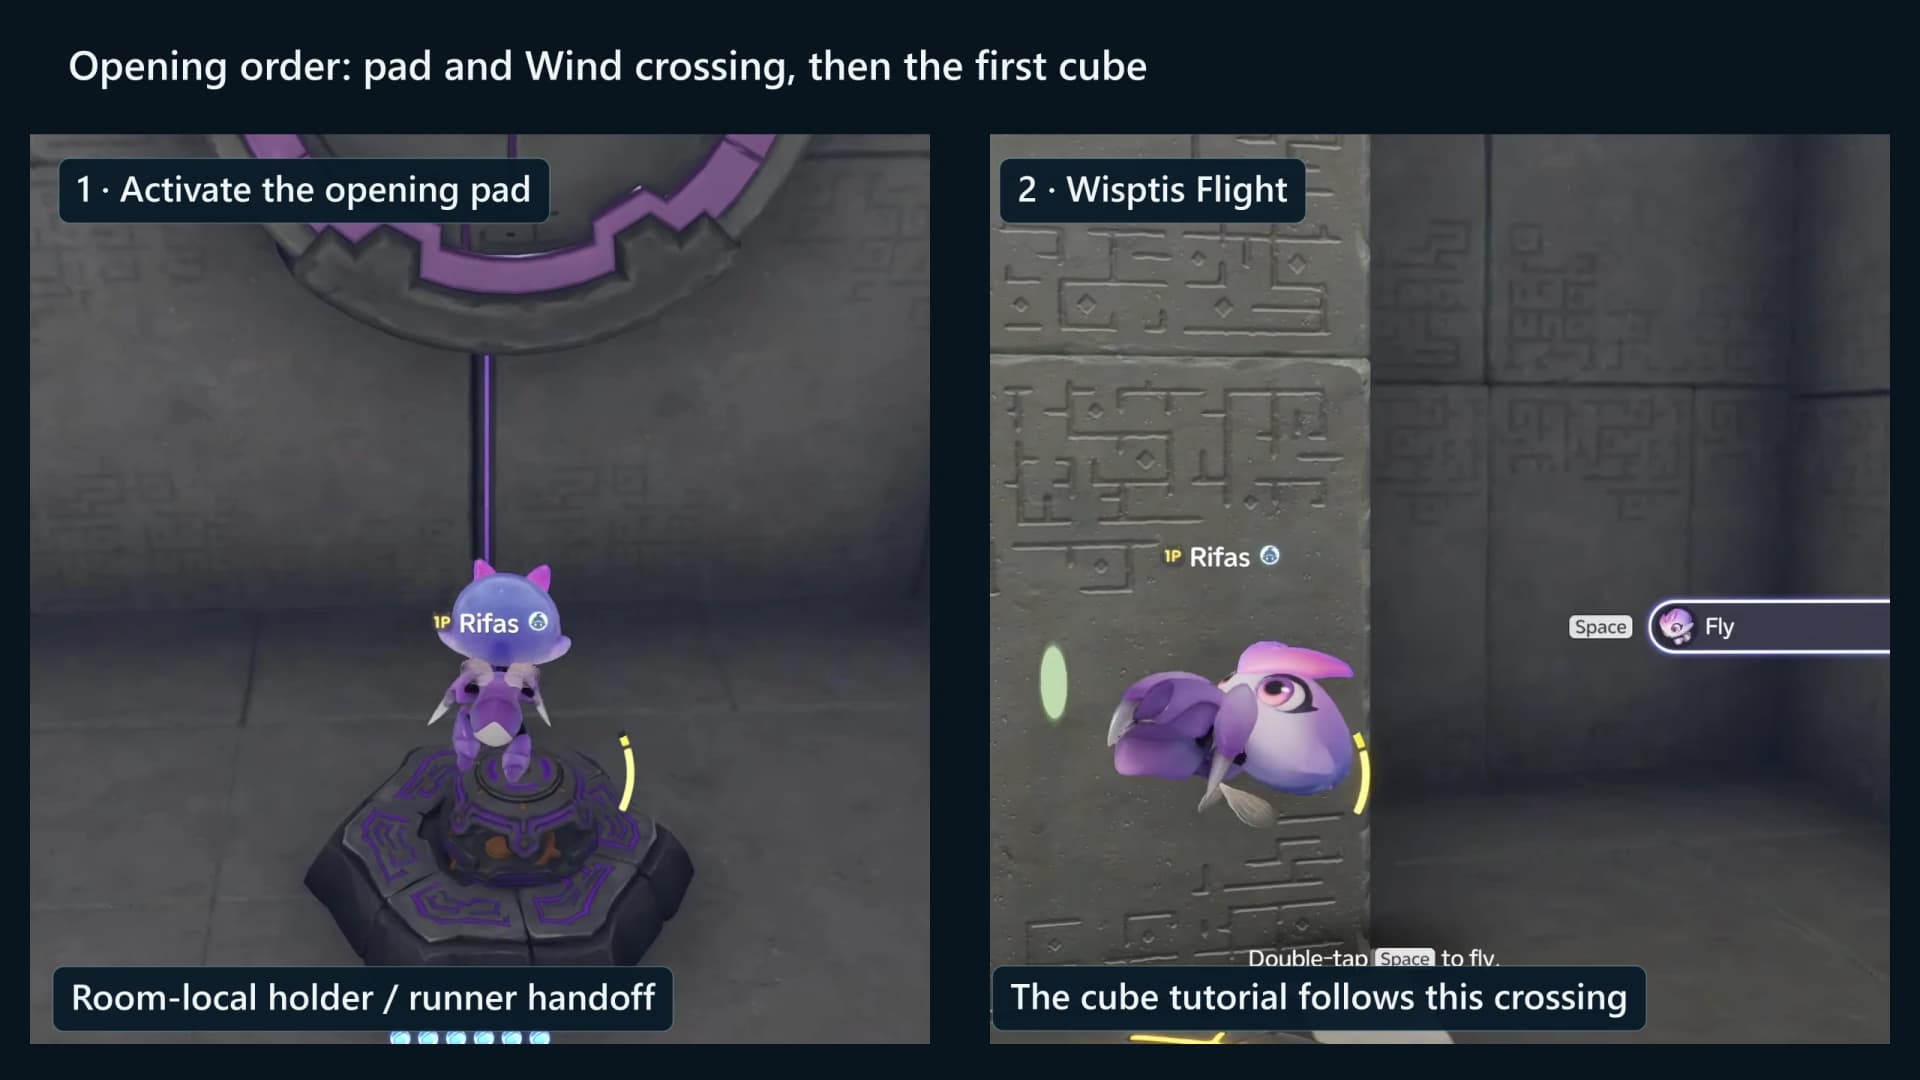
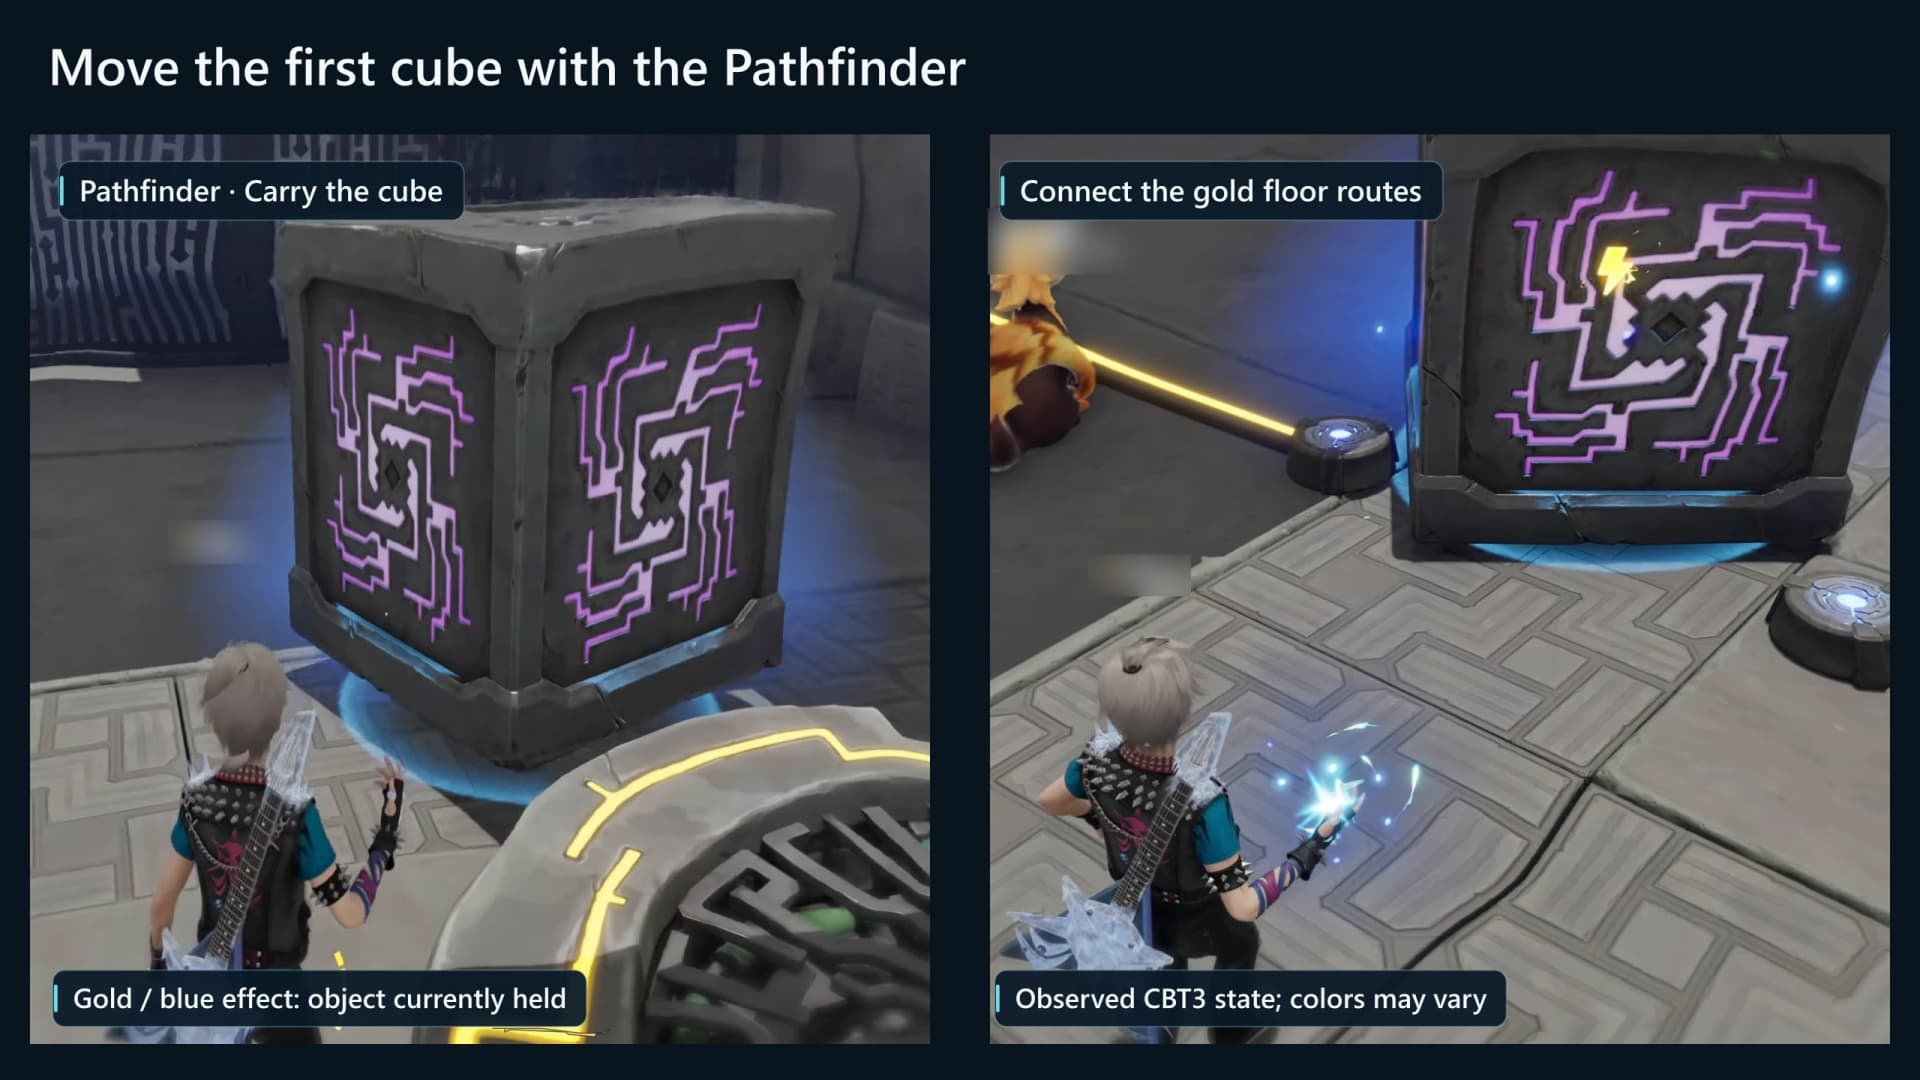
Mechanism close-ups and handoffs
The route above is the order of play. These frames are the mechanisms themselves, in the same order, for the moments where knowing what an accepted state looks like matters more than knowing where to stand.
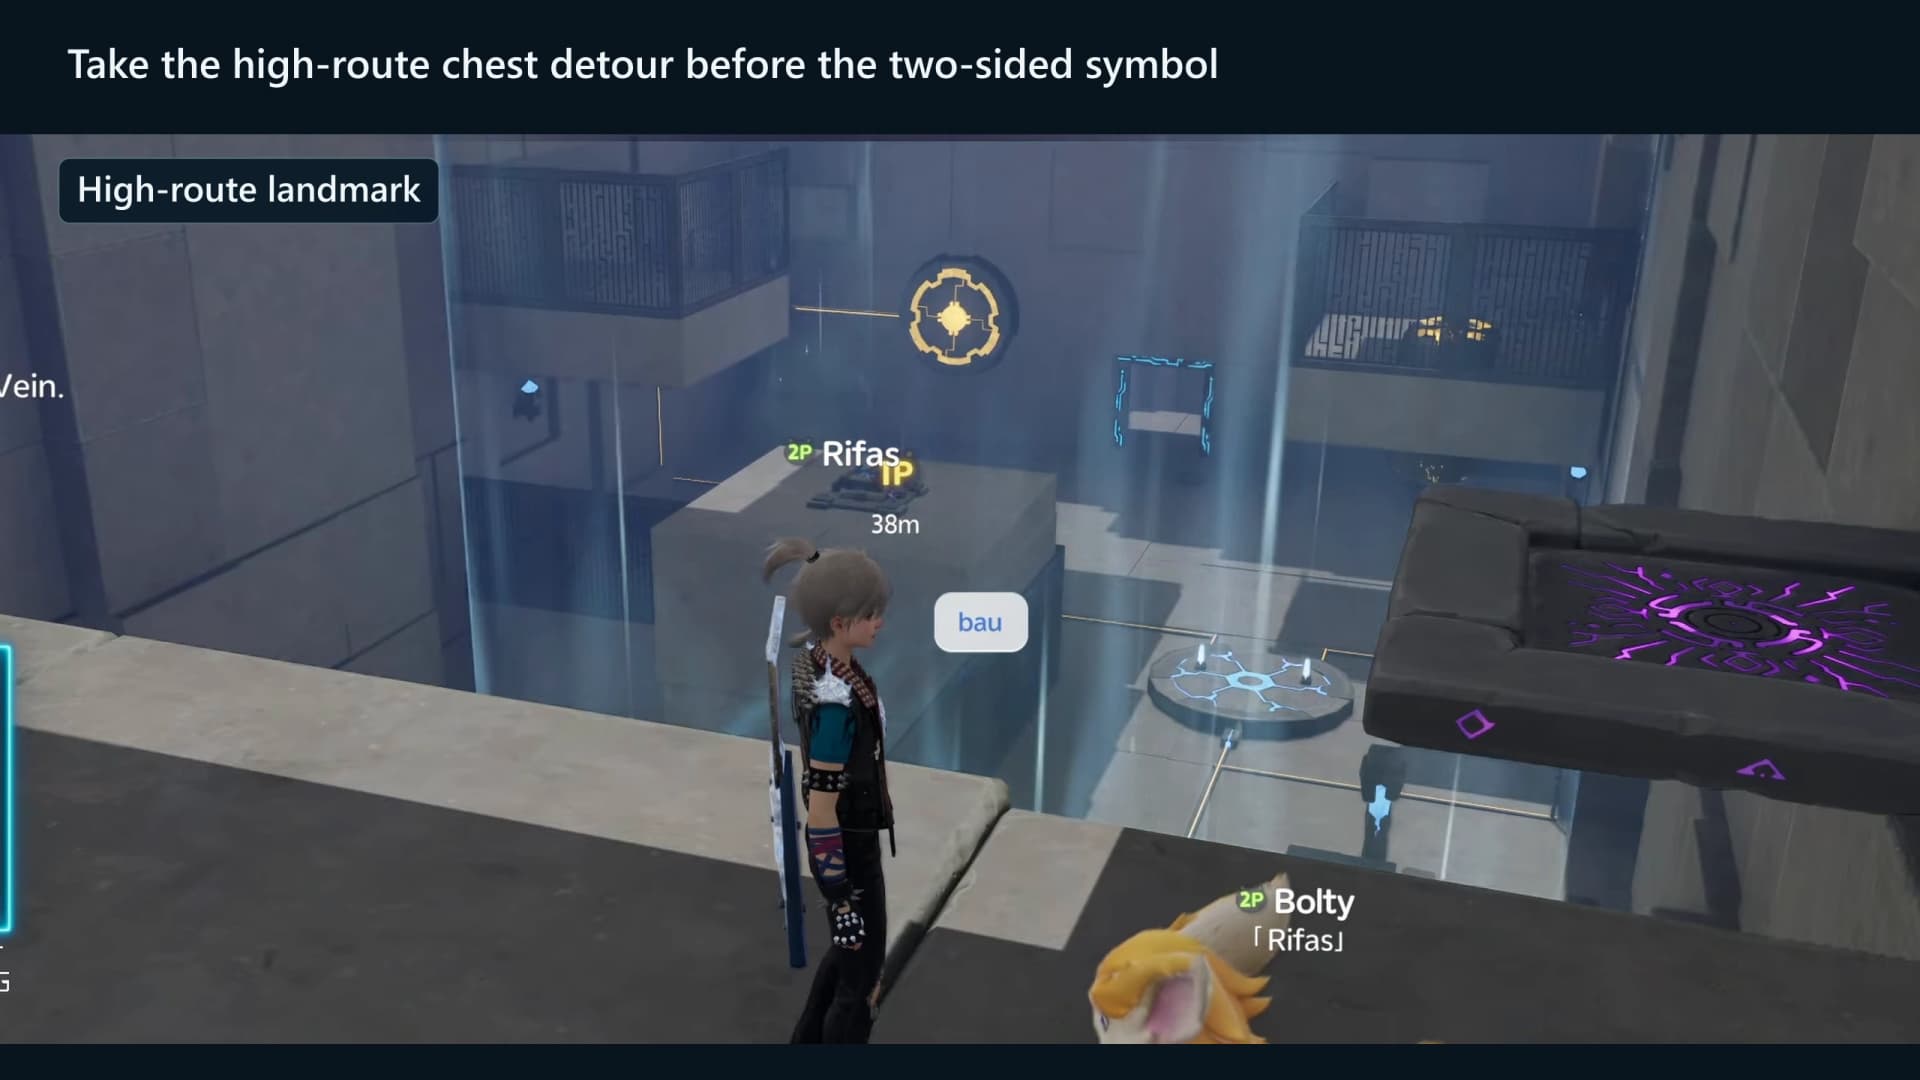
Four-chest checklist
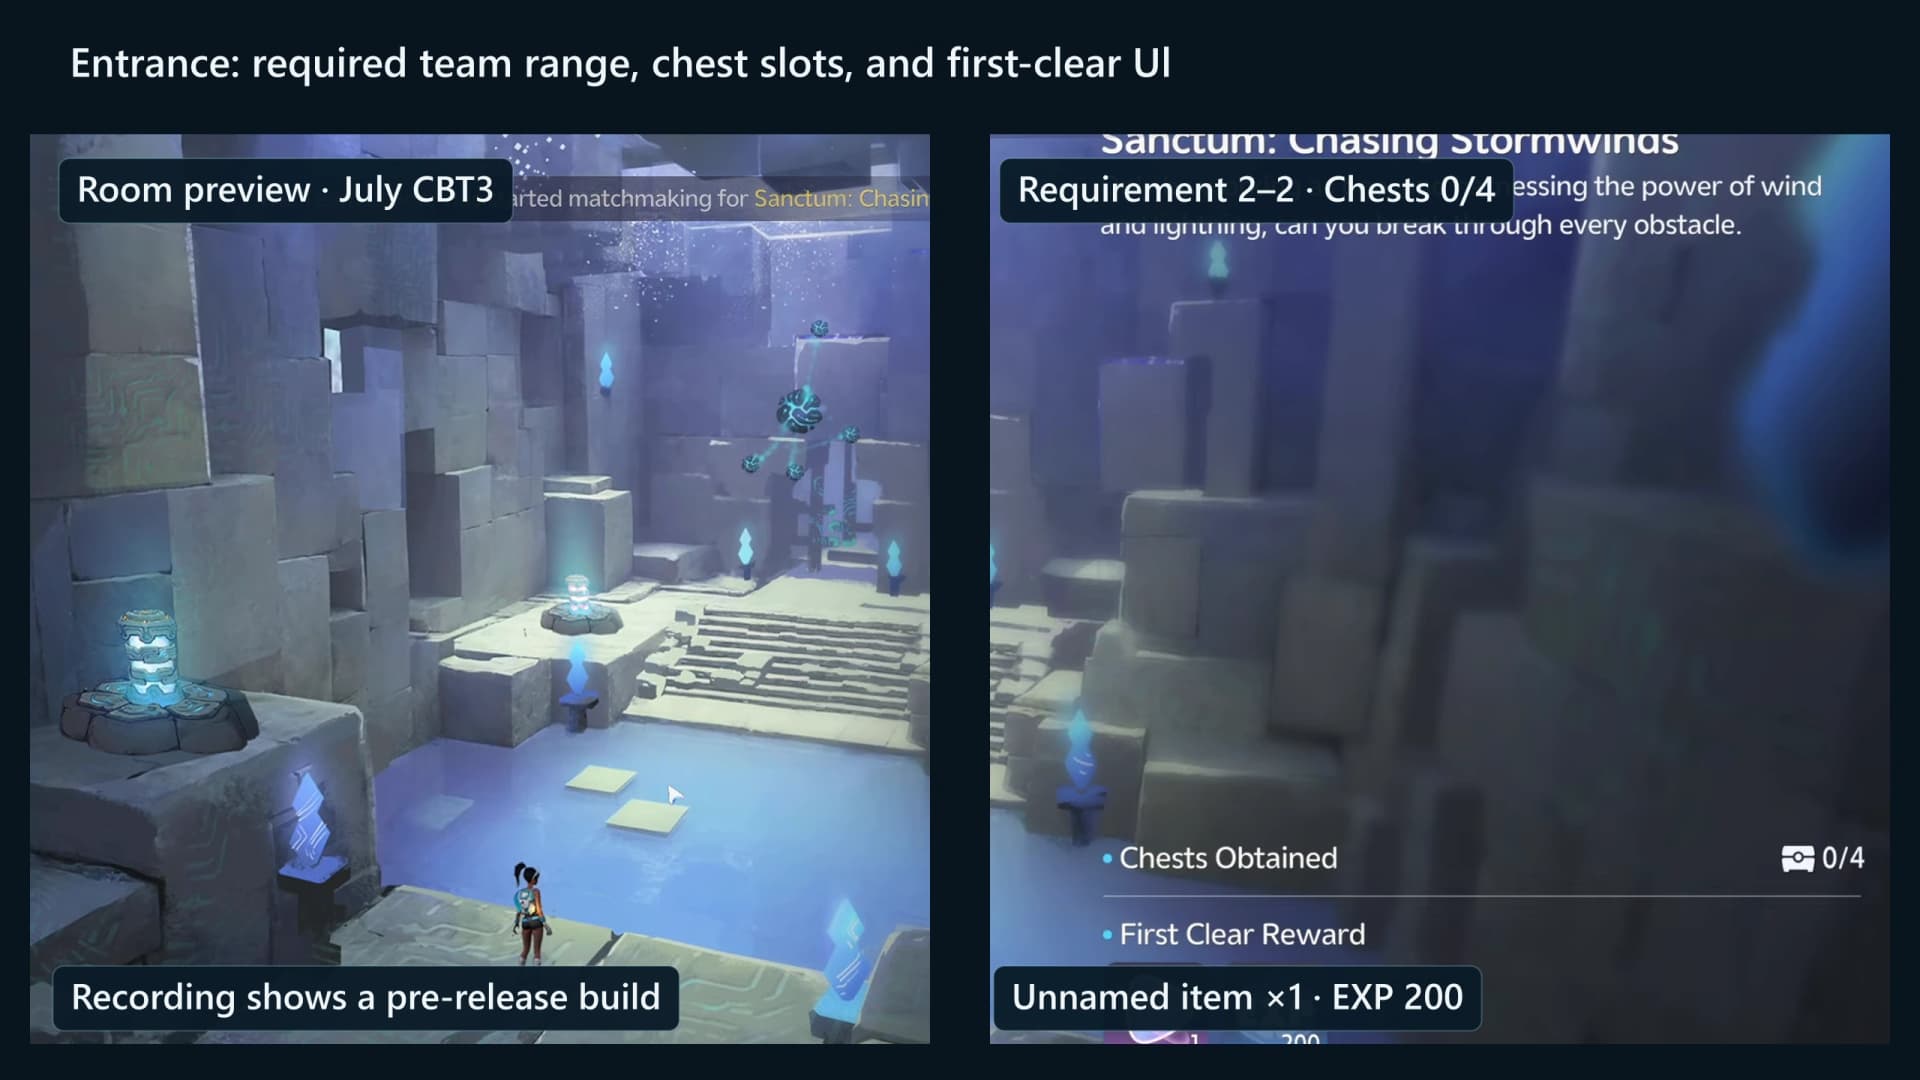
The entrance lists four chest slots and the route opens them in one pass: the raised alcove off the battery shelf, the barred alcove under the mezzanine bulb, the water-channel bed and the west-bank vault behind the fault. Read your progress from the chest icon below View Help rather than the top-left party icon.
| Chest | Tier | Contents |
|---|---|---|
| Chest 1 | Basic | Glimmer x5, Credits x5000, Sparkling Crystal x5 |
| Chest 2 | Standard | Glimmer x10, Credits x10000, Sparkling Crystal x10, one Rare held item |
| Chest 3 | Standard | Glimmer x10, Credits x10000, Sparkling Crystal x10, one Rare held item |
| Chest 4 | Standard | Glimmer x10, Credits x10000, Sparkling Crystal x10, one Rare held item |
| First clear | Reward | Lumin Amber: Breezy Plains, EXP x500 |
Every held item: Spirited Feather, Fission Needles, Echoing Grimoire, Ferocious Fang, Miraculous Fleece, Lightning Needle, Gargantuan Horn, Marching Flask, Capacitous Battery, Heartseeker Pendant, Avenging Gear, Heritage Amulet, Explosive Gloves, Giant Tortoise Shell, Auspicious Bell.
Recovery, completion and rewards
A first clear pays Lumin Amber: Breezy Plains ×1 plus 500 EXP, and it pays once: there is no repeat-clear reward. Clearing the room also lights its node on the Leyline Tree and counts towards the Sanctum Delver badges at 3, 5, 10 and 15 clears.
Frequently asked
Where is the Lightning Gale Sanctum?
It is in Berylline Causeway. The AniimoVerse atlas marker is at 1640, 596. Open the exact Lightning Gale atlas pin.
How many players and chest slots does Lightning Gale have?
The entrance requires two challengers and lists four chest slots. You can let the game fill the team automatically after you start, but a known partner makes the paired pads, panels and wire handoffs far easier.
Do Wisptis and Bolty move the Lightning Gale crates?
No. Wisptis handles flight and Cloak traversal, Bolty answers the electrified-wire prompt, and the human Pathfinder’s Grab/Manipulate action from Gravity Pull moves the metal crates and the wooden crate.
What is the Lightning Gale first-clear reward?
A first clear pays Lumin Amber: Breezy Plains ×1 plus 500 EXP, lights the room’s Leyline Tree node and counts towards the Sanctum Delver badges at 3, 5, 10 and 15 clears. Repeat clears pay nothing.