
Location and party requirements
Open the exact Flaming Wings atlas pin in Sea of Flowers. The marker sits at 2521, 1524 on the AniimoVerse atlas. The entrance requires two players and tracks five optional chests with one shared counter.
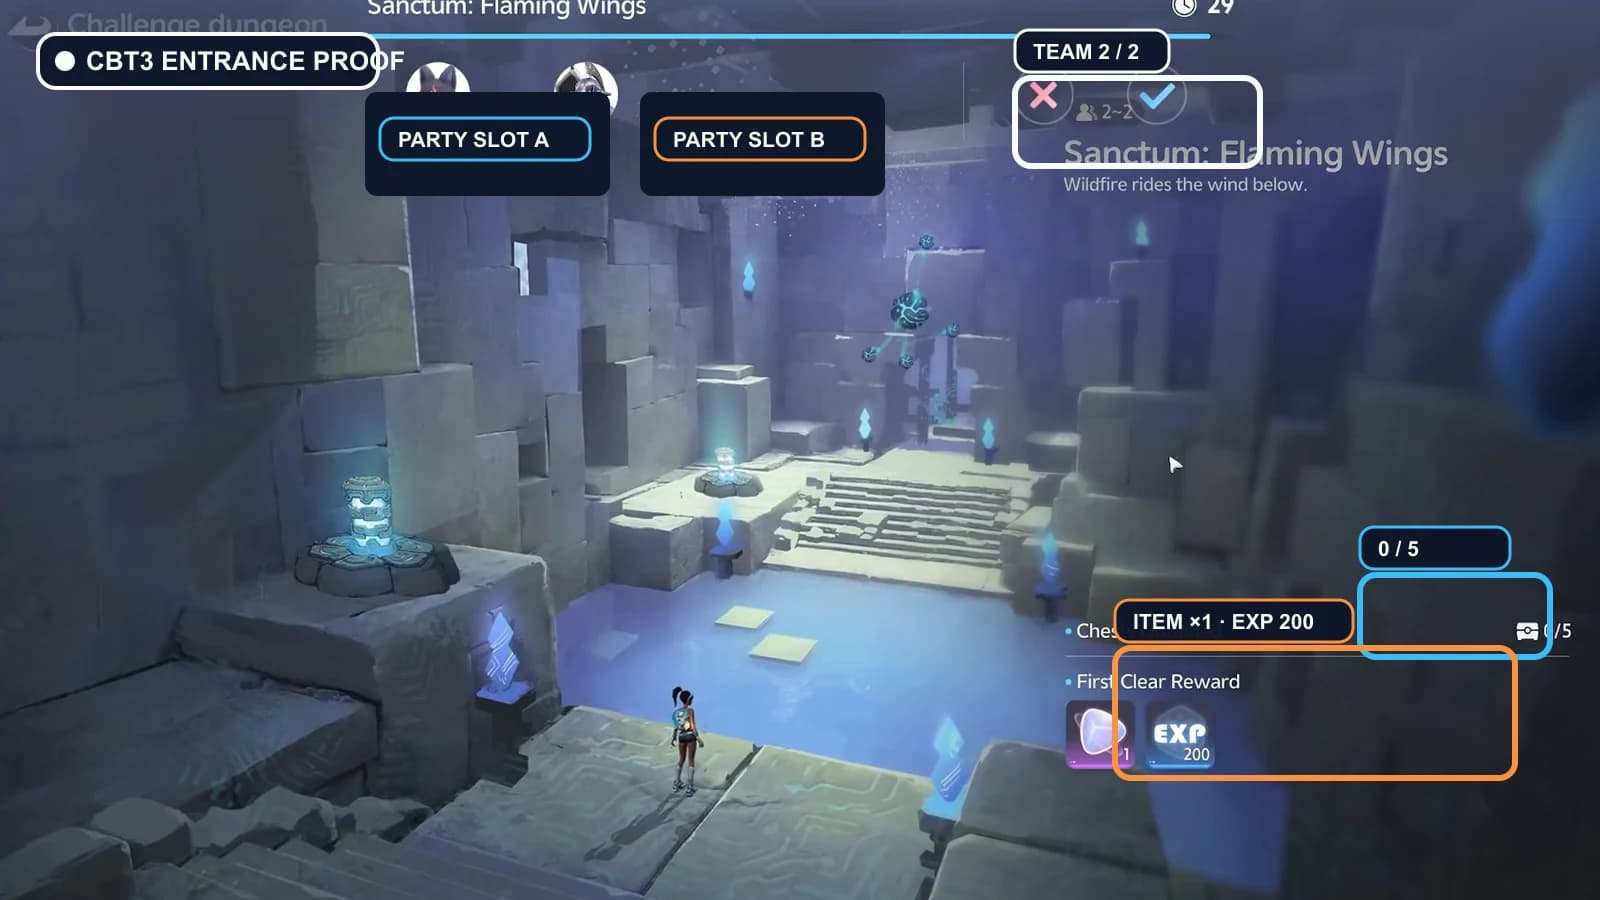
Assign stable Player A and Player B roles
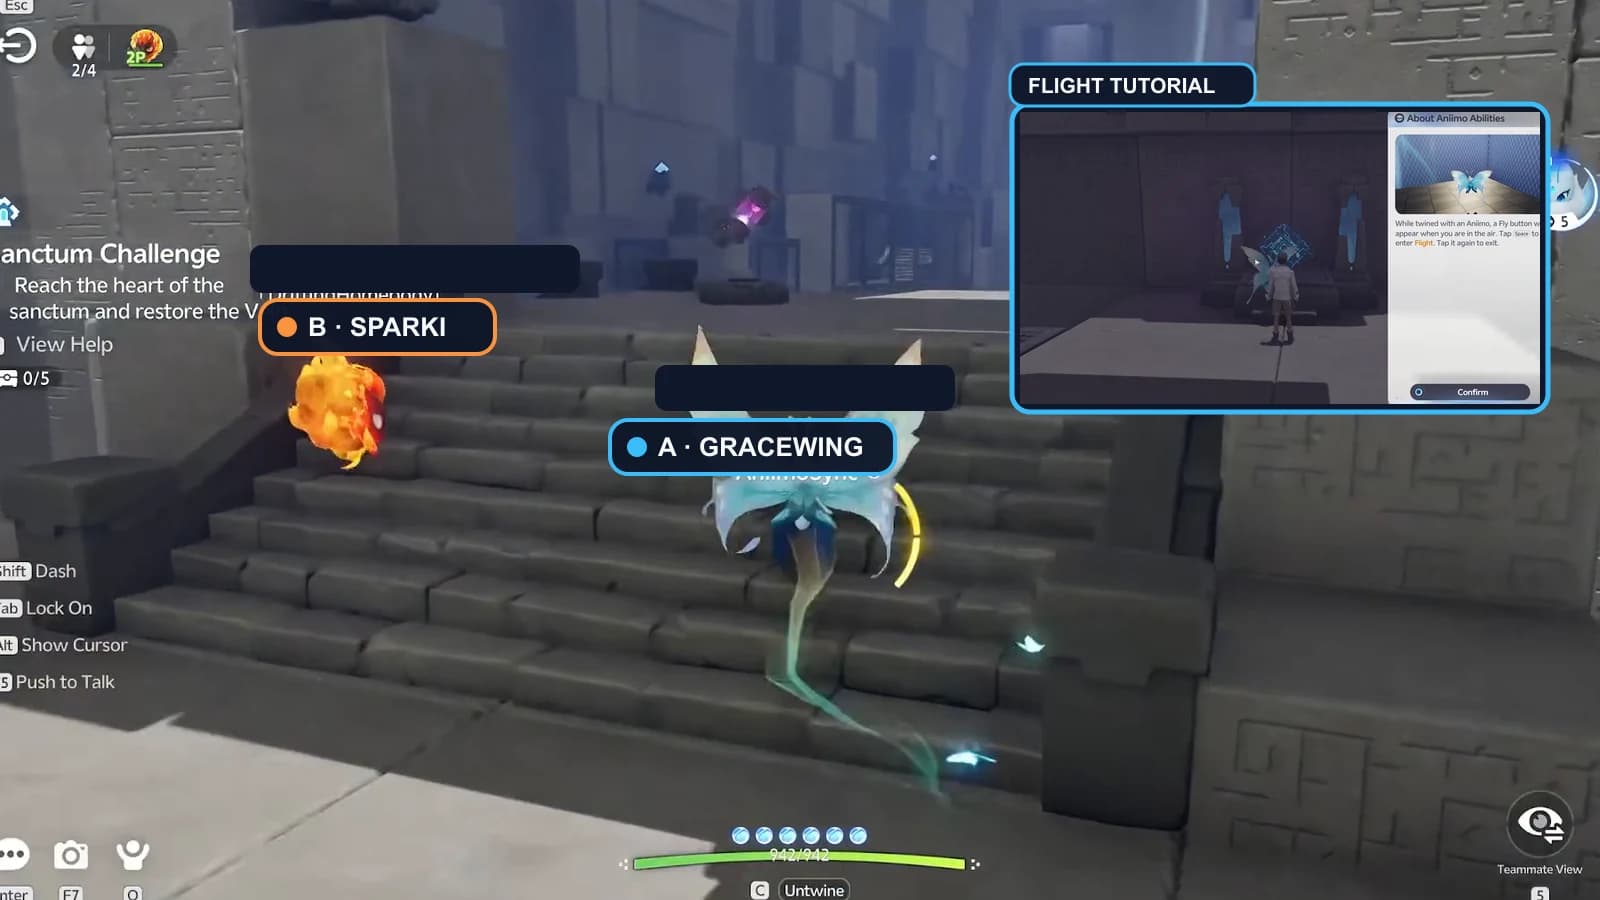
The game does not assign blue Player A or orange Player B labels. They are this guide’s shorthand. Either human may choose either sealed trial, but once the statues are claimed, call the  Gracewing player A and the
  Sparki player B for the rest of the run. The in-room help panel says each player can Twine with one trial Aniimo and can interact with the statue again to seal it back inside.
| Guide label | Trial and control | Primary jobs | Suggested chests |
|---|---|---|---|
| Player A · blue | Gracewing · Flight / official Pathfinding Fly Lv.2 | Hold circular pads, place the wind module, follow by flight, take chest detours | All five in this route |
| Player B · orange | Sparki · aimed Fire Orb | Burn thorn barriers and fan covers, cross A’s cyan paths, adjust fans on A’s calls | None in this route |
Quick solution
- 1Claim Gracewing and Sparki
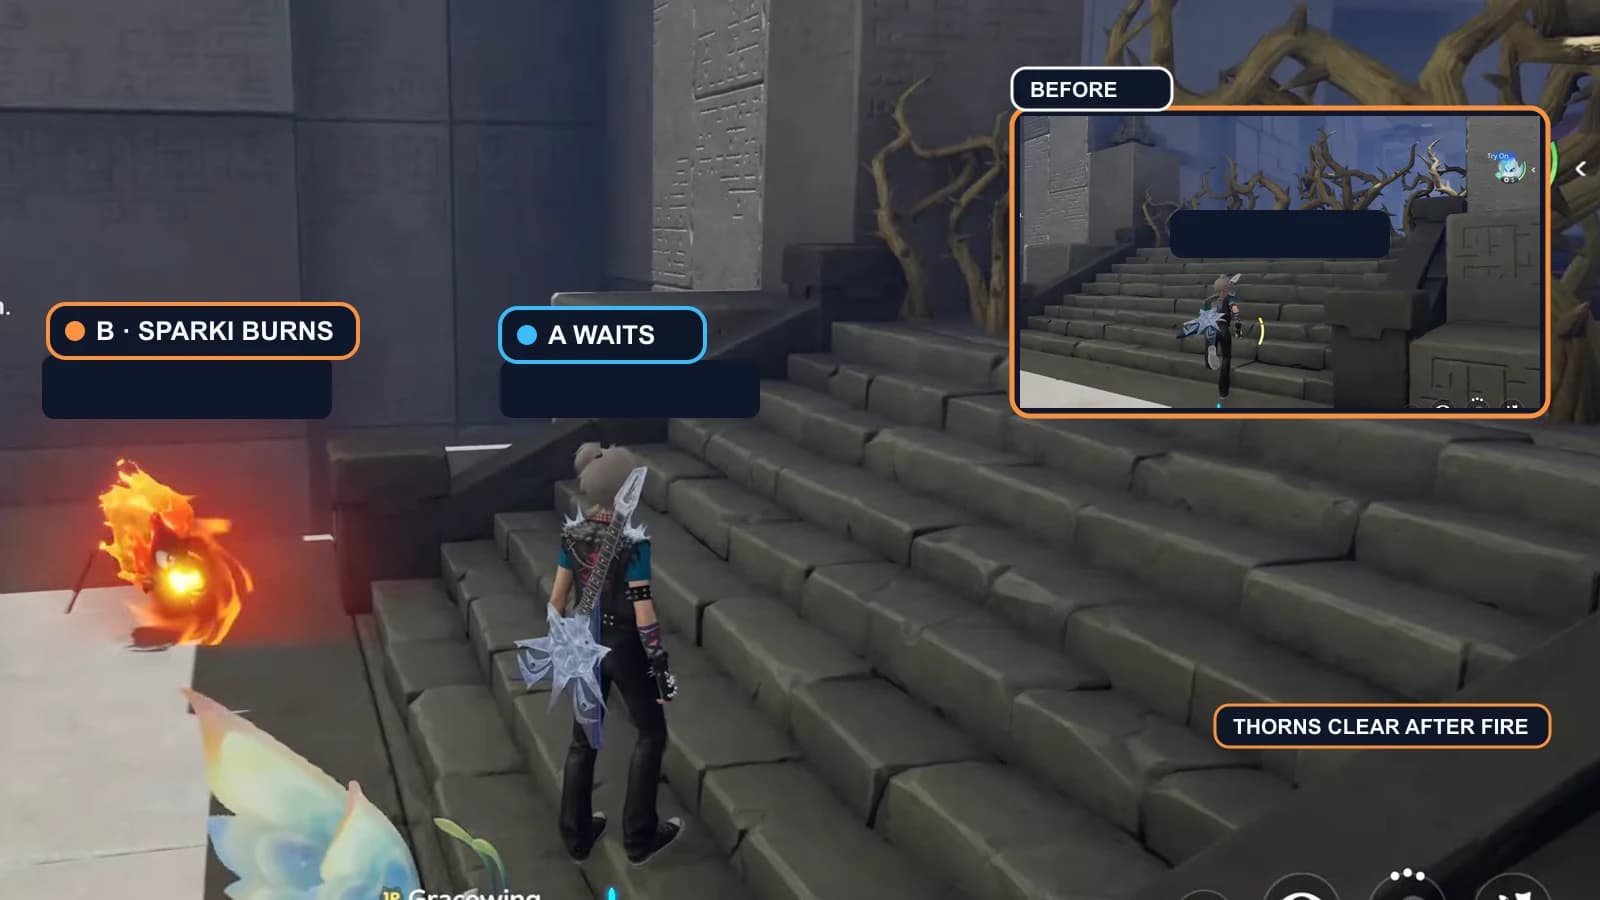
A takes Gracewing and waits behind the first thorn line. B takes Sparki, moves into aim range and burns the thorns with Fire Orb; A moves only after the route is visibly clear.
- 2Relay the early circular pads
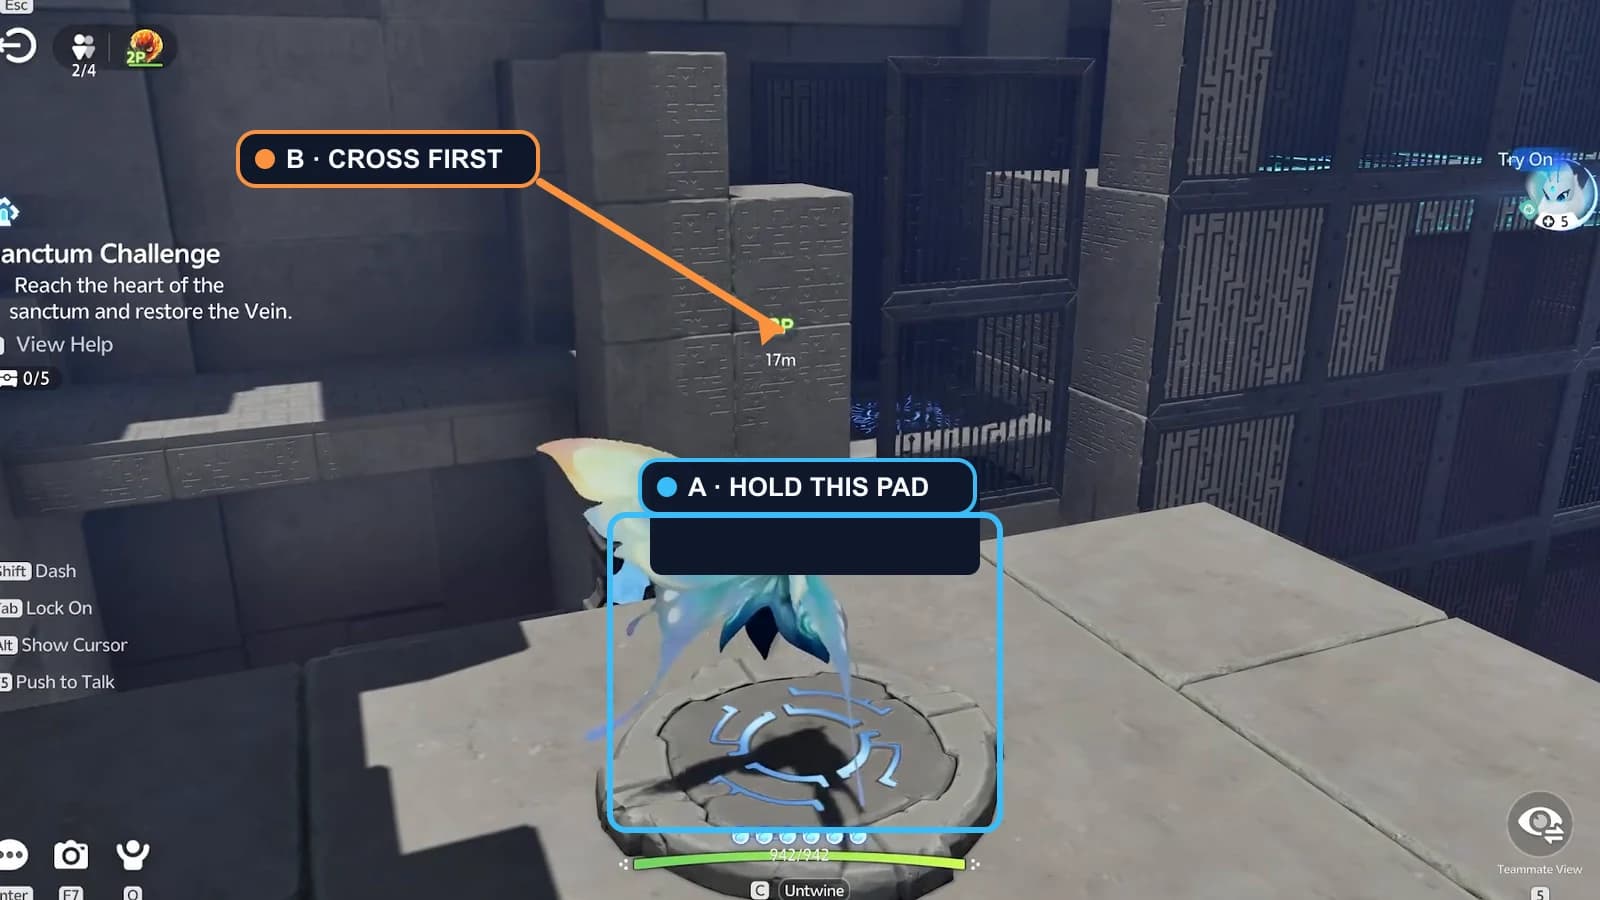
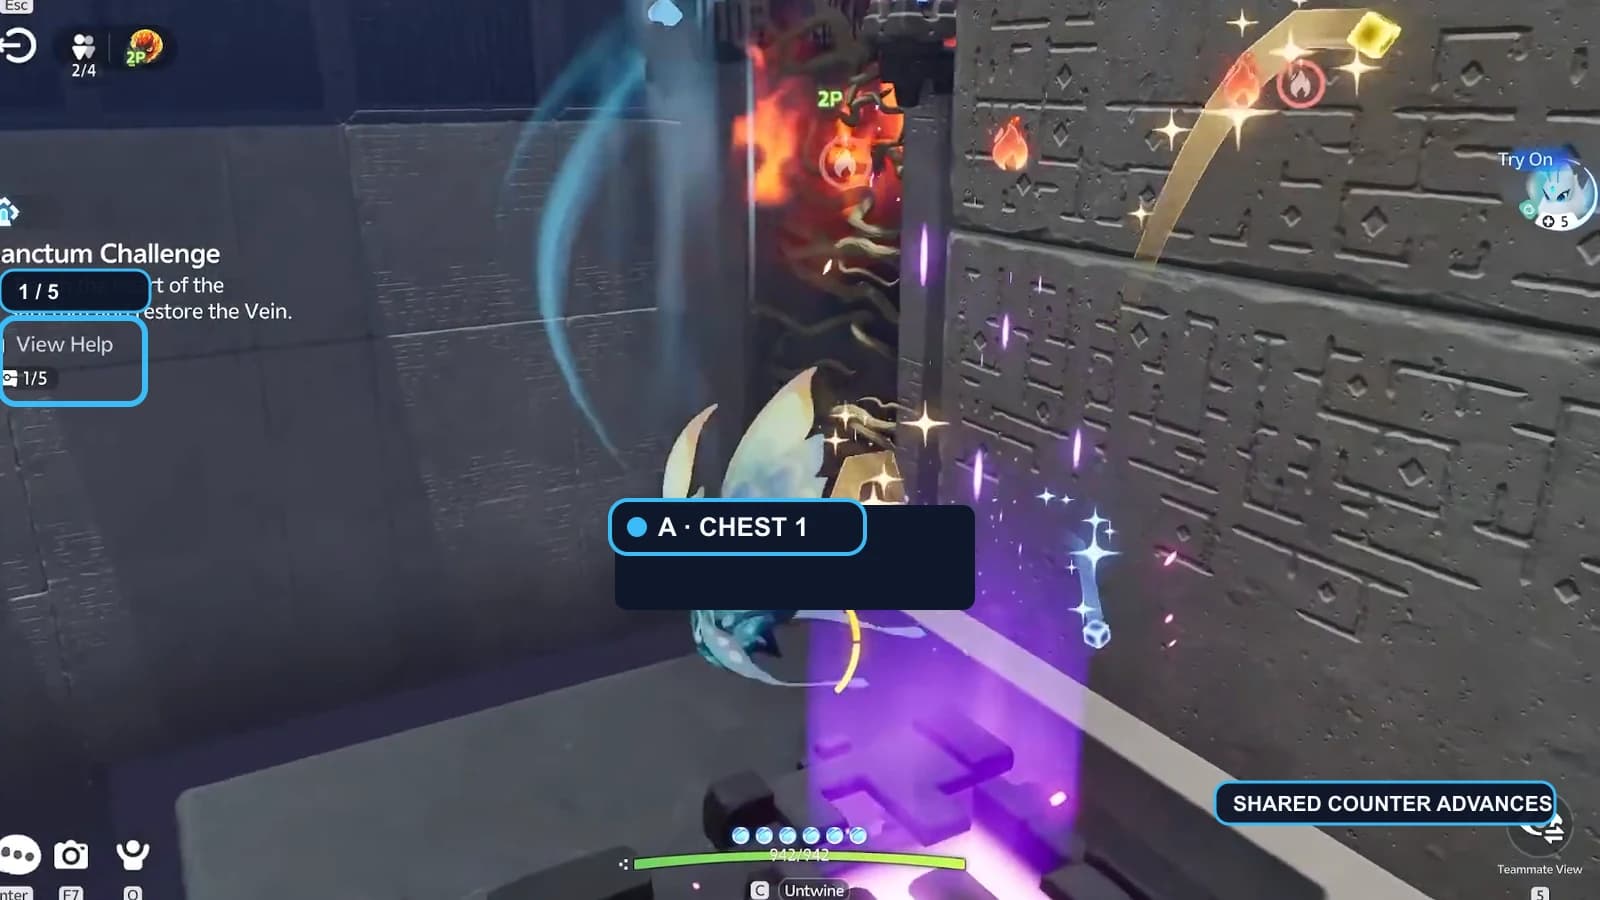
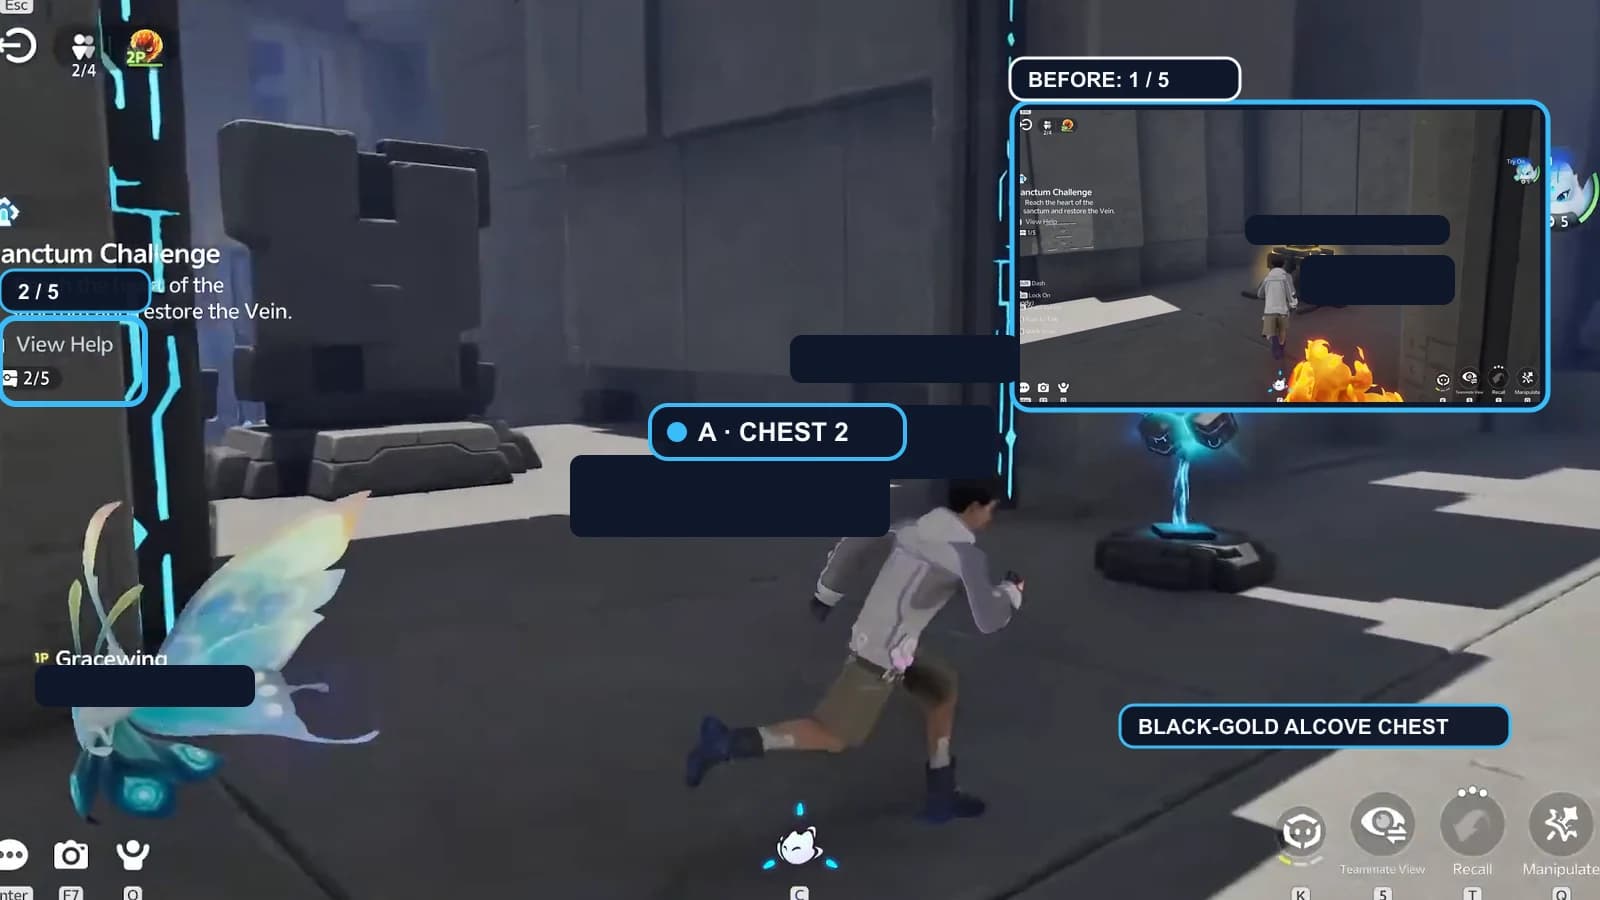
A moves onto each circular pad and stays while B advances across the enabled lane. After B calls “safe,” A leaves the pad and follows by Flight. A collects the isolated purple chest 1 and the black-gold alcove chest 2.
- 3Cross the long cyan bridge
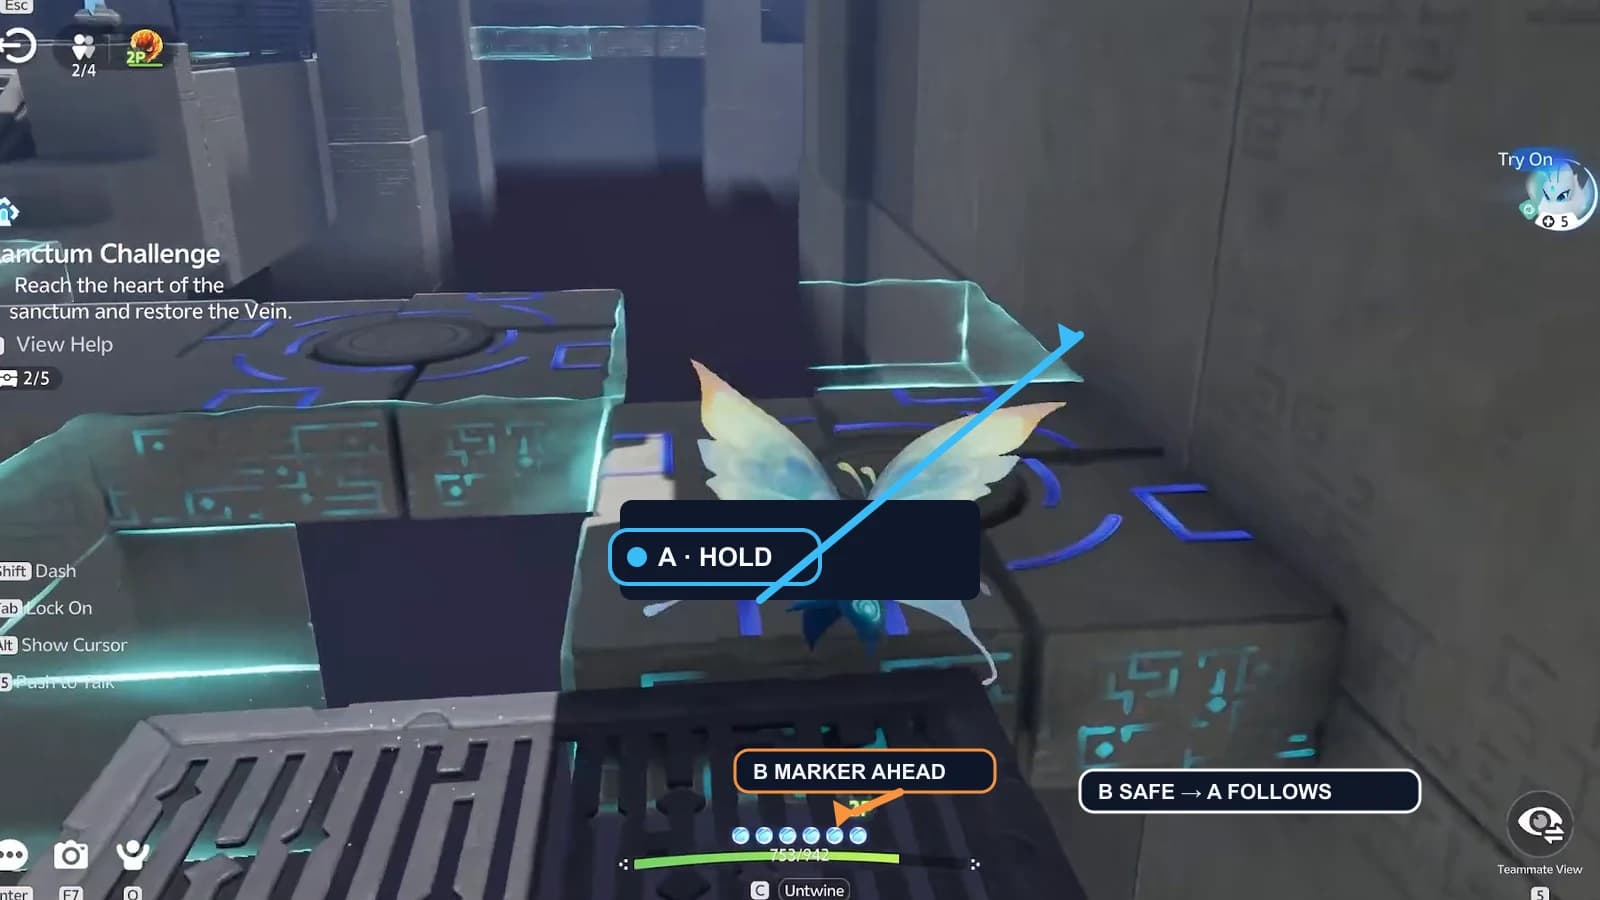
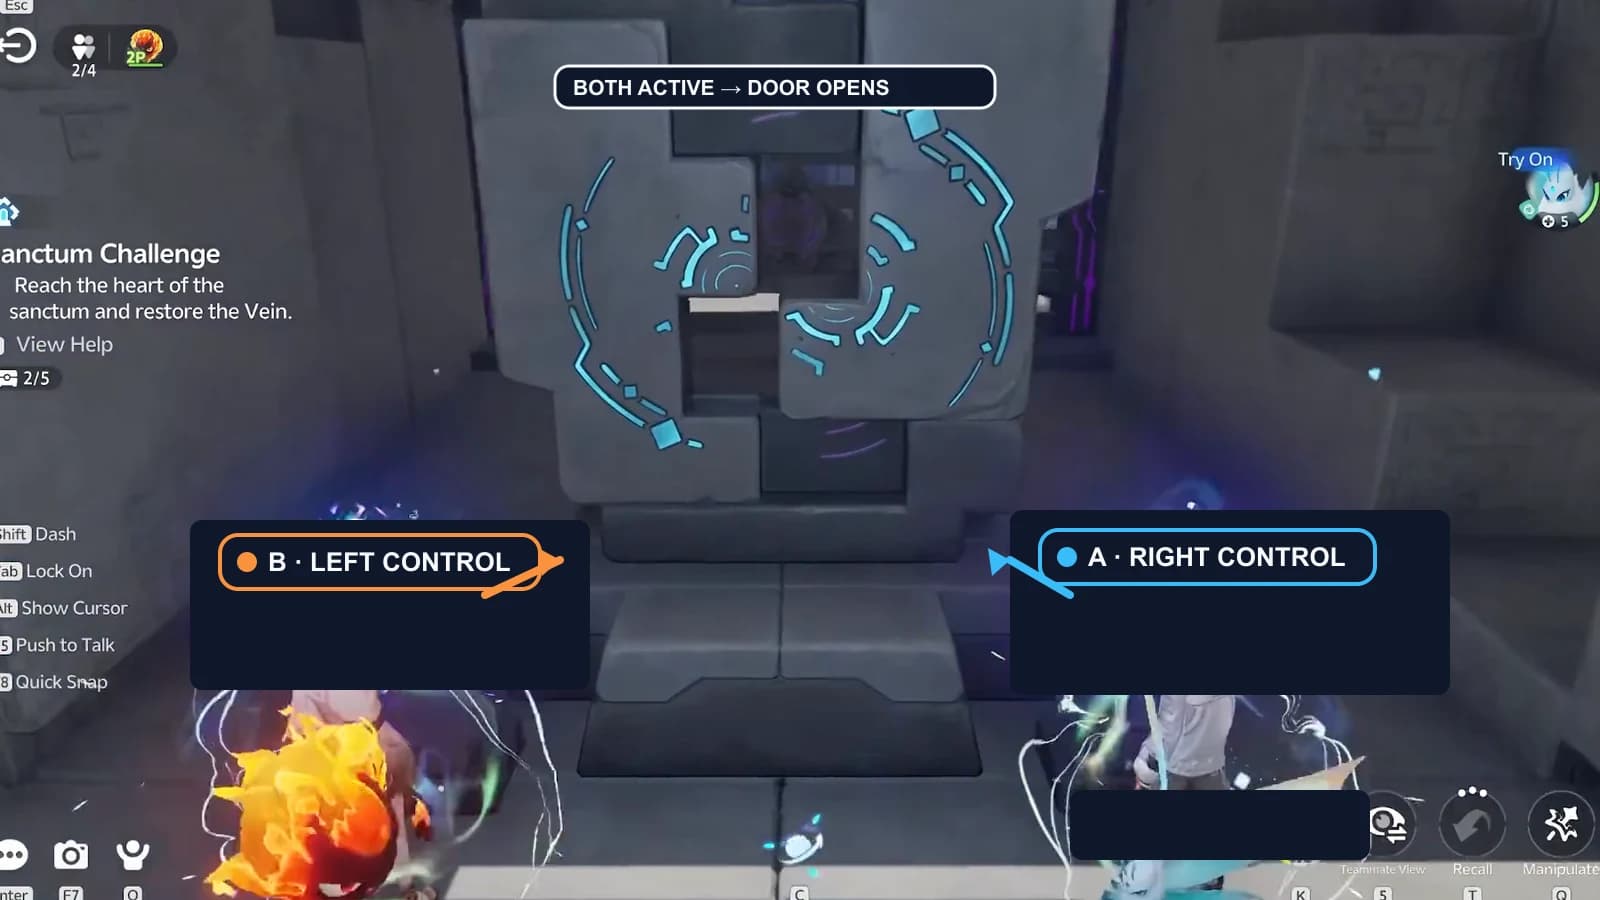
A stays on each circular pad while B moves across the extended cyan sections. Once B is safely across, A follows by Flight and rejoins B at the paired purple controls.
- 4Open the arena and aim the fans
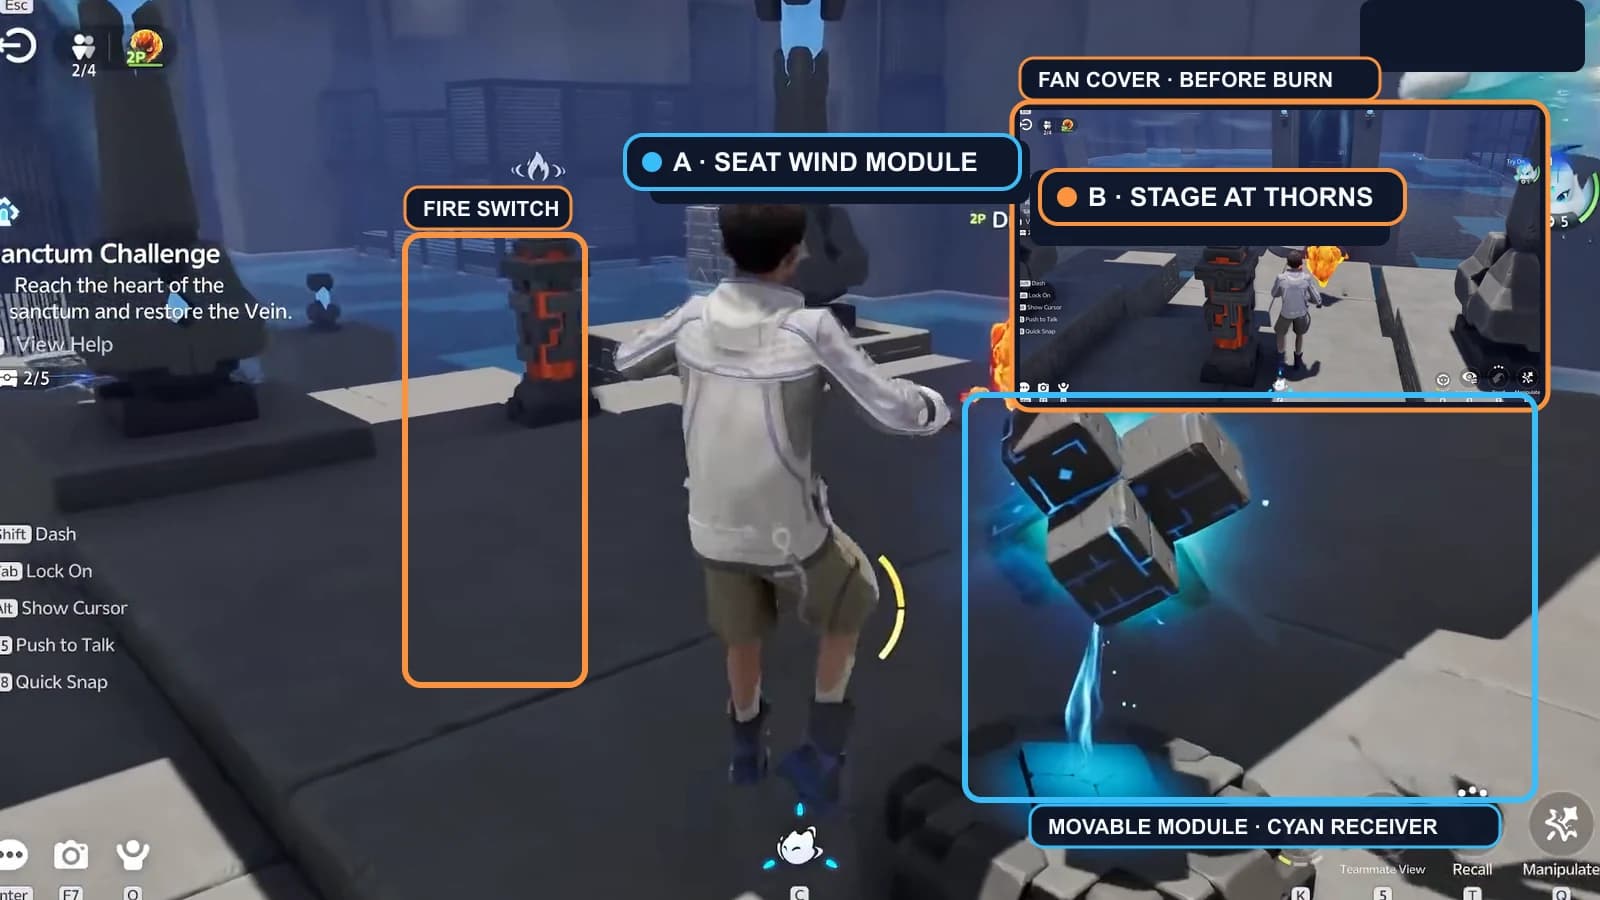
A and B each keep one purple side interaction active to open the arena. A untwines, uses Manipulate to seat the purple-black wind module on the cyan receiver, and calls “module set.” B burns the fan’s thorn cover. If its airflow misses the next landing, B hits the adjacent red Fire switch once per A call until A sees the correct direction.
- 5Let A sweep chests 3, 4 and 5
A rides the first updraft to chest 3, then flies to the black-gold chest 4 in the mid-room alcove. B burns the thorns from the second fan; A rides that airflow to the final high black-gold chest 5. Confirm 3/5, 4/5 and 5/5 in order.
- 6Hold both final handprint panels
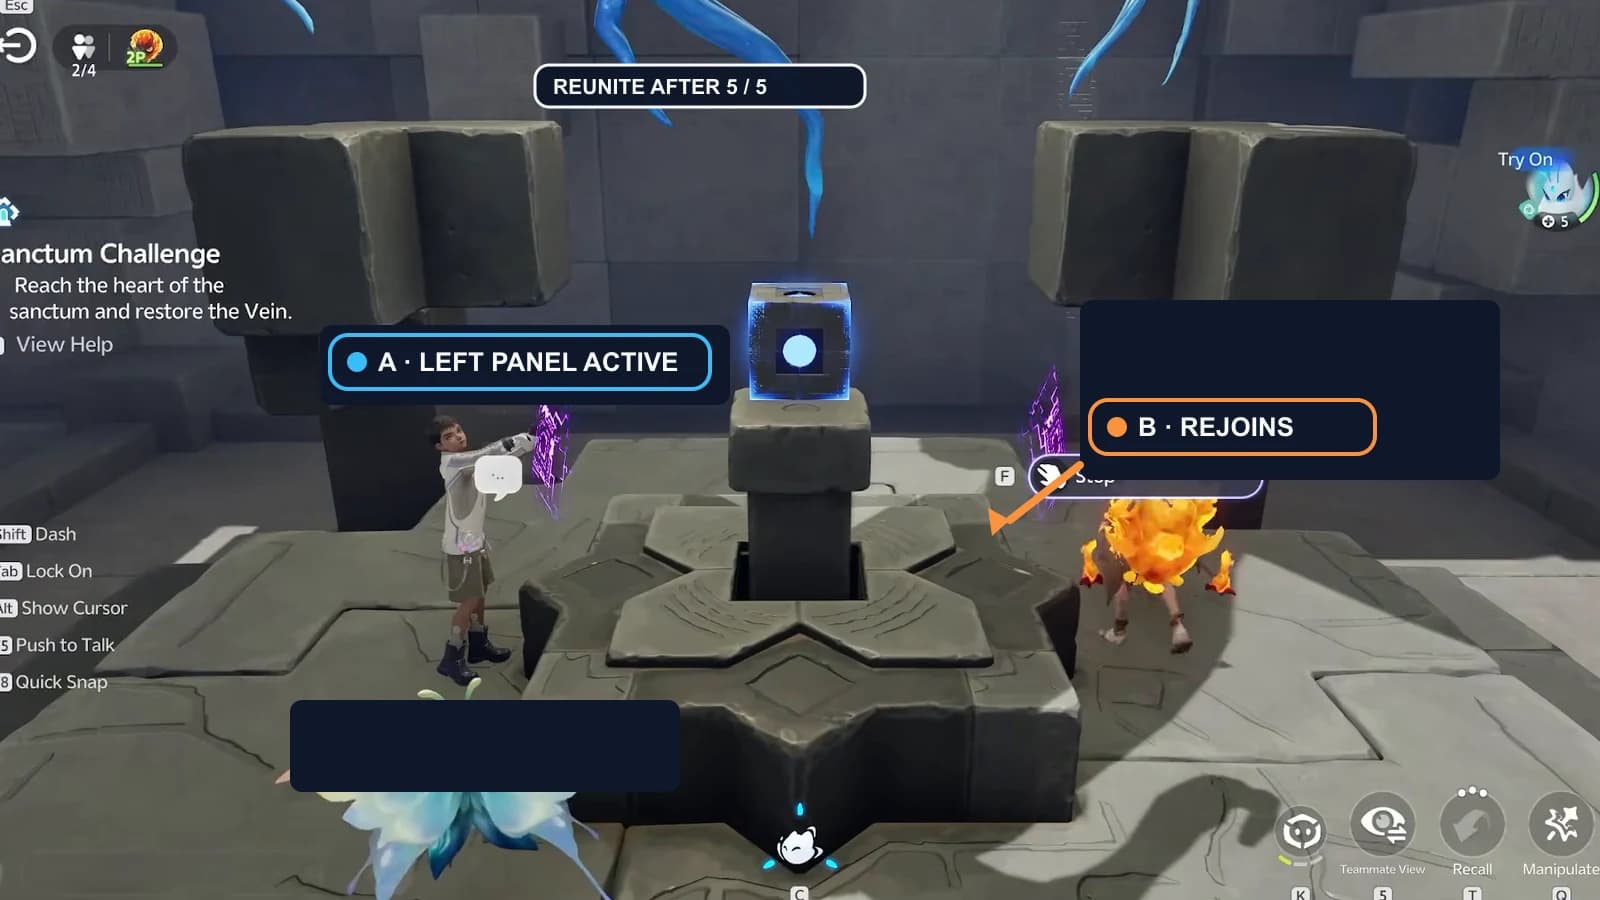
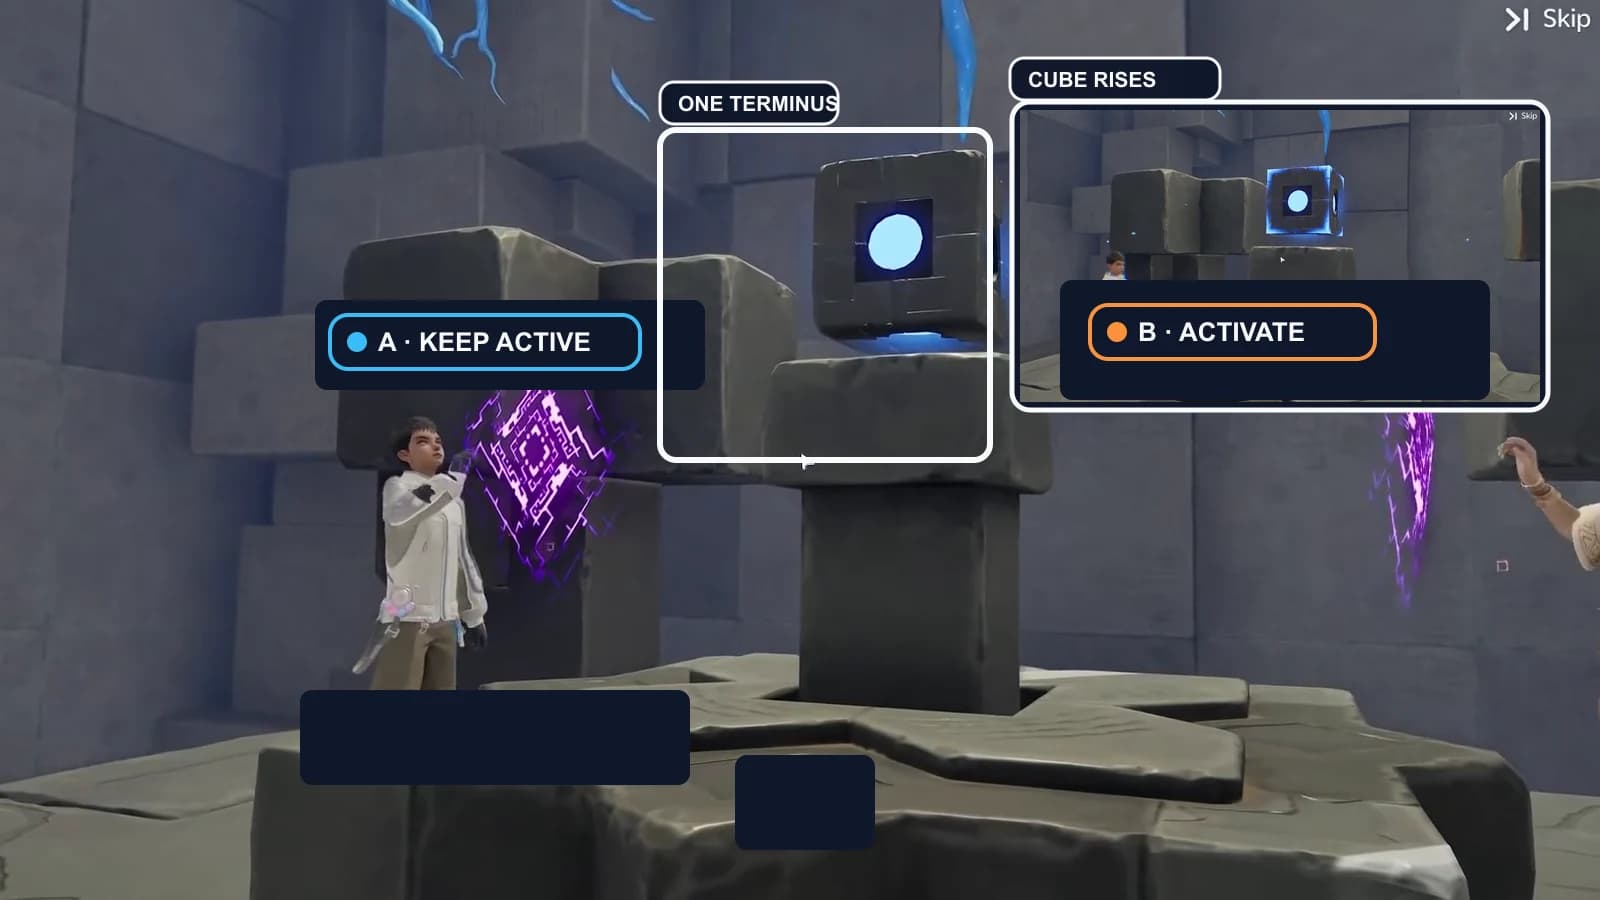
With the counter at 5/5, A and B reunite at the central Sanctum Terminus/Tesseract. A activates and keeps holding one purple handprint panel; B activates the other. Keep both active until the central cube rises and restores the Vein.
Numbered synchronized walkthrough
- 11. Burn the opening thorns
A moves to the Gracewing statue and Twines; B moves to the Sparki statue and Twines. A stays short of the thorn barrier. B moves to a clear firing angle, aims Fire Orb and burns the barrier. B calls “clear,” then A moves through.
- 22. Hand B through the early vertical lane
A flies to the first circular pad and stays. B moves across the route that A enabled and calls “safe” from the next landing. A then leaves the pad and follows by Flight. Repeat the same order at the next circular pad: A holds, B moves, B calls safe, A follows.
- 33. Let A collect chest 1
After the early pad relay, A flies to the isolated purple chest ledge, opens chest 1 and confirms the shared counter changes from 0/5 to 1/5.
- 44. Let A collect chest 2
A follows the narrow upper route to the black-gold alcove, opens chest 2 and confirms 2/5. A may untwine to interact but remains the same blue A human. B does not need to hold a gate state while this chest opens.
- 55. Relay the long cyan bridge
A moves onto the near circular pad and stays while B crosses the extended cyan section. When B calls “safe,” A leaves and follows by Flight. At the next break, A again stays on the circular pad while B moves across; B calls safe, then A flies over to rejoin. Keep A on the pads, because A is the one who can fly across afterwards.
- 66. Open the arena together
A and B untwine at the central door. A activates one purple side interaction and keeps it active while B activates the opposite one. When both are active, the door opens. A moves toward the movable wind module while B retwines with Sparki and waits within Fire Orb range of the covered fan.
- 77. Place, uncover and aim the first fan
A remains human and uses Manipulate to carry the purple-black four-block wind module onto the cyan receiver beside the covered fan. After it seats, A calls “module set.” B fires directly into the thorns until the cover burns away. If the exposed airflow does not face A’s next landing, B uses one Fire Orb hit on the adjacent red switch per A call; each successful ignition reorients the corresponding fan. A waits for each change to finish before flying.
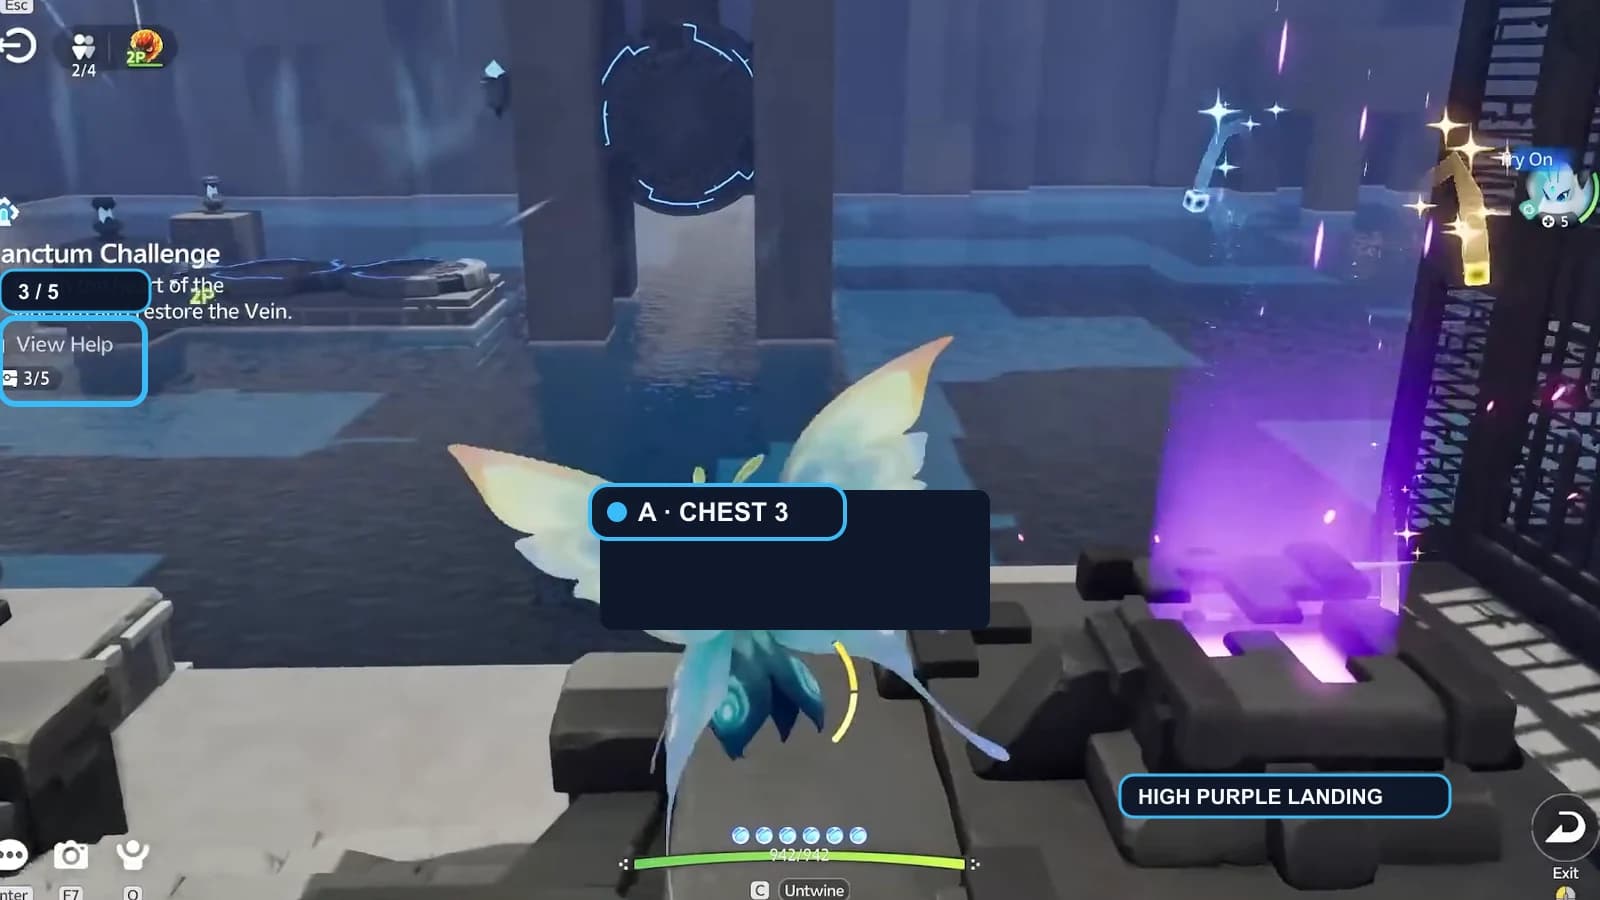
- 88. Let A collect chest 3
A retwines with Gracewing, follows the correctly aimed airflow to the high purple landing, opens chest 3, confirms 3/5, and returns toward the central platforms.
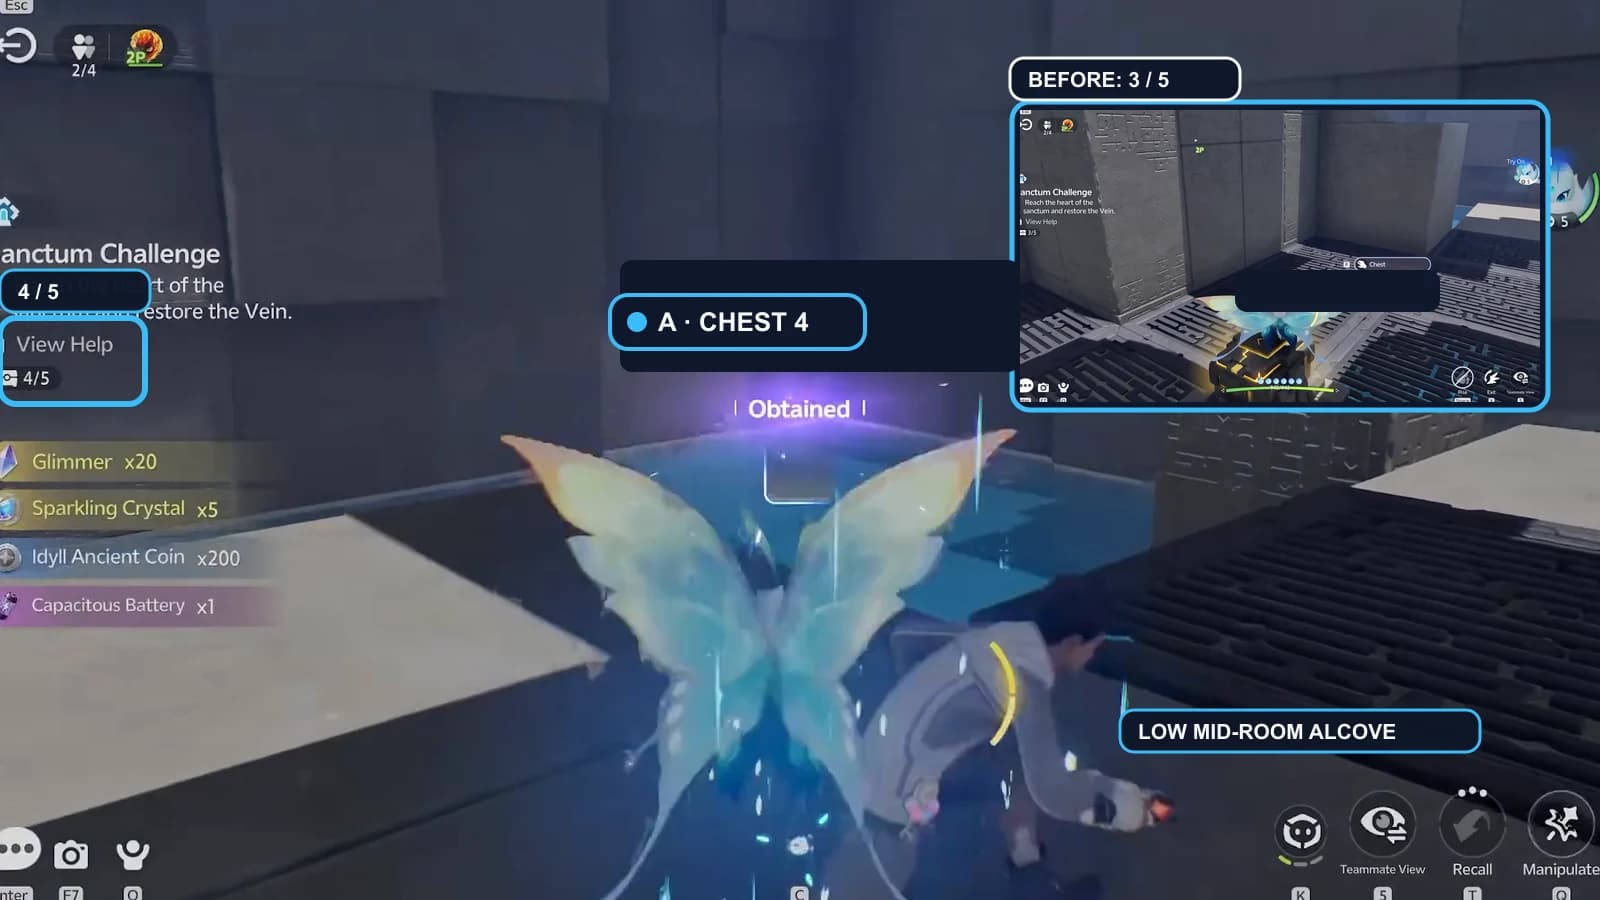
- 99. Let A collect chest 4
A flies across the middle of the room to the black-gold chest in the low alcove between two stair runs. A opens chest 4 and confirms 4/5.
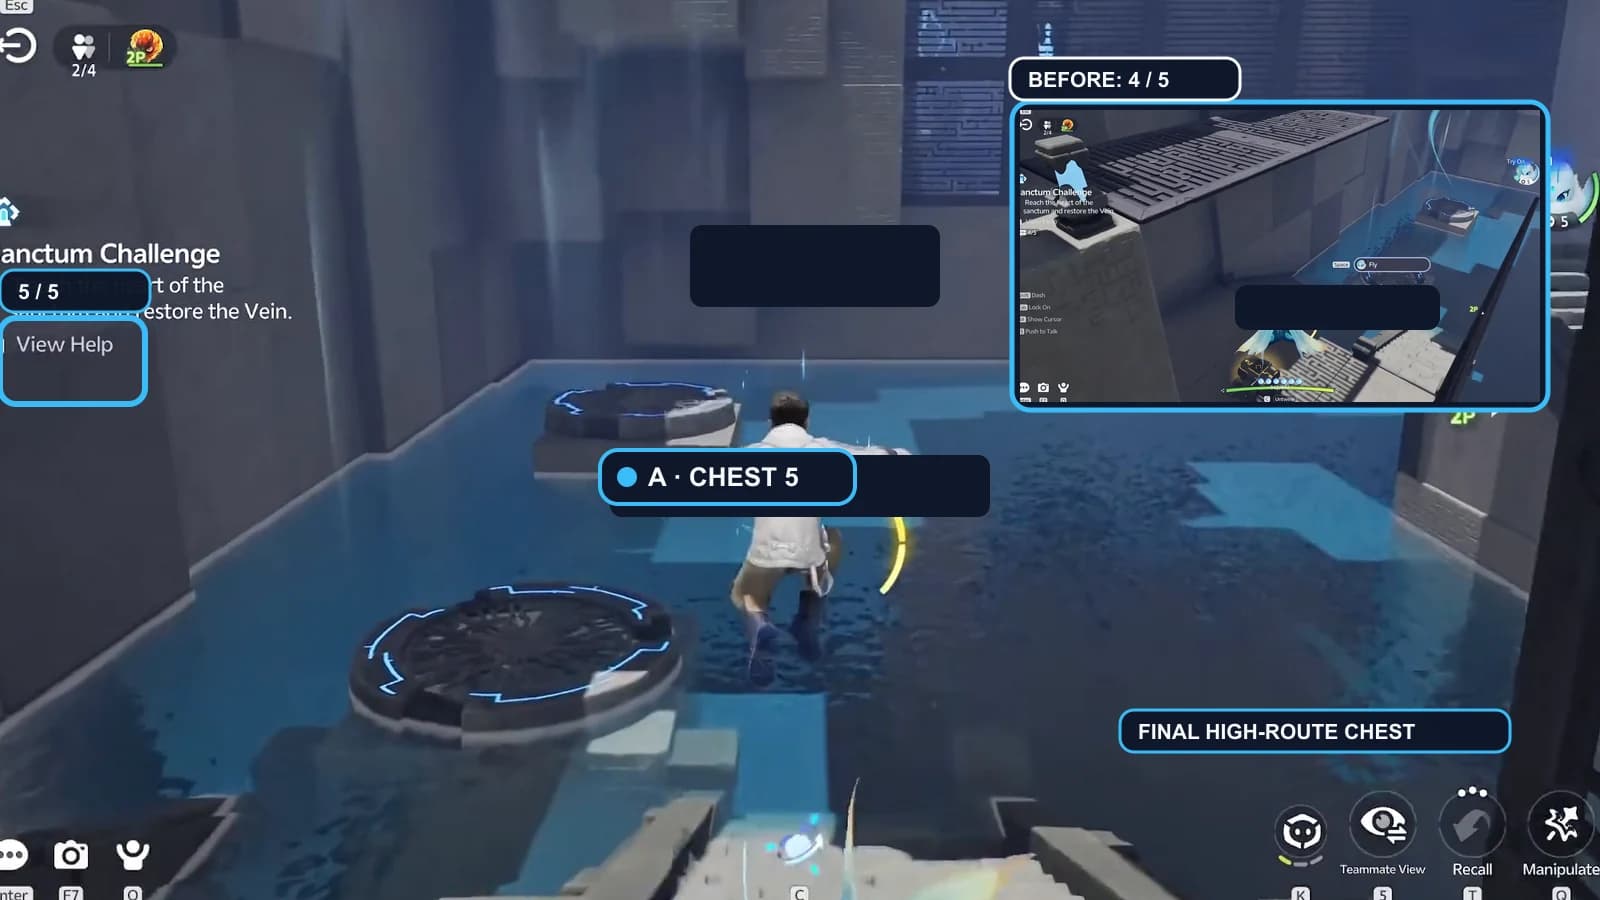
- 1010. Burn the second fan and let A collect chest 5
B moves into range of the second thorn-covered fan and burns its cover with Fire Orb. A waits until the updraft is visibly active, then rides it along the final high route to the black-gold chest. A opens chest 5, confirms 5/5, and flies back to B.
- 1111. Activate both final panels
A and B move together to the central Sanctum Terminus/Tesseract. A activates one purple handprint panel and keeps it active while B moves to and activates the opposite panel. Keep both panels active until the central cube rises and restores the Vein. These are two controls for one Terminus, not separate elemental consoles.
Five-chest checklist
| Chest | Suggested collector | Landmark | Counter |
|---|---|---|---|
| 1 | A · Gracewing | Isolated purple chest on the early high ledge | 0/5 → 1/5 |
| 2 | A · same human, briefly untwined | Black-gold chest in the narrow upper alcove | 1/5 → 2/5 |
| 3 | A · Gracewing | Purple chest on the high arena landing reached by the fan | 2/5 → 3/5 |
| 4 | A · Gracewing | Black-gold chest in the low mid-room alcove between stair runs | 3/5 → 4/5 |
| 5 | A · Gracewing | Black-gold chest on the final high flight route | 4/5 → 5/5 |
Reset, rejoin and missed-switch troubleshooting
- If a cyan section retracts before B is safe, A moves back to the last circular pad and stays. B returns to the last solid platform, crosses again, calls “safe,” then A follows by Flight.
- If the first arena fan stays inert, check both setup states: A has seated the purple-black module on the cyan receiver, and B has burned away the thorn cover. A should see the airflow start before retwining and launching.
- If an exposed fan points away from the next landing, B hits the adjacent red Fire switch once on A’s call. A waits for the airflow to settle, checks the direction, and asks for another hit only if needed. There is no fixed shot count.
- If chest 4 does not advance the shared counter, return to the low black-gold chest between the stair runs. Do not approach chest 5 until both players see 4/5.
- A Reset Gameplay control exists in the Sanctum interface. If either player uses it, check the shared chest counter before continuing.
- If a player disconnects, reform the two-player party and re-enter the Sanctum, then check whether the new run starts at 0/5.
- If the wrong human took a statue, that player can interact with it again to reseal the trial Aniimo. Re-establish A=Gracewing and B=Sparki before continuing so the calls remain unambiguous.
Complete the Sanctum and continue
At 5/5, A and B reunite in human form at the final central mechanism. A activates and keeps holding one purple handprint panel while B moves to and activates the other. Keep both active until the central cube rises and restores the Vein. This Sanctum Terminus/Tesseract is the device that restores the Vein, not the Vein itself.
To return to the entrance, open the Flaming Wings atlas pin.
Frequently asked
Can either player take Gracewing in Flaming Wings?
Yes. Blue A and orange B are guide labels, not game-assigned slots. Whichever human takes Gracewing becomes A; the human who takes Sparki becomes B. Keep those labels stable even while untwined.
Which player collects each Flaming Wings chest?
This guide sends A/Gracewing for all five, which keeps the flight detours and the pad holds on one player. The counter is shared, so either human can open any chest. Keep the labels stable and confirm the counter after every chest.
How do the Flaming Wings fan controls work?
A first uses Manipulate to seat the purple-black wind module on the cyan receiver. B then burns the fan’s thorn cover. If the exposed airflow misses the next landing, each successful Fire hit on the adjacent red switch reorients the corresponding fan; A waits for the new direction before flying.
What is the Flaming Wings first-clear reward?
The entrance card shows an item icon ×1 and EXP 200 in the First Clear Reward slot, and the first-clear Sanctum award is Lumin Amber.