




How Tutorial Courses work
Open Courses and pick a course to enter its tutorial stage. Every stage runs as a chain of short objectives, most of them ending at a green checkpoint, and the course completes at the finish gate. Since version 1.1 each step shows in your quest tracker as you go, so the lists below match what the game asks for, in order.
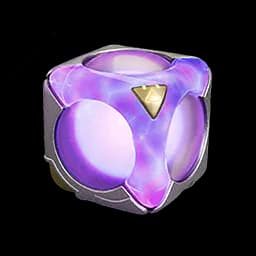
- Course reward: 14 of the courses pay 100 Safaris, 20,000 Credits and 10, 15 or 20 Glimmer on first completion. Try the Aniipod pays a Voxel Cube instead.
- Group reward: each of the three main groups pays four more rewards as you finish its courses, covered at the end of this guide.
- Unlocks: seven courses are open from the start. The other eight open when you catch, evolve, learn or beat something first.


The reward lines for every course, by drop, are on the training course rewards page. For the rest of the early game, the beginner guide and the other Aniimo guides pick up where the courses stop.
Basics: catching, Twining and counters
| Course | Opens | Glimmer |
|---|---|---|
| Basic Catching | From the start | 10 |
| Twining | From the start | 10 |
| Combat Tutorial | From the start | 10 |
| Elemental Counters | After you complete the Combat Tutorial | 10 |
| Spatial Counters | After you defeat Alpha Turbo | 20 |
Basic Catching



The catching guide covers BREAK, Quick Catch and Aniipod choice in the open world.
Twining
- 1Twine
Twine with a Celestis and move to the green checkpoint.
- 2Climb
Climb the wall to the high ground while Twined with the Celestis.
- 3Glide
Glide to the green checkpoint while Twined with the Celestis.
- 4Checkpoint
Go to the next green checkpoint.
- 5Swim
Twine with a Susuta and swim across the river to the finish gate.
Each Aniimo brings its own movement when you Twine; the Twining guide covers what each one adds.
Combat Tutorial
- 1Fight
Defeat the target.
- 2Finish
Get to the exit.
Finishing it opens Elemental Counters. The combat guide goes deeper on BREAK and skill timing.
Elemental Counters
- 1Twine
Twine with an Emberpup.
- 2Move
Proceed to the target location.
- 3Counter
Use Elemental Counters to defeat the Hummin.
- 4Move
Proceed to the next target location.
- 5Counter
Use Elemental Counters to defeat the Susuta.
- 6Finish
Get to the exit.

Spatial Counters


The course opens after the story fight with Alpha Turbo.

Element Interactions: using elements on the world
| Course | Opens | Glimmer |
|---|---|---|
| Fire Interactions | From the start | 10 |
| Water Interactions | From the start | 15 |
| Ice Interactions | After you catch an Ice Aniimo | 20 |
| Lightning Interactions | After you catch a Lightning Aniimo | 20 |
| Element Level | After you evolve an Aniimo | 15 |
The same interactions open paths in Sanctums and the open world; the puzzle guide covers where they come back.
Fire Interactions
- 1Twine
Twine with an Emberpup and move to the green target point.
- 2Burn
Burn the vines blocking the way and get to the next checkpoint.
- 3Checkpoint
Get to the checkpoint in the tall grass.
- 4Wind field
Set fire to the tall grass to make a wind field, then ride the wind to the platform above.
- 5Melt
Use Fire to melt the ice and head to the next checkpoint.
- 6Finish
Burn out all the vines covering the wall and climb to the finish gate.
Water Interactions
- 1Twine
Twine with a Shelly and get to the checkpoint ahead.
- 2Douse
Use a Water skill to put out the fire and head to the next checkpoint.
- 3Bounce
Use a Water skill to activate the Bouncy Pad and bounce to the checkpoint.
- 4Finish
Use the Bouncy Pad in the water to reach the finish gate.

Ice Interactions
- 1Twine
Twine with a Bonesky and get to the checkpoint ahead.
- 2Douse
Use an Ice skill to put out the fire and head to the next checkpoint.
- 3Finish
Cast an Ice skill on the water to make floating ice, then cross the deep water on it to the finish gate.

Lightning Interactions
- 1Checkpoint
Head to the green target ahead.
- 2Charge
Use a Lightning skill to charge the batteries and power the fan.
- 3Ride
Ride the wind to the green target on the higher platform.
- 4Conduct
Charge the batteries and let the metal crate carry the current to the fan.
- 5Ride
Ride the wind to the green target on the higher platform.
- 6Soak
Soak the wooden chest so it conducts, then power the fan.
- 7Finish
Use the wind field to reach the final gate.
Element Level
- 1Twine
Twine with an Emberpup and move to the green target point.
- 2Ignite
Use the Emberpup’s Fire Bolt to ignite the vines blocking the way.
- 3Move
Continue to the green target point.
- 4Keep firing
Keep attacking with the Emberpup’s Fire Bolt until the vines catch.
- 5Move
Continue to the green target point.
- 6Try again
Try the Emberpup’s Fire Bolt on the next vines.
- 7Evolve up
Twine with a Scorchhowl and ignite the vines with its Fire Bolt.
- 8Finish
Head to the gateway at the finish point.
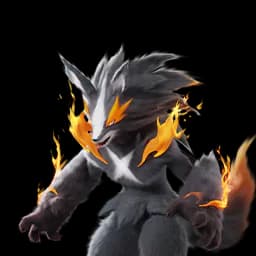
The course opens after your first evolution, and its last step hands the job to Scorchhowl. The evolution guide covers how evolution works.
World Observation: Pathfinder tools and the camera
| Course | Opens | Glimmer |
|---|---|---|
| Gravity Pull | After you learn Gravity Pull | 15 |
| Shock Wave Interactions | After you learn Mega Mallet | 15 |
| Snap Tutorial | From the start | 15 |
| Advanced Catch: Tumbler | After you obtain a Tumbler | 20 |
Gravity Pull and Mega Mallet are Pathfinder skills; the Pathfinder skill list shows when each unlocks.
Gravity Pull
- 1Checkpoint
Head to the green target ahead.
- 2Pull
Use Gravity Pull to move the obstacle aside, then head to the green target point.
- 3Checkpoint
Head to the green target ahead.
- 4Place
Use Gravity Pull to set the batteries into their slots and power the fan.
- 5Finish
Ride the fan’s airflow to the higher platform and reach the final gate.
Shock Wave Interactions
- 1Checkpoint
Head to the green target ahead.
- 2Smash
Use the Pathfinder’s hammer strike (Mega Mallet) to break through the stone wall.
- 3Drop Kick
Use Scorchhowl’s Drop Kick to smash through the floor to the next target point.
- 4Finish
Blast the rubble with Explosive Barrels, then head to the finish line.
Snap Tutorial
- 1Checkpoint
Move to the green checkpoint.
- 2Snap
Take a photo at the moment the Budclaw is Stunned.
- 3Finish
Go to the finish gate.
Advanced Catch: Tumbler
- 1Checkpoint
Move to the green checkpoint.
- 2Catch
Catch all the Aniimo with the Tumbler.
- 3Finish
Go to the finish gate.

Try the Aniipod
The fifteenth course sits in its own Astra Exploration group. It repeats the Basic Catching route, Emberpup, Celestis and Susuta, and pays a single Voxel Cube rather than the usual Safaris, Credits and Glimmer.
Course group rewards
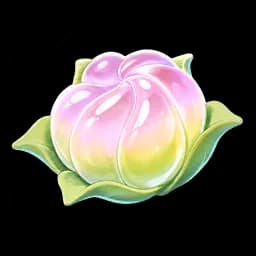
Each of the three main groups pays four rewards as you complete its courses. Finishing every course in all three groups adds 220,000 Credits, 20 Aniipod Mega, 20 Growth Fruit and 225 Glimmer to the course rewards.
| Group | 1 course | 2 courses | 3rd reward | Last reward |
|---|---|---|---|---|
| Basics (5 courses) | 50,000 Credits | 5 Aniipod Mega | 5 Growth Fruit at 4 courses | 50 Glimmer at 5 courses |
| Element Interactions (5 courses) | 70,000 Credits | 7 Aniipod Mega | 7 Growth Fruit at 3 courses | 75 Glimmer at 5 courses |
| World Observation (4 courses) | 100,000 Credits | 8 Aniipod Mega | 8 Growth Fruit at 3 courses | 100 Glimmer at 4 courses |
Frequently asked
How many Tutorial Courses are there in Aniimo?
There are 15: five Basics courses, five Element Interactions courses, four World Observation courses and Try the Aniipod.
What do Aniimo Tutorial Courses reward?
Each course pays 100 Safaris, 20,000 Credits and 10 to 20 Glimmer once, except Try the Aniipod, which pays a Voxel Cube. Group rewards add Credits, Aniipod Mega, Growth Fruit and Glimmer, for 430 Glimmer and 500,000 Credits in total.
Why is a Tutorial Course locked?
Eight courses need something first: complete the Combat Tutorial, defeat Alpha Turbo, catch an Ice or a Lightning Aniimo, evolve an Aniimo, learn Gravity Pull or Mega Mallet, or obtain a Tumbler.